Virtual Machine Installation (ESXi-Hypervisor)
You can install Belden Horizon Data Manager on a virtual machine using VMWare ESXi - Hypervisor.
The virtual machine that runs Belden Horizon Data Manager uses the system time of the host environment. To ensure that timestamps of collected data are as universal as possible, we recommend setting the system time of the host environment to the UTC timezone.
A typical Belden Horizon Data Manager virtual file for ESXi deployment adheres to the following naming convention: <product-2.2.2>.ova.
Login information is as follows:
- admin https://<your-ip-address>:8446 username: admin password: admin
- application https://<your-ip-address> username: demo password: demo
- key-cloak https://<your-ip-address>/auth/admin username: kadmin password: kadmin
Before You Begin
- Configure the docker bridge network. By default, this installation allocates the subnet 172.17.0.0/16. Make sure that this does not conflict with your host environment network configuration.
Tip: To reconfigure the docker bridge network, please refer to this docker guide.
- Set up proxies to access Belden Horizon Data Manager behind the company firewall.
- Obtain a valid .ova file from Belden.
To use ESXi-Hypervisor to install Belden Horizon Data Manager, you will need to do the following.
- Step 1: Install the Virtual Machine (ESXi-Hypervisor)
- Step 2: Log in to the Belden Horizon Data Manager UI
- Step 3: Verify Post-Installation Checklist
To jump to a specific section, refer to the Table of Contents on the right side and click the corresponding step.
Step 1: Install the Virtual Machine (ESXi-Hypervisor)
You will first need to install the virtual machine that will run Belden Horizon Data Manager.
To install the virtual machine:
1. Start the VMWare application (for example, VMWare vSphere 6.7 hypervisor). The VMWare ESXi application appears.
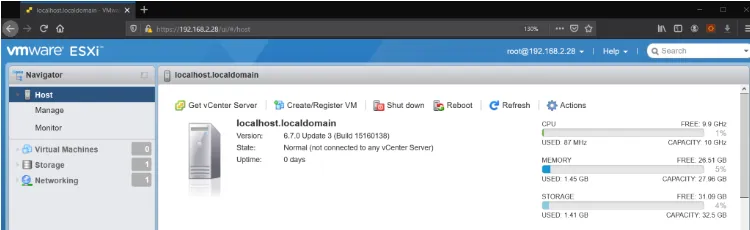
2. Click Create/Register VM. The New virtual machine wizard - select creation type appears.
3. Click Deploy a virtual machine from OVF or OVA file, and then click Next.
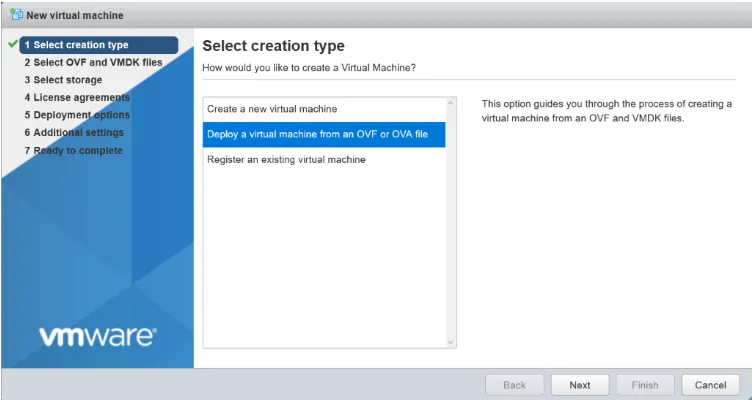
The New virtual machine wizard - select OVF and VMDK files appears.
4. From the right pane, do the following:
a. Enter a name in the Name field.
b. Select the .ova file using Browse or drag and drop the file on the Select File field, and then click Next.
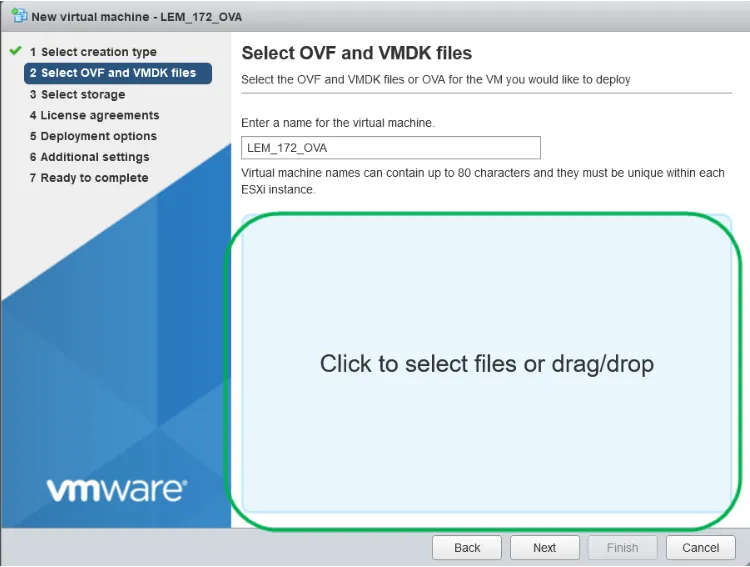
The New Virtual Machine wizard - Select datastore appears.
5. From the right pane, select the datastore, and the click Next.
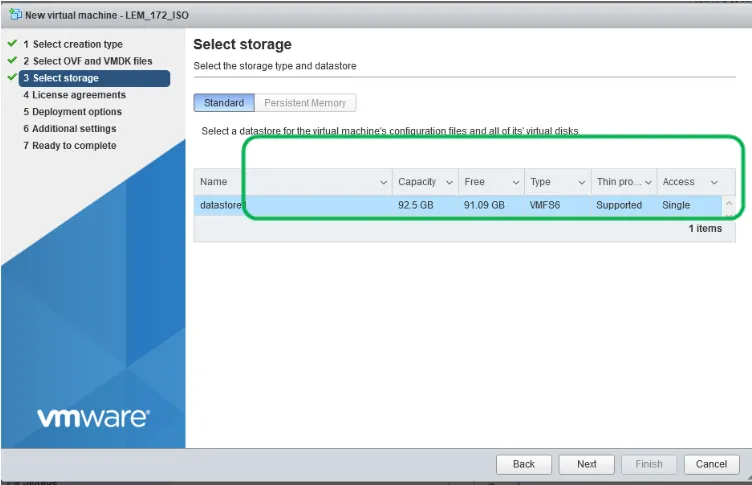
Note: The datastore must have at least 80 GB of free capacity.
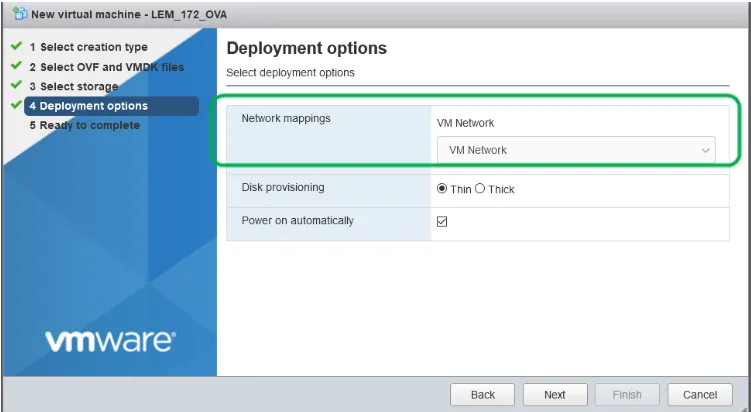
The New virtual machine wizard - Deployment options appears.
6. From the right pane, do the following:
a. Verify that the VM Network is set to your main Network port group (for example, VM Network).
b. Uncheck Power on automatically, and then click Next.
The New virtual machine wizard - Ready to complete pane appears.
7. Review the settings, and then click Finish.
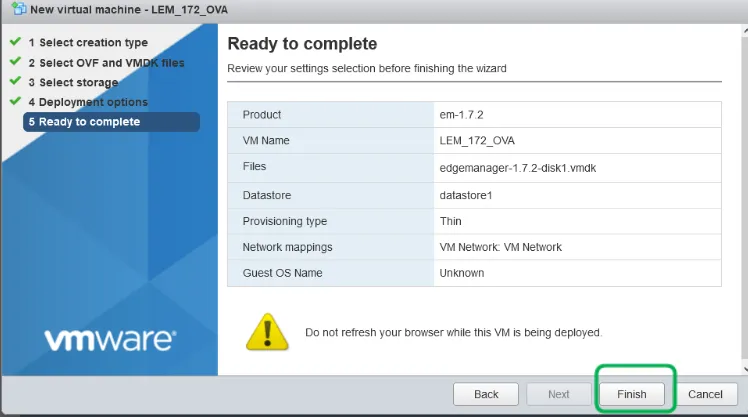
The virtual machine deploys. The progress of the deployment is indicated at the bottom in the Recent tasks display.
Deployment may take several minutes.
The virtual machine appears in the localhost pane.
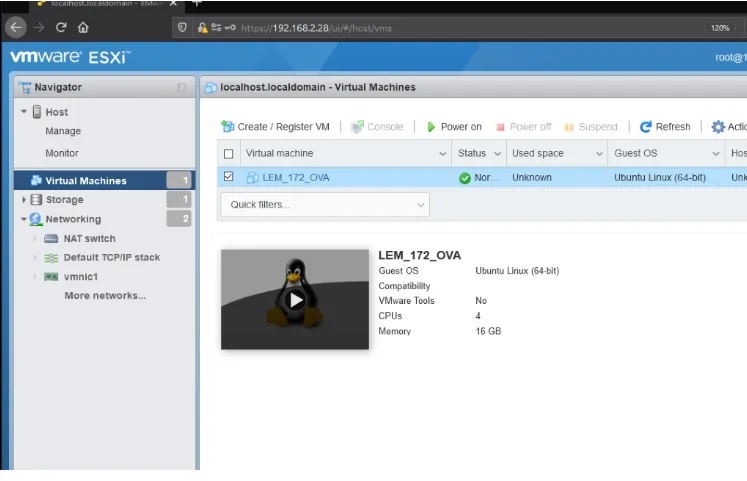
The virtual machine starts up and the terminal window displays.
Tip: You can change your settings using the Terminal User interface (TUI).
To log in using the Terminal window, use the following credentials:
username: em_setup
password: edgemanager
8. Note the IP address required for login.
Step 2: Log in to the Belden Horizon Data Manager (BHDM) UI
After installing the virtual machine, you can then log in to Belden Horizon Data Manager using a browser.
To log in to BHDM UI:
1. Open a new incognito browser window, and paste the IP address into the URL field. The application initializes, and then the Log In screen appears.
2. Log in with the following credentials:
- Username: demo
- Password: demo
3. Change your password to activate your account, and then click Submit. The Belden Horizon Data Manager application opens.
Note: You must change your password after the first log in.
Step 3: Verify Post-Installation Checklist
Verify the contents within the Post-Installation Checklist.