Topic Use Cases (PLC Status, Poll-once, Write, Manage, Batch Write)
Refer to the following use cases for DeviceHub topics.
Notes:
- When publishing structured data such as JSON, you must convert to a byte array (string) first. To do this in a flow, you can use the json node.
Add DeviceHub Device
For these use cases, follow the steps to Connect a Device and make the following selections.
Device Type: Simulator
Driver Name: Generator
Name: Enter a name for the device.
After adding the device, it shows a connected status. The Generator device will be used to simulate a PLC device connected to Belden Horizon Data Operations.
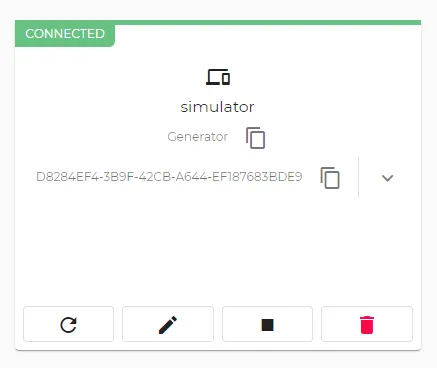
Use Case 1: PLC Status Topic
The PLC status topic is used to verify the connection of DeviceHub devices.
To use the PLC status topic:
- Follow the steps in the Add DeviceHub Device section.
- Navigate to DeviceHub.
In the Generator device tile, click the Display Copy Options icon and select the PLC status topic. This will copy the PLC status topic. You will refer to this topic later on.
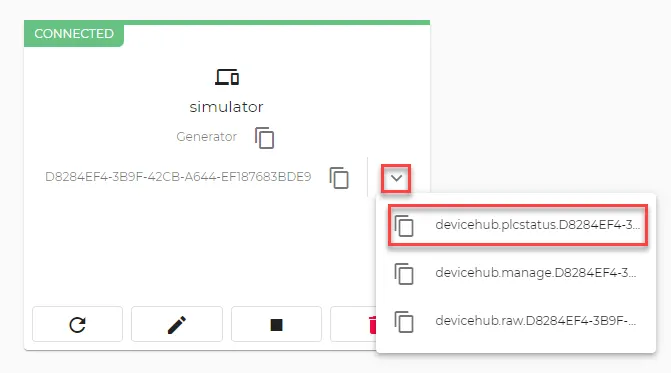 Copy the PLC status topic
- Navigate to Flows Manager.
For a Flows Manager, click the Go To Flow Definition icon.
The Flow canvas opens in a new browser tab.
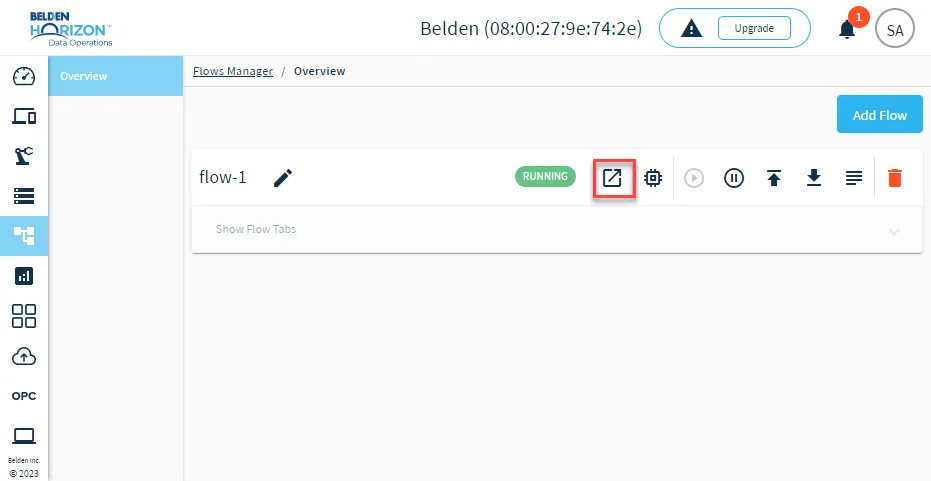 Go To Flow Definition icon
On the Flow canvas, drag the Datahub Subscribe node and debug node onto the canvas. Then, connect the two nodes.
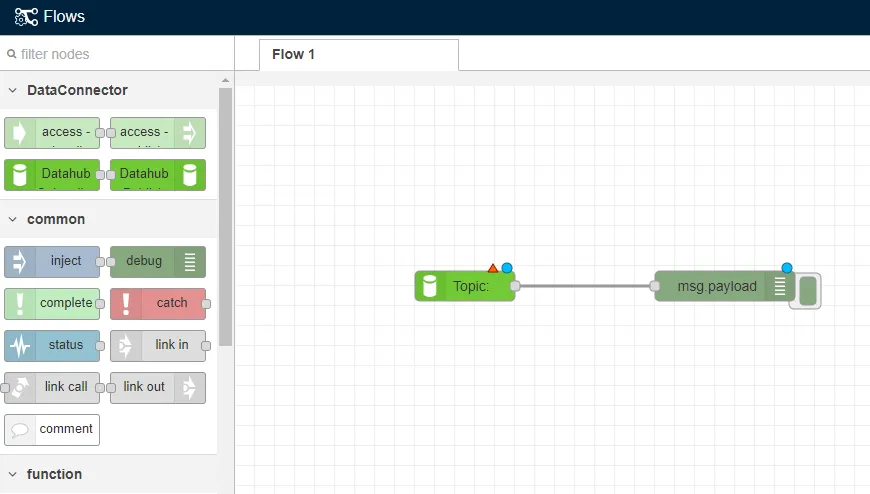 Nodes needed for PLC status
- Double-click the DataHub Subscribe node. The Edit DataHub Subscribe node dialog box appears.
- In the Topic field, paste the PLC status topic you copied in step 3.
- If needed, configure the Datahub Subscribe connection. See the Step 3: Configure Connector Nodes section in Create a Flow to learn more.
- Click Done, and then click Deploy.
Expand the message window beneath the flow to view debug messages.
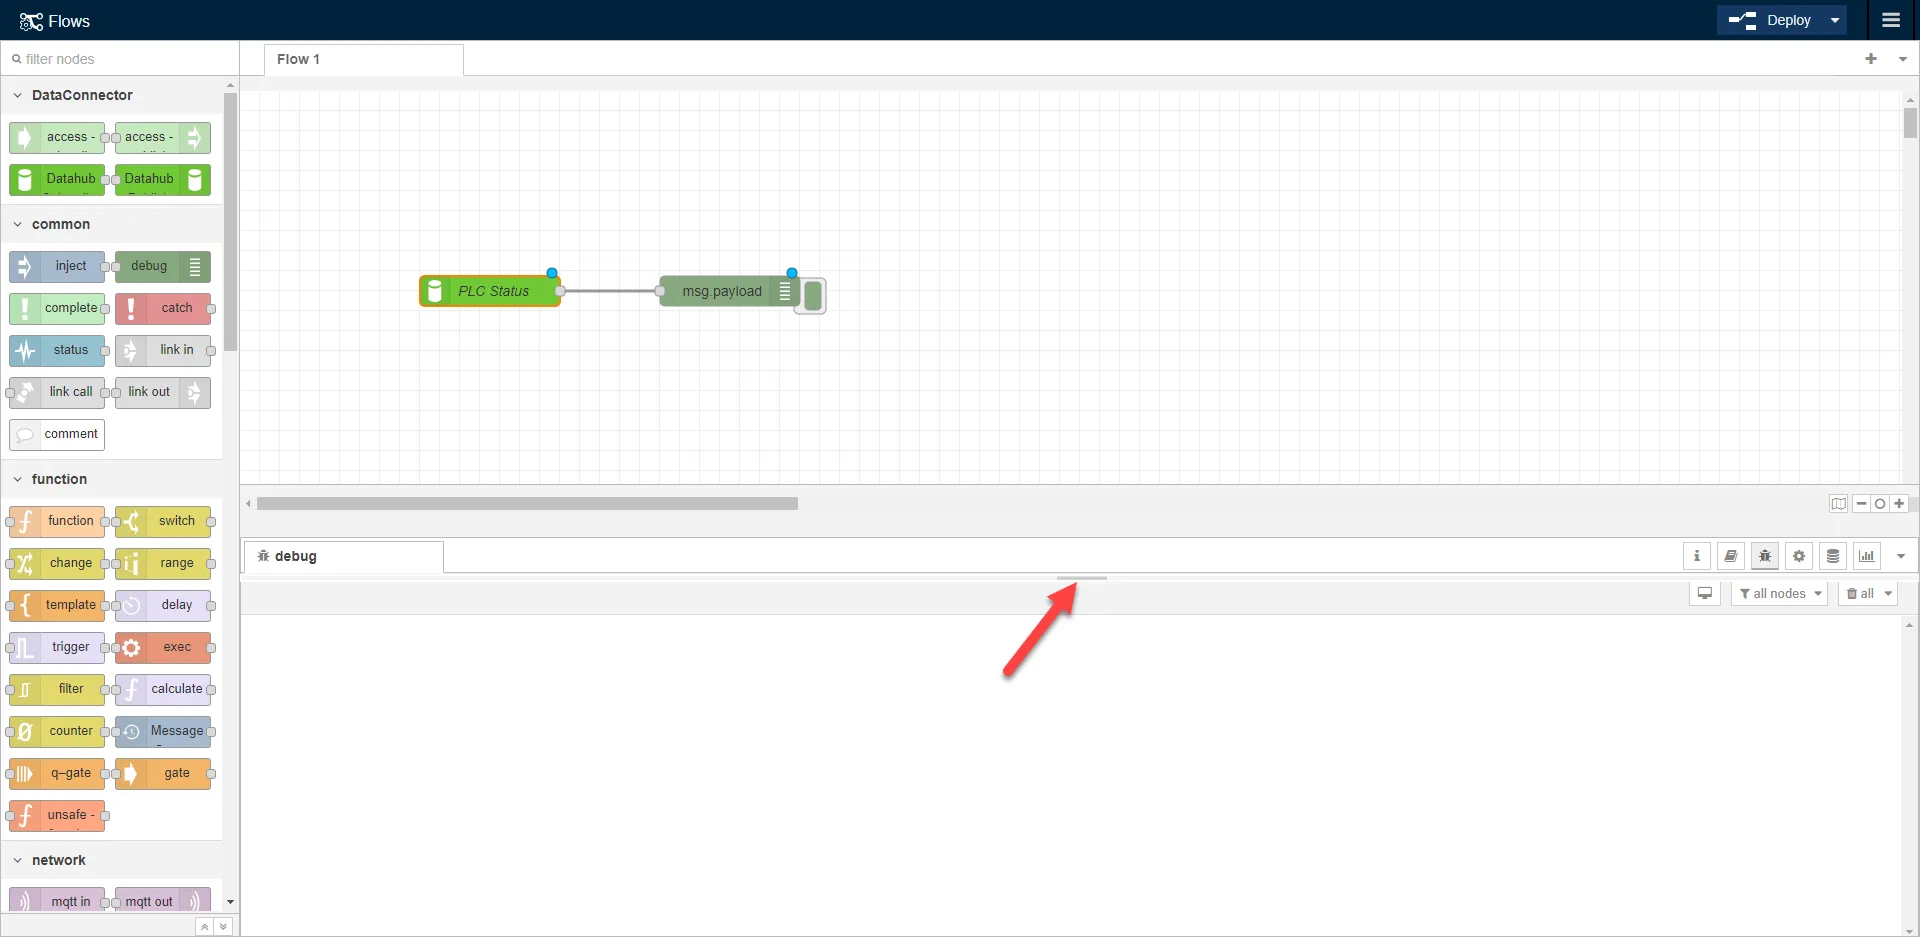 The message window
Click the Debug icon.
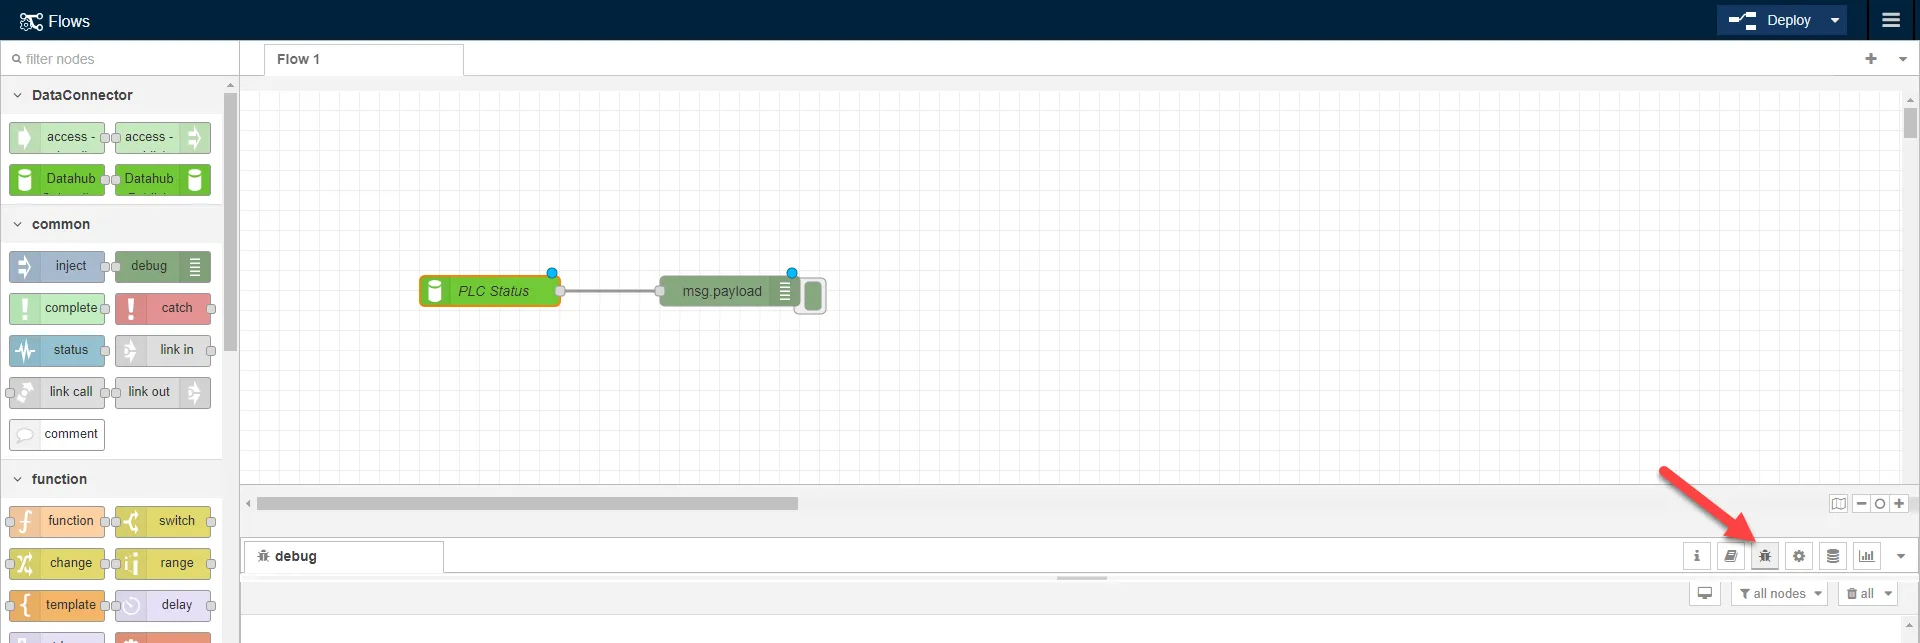 The Debug icon
Click the Activate Debug button. This triggers the debug node to display messages in the debug message window.
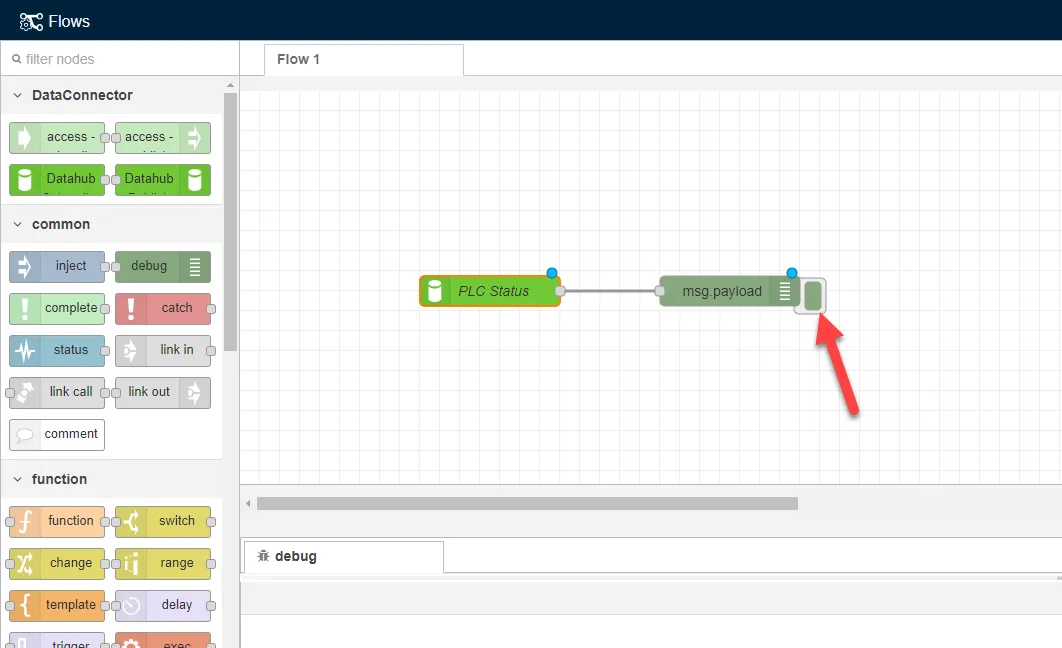 The activate debug button
The debug window displays a "success": true message, which means the device is successfully connected to Belden Horizon Data Operations. If you manually disconnected the device in Belden Horizon Data Operations, the debug window would display "success": false.
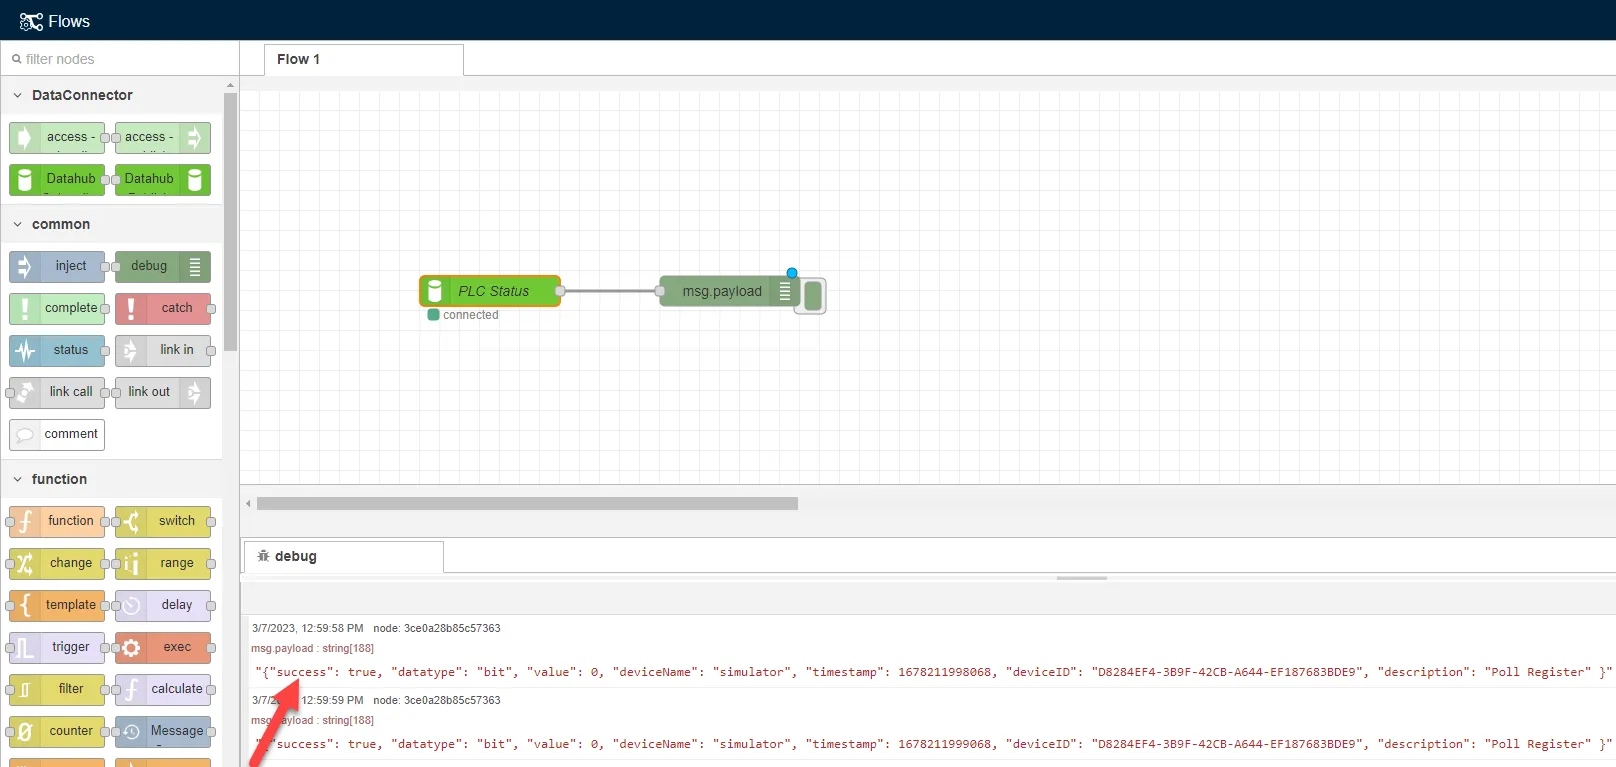 Success true message
The rest of the payload displays the following information from the device:
- Data type: The data type used to verify the PLC status. The bit data type displays two values: 0 for on/connected and 1 for off/disconnected.
- Value: The bit value that displays the status of the device. The value 0 means the device is on/connected.
- Device Name: The device name you configured in Belden Horizon Data Operations.
- Timestamp: Date and time data for the PLC status message.
- Device ID: The device ID for the DataHub device generated in Belden Horizon Data Operations.
- Description: The default description for the PLC status topic (Poll Register).
Use Case 2: Manage Topic
The Manage topic allows you to control the DeviceHub device.
For this use case, you will stop the DeviceHub device using the Manage topic.
To use the Manage topic:
- Follow the steps in the Add DeviceHub Device section.
- Navigate to DeviceHub.
In the Generator device tile, click the Display Copy Options icon and select the Manage topic. This will copy the Manage status topic. You will refer to this topic later on.
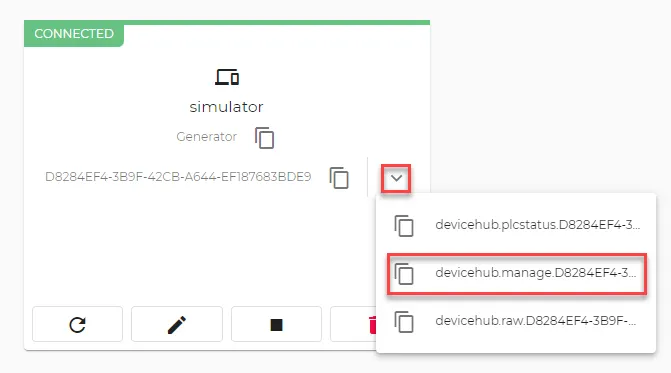 Copy the manage topic
- Navigate to Flows Manager.
For a Flows Manager, click the Go To Flow Definition icon.
The Flow canvas opens in a new browser tab.
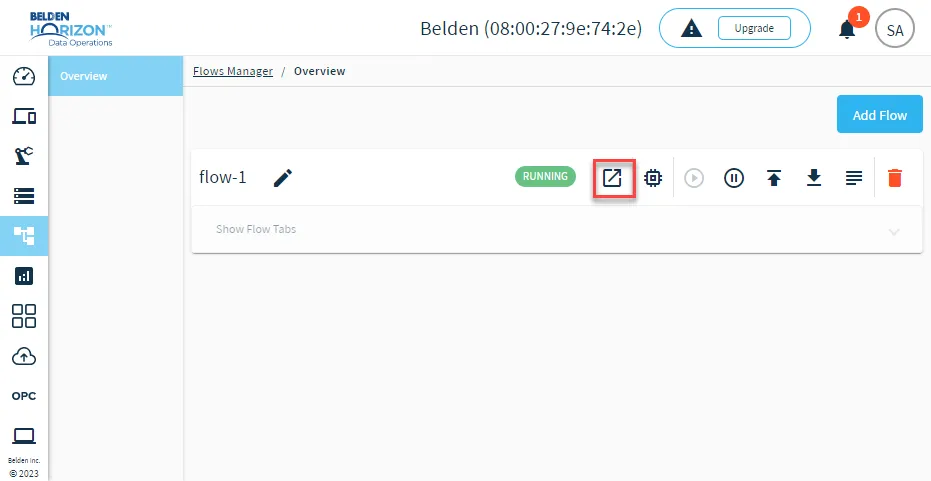 Go To Flow Definition icon
On the Flow canvas, copy the DataHub Publish node and inject node onto the canvas. Then, connect the two nodes.
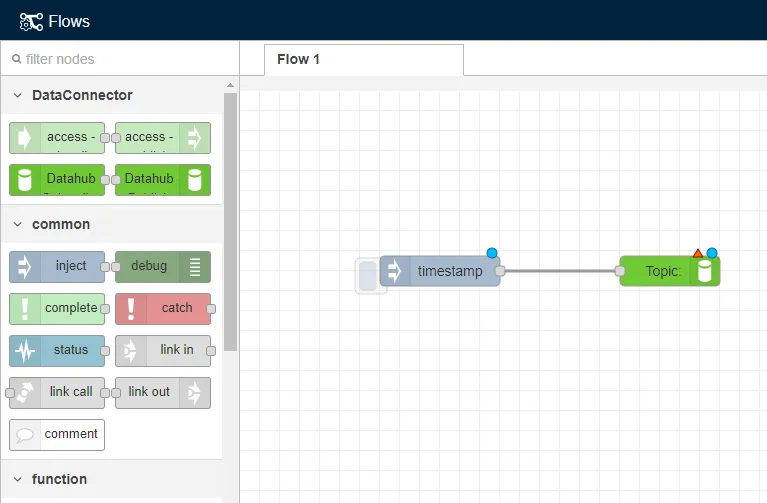 The nodes needed for the manage topic
- Double-click the DataHub Publish node.
- In the Topic field, paste the Manage topic you copied in step 3.
- If needed, configure the Datahub Subscribe connection. See the Step 3: Configure Connector Nodes section in Create a Flow to learn more.
- Click Done.
- Double-click the inject node. The Edit inject node dialog box displays.
For msg.payload, select string.
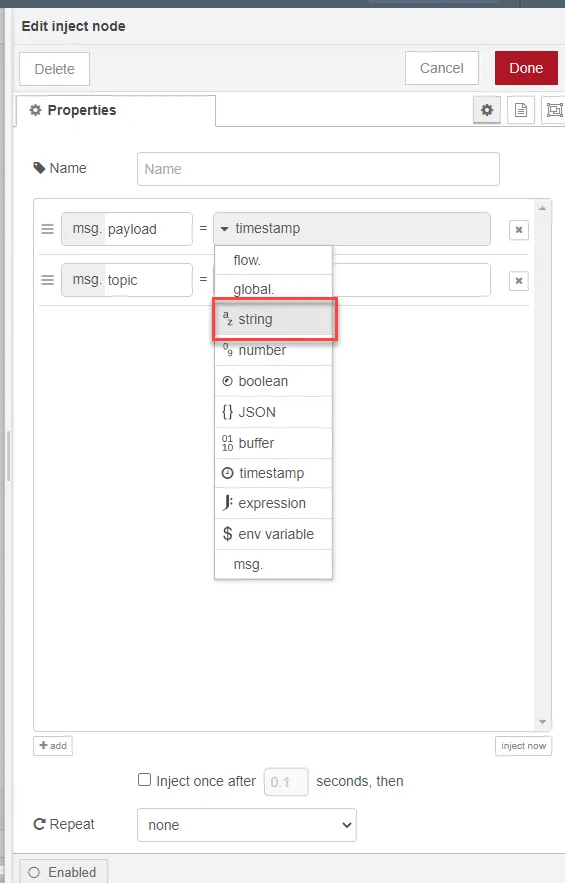 Select a string payload
For msg.payload, enter {"command" : "stop"}.
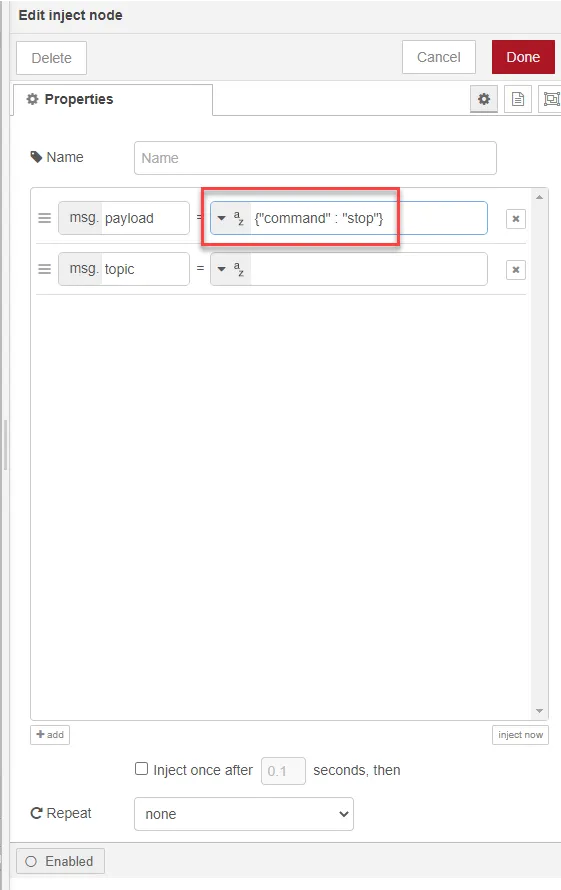 Command to stop device
- Click Done, and then click Deploy.
Click the inject button. This triggers the payload message you configured for the node.
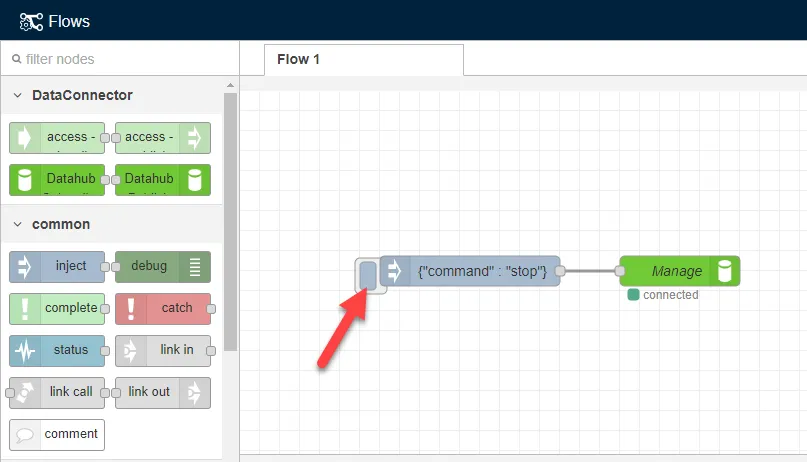 The inject button
Return to the Belden Horizon Data Operations browser window and navigate to DeviceHub. The device now shows a Stopped status.
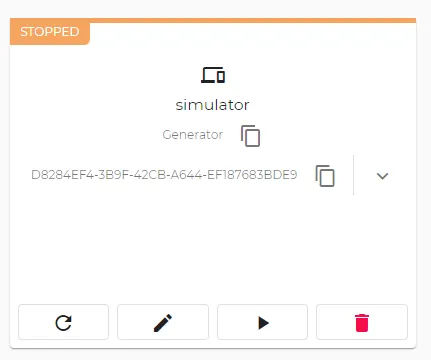 Stopped status
To restart the device, you can use the following command: {"command" : "resume"}.
Use Case 3: Poll-Once Topic
The Poll-once topic is used for tags that have a poll interval set to 0. If there is no poll interval, you can use the Poll-once topic to retrieve a register value when an event occurs. The poll-once topic will manually trigger the polling of register values.
To use the Poll-once topic:
- Follow the steps in the Add DeviceHub Device section.
- Name: S - Random value generator
- Value Type: int64
- Polling Interval: 0
- Tag Name: Enter a name for the tag.
- Address: 1
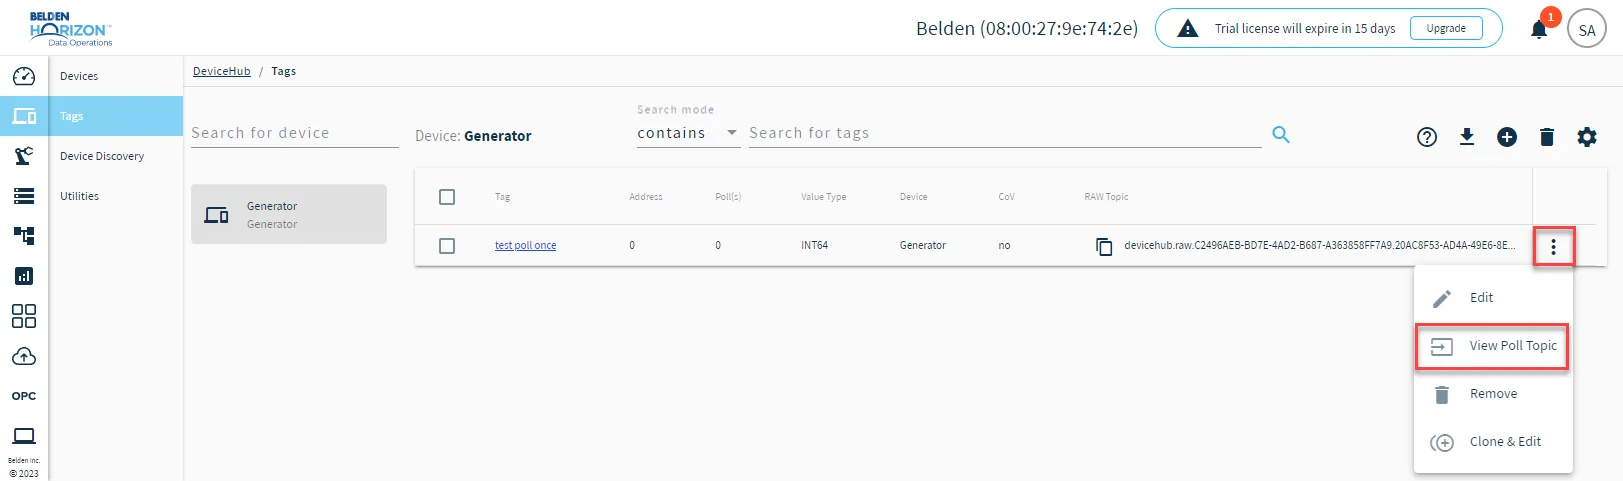
Click the Copy icon for the tag's RAW Topic. You will refer to this later.
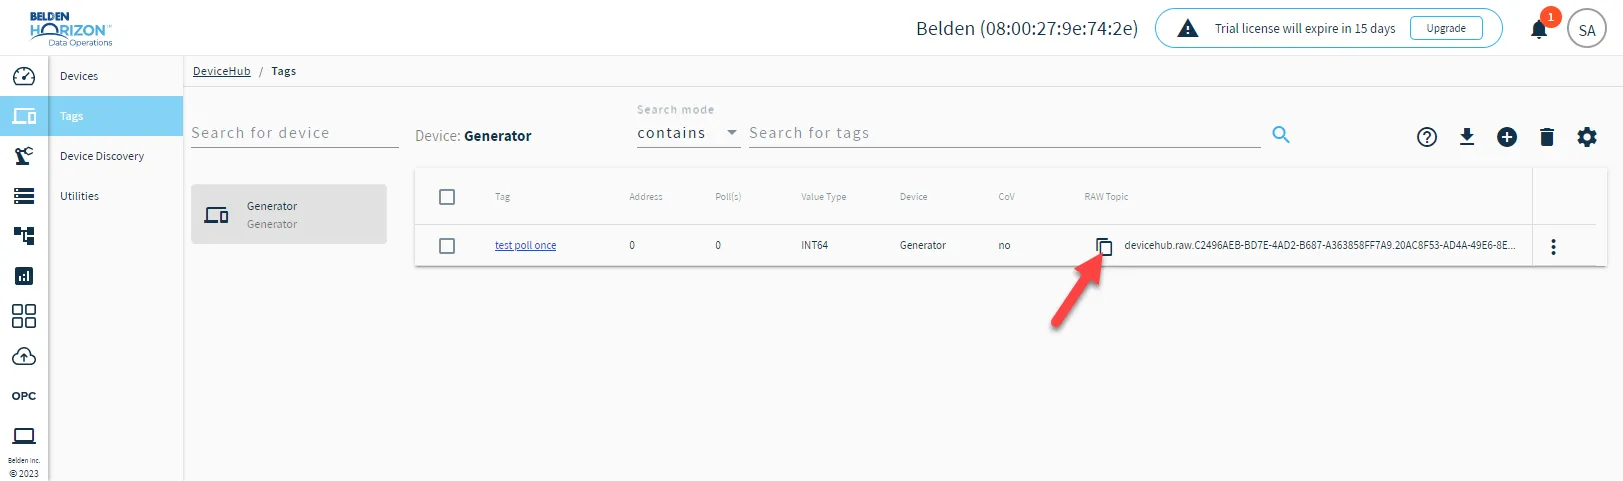 Copy RAW Topic icon
Click the Action menu for the tag and select View Poll Topic.
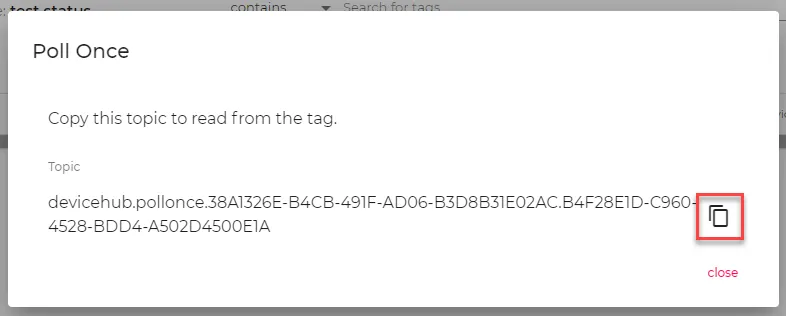
The Poll Once dialog box displays.
Click the Copy icon for the tag. You will refer to this later.
- Navigate to Flows Manager.
For a Flows Manager, click the Go To Flow Definition icon.
The Flow canvas opens in a new browser tab.
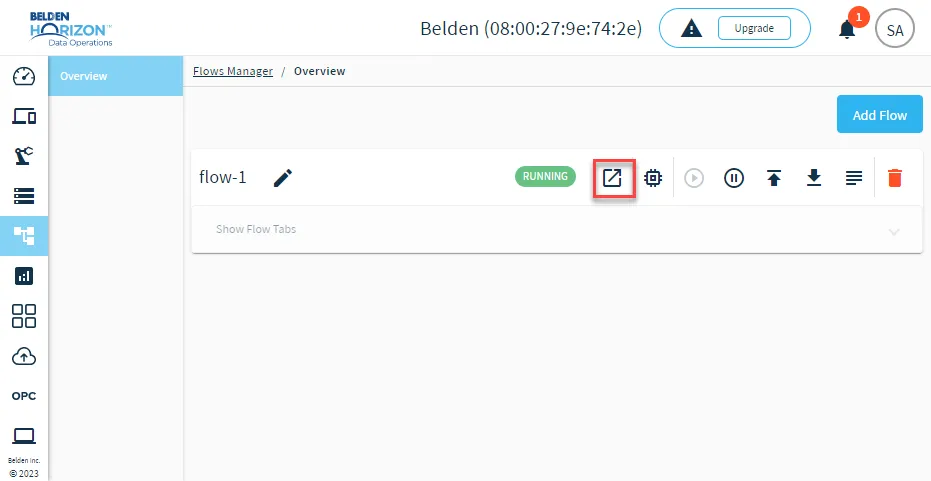 Go To Flow Definition icon
On the Flow canvas, drag the inject node and DataHub Publish node onto the canvas. Then, connect the two nodes.
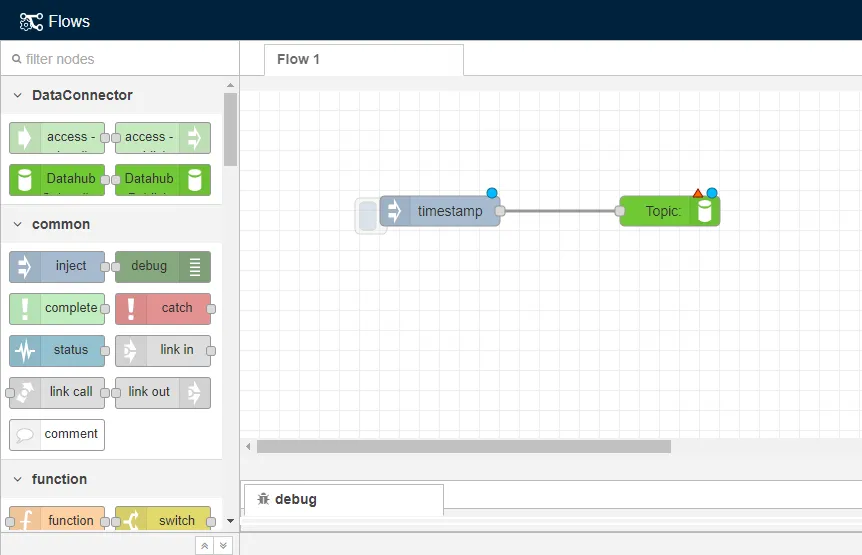 The inject and DataHub Publish nodes
- Double-click the DataHub Publish node. The Edit DataHub Publish node dialog box displays.
- In the Topic field, paste the Poll-once topic you copied in step 5.
- If needed, configure the Datahub Subscribe connection. See the Step 3: Configure Connector Nodes section in Create a Flow to learn more.
- Click Done.
Drag the DataHub Subscribe node and debug node onto the canvas.
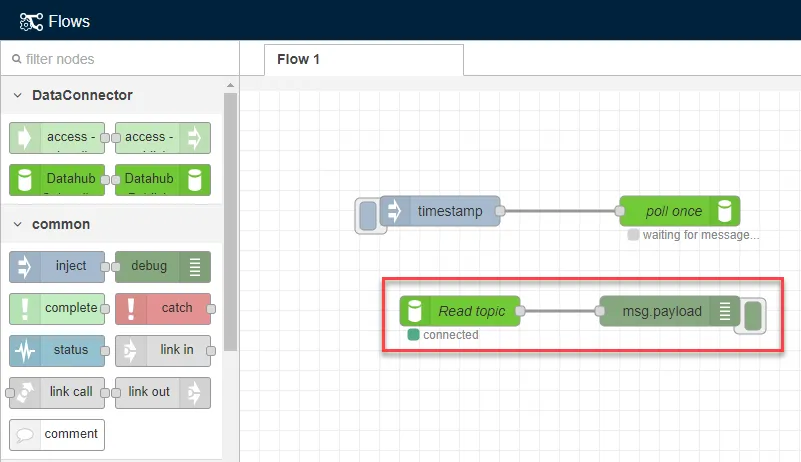 The DataHub Subscribe and debug nodes
- Double-click the DataHub Subscribe node. The Edit DataHub Subscribe node dialog box displays.
- In the Topic field, paste the Raw Topic you copied in step 2.
- Click Done, and then Deploy.
Expand the message window beneath the flow to view debug messages.
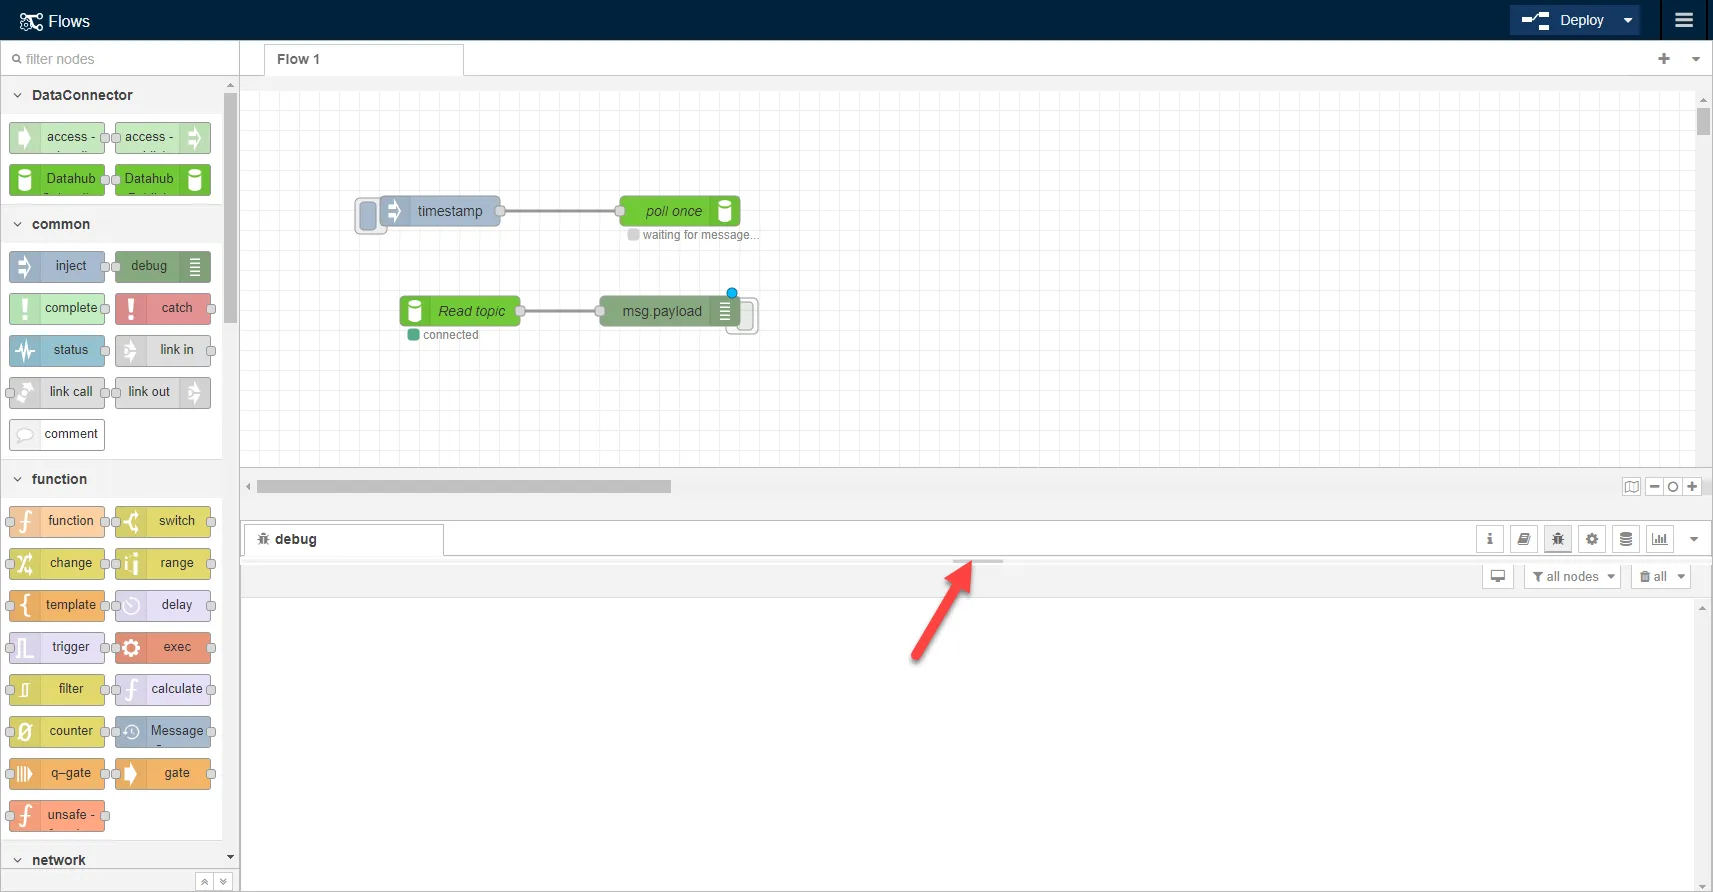 The message window
Click the Debug icon. This triggers the debug node to display messages.
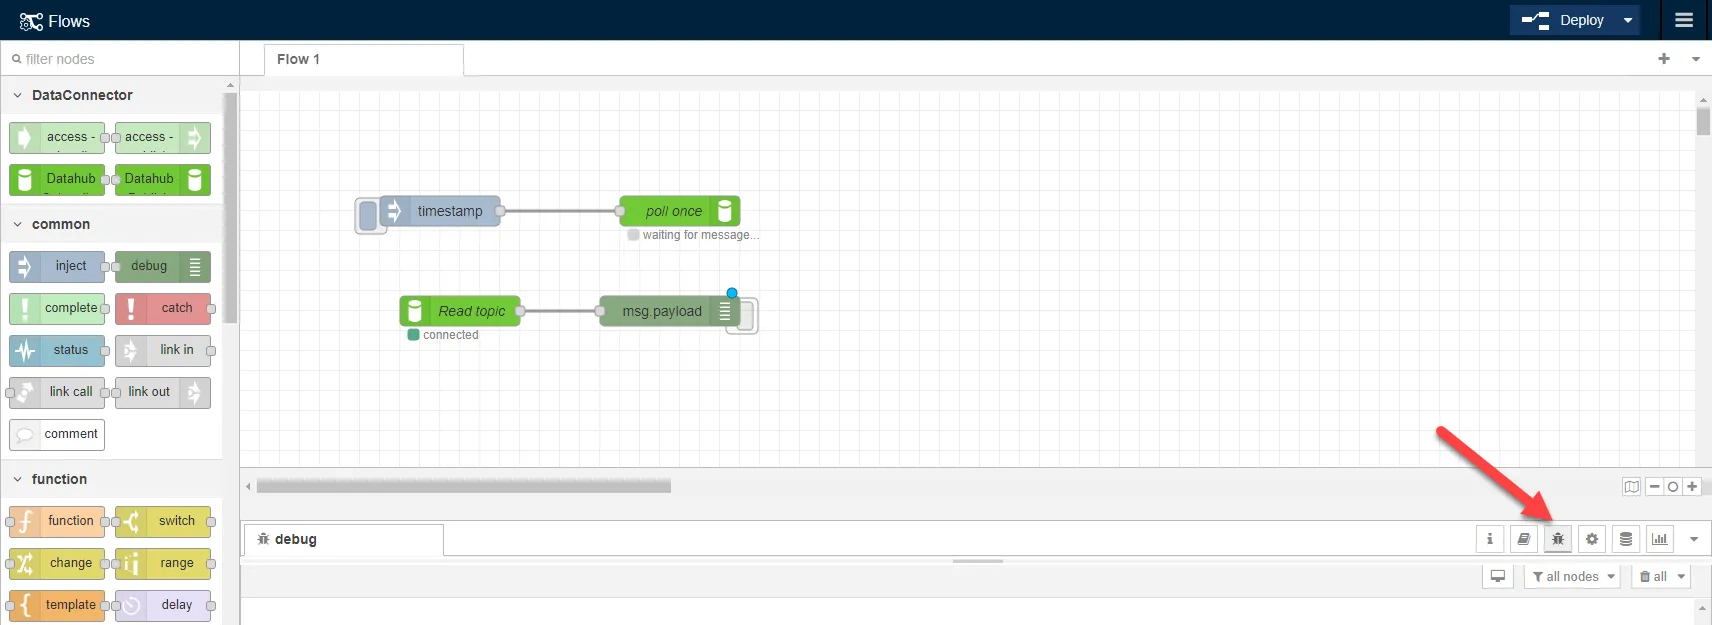 The debug icon
Click the Inject button. This triggers the timestamp message, which will then trigger the poll once tag to be activated.
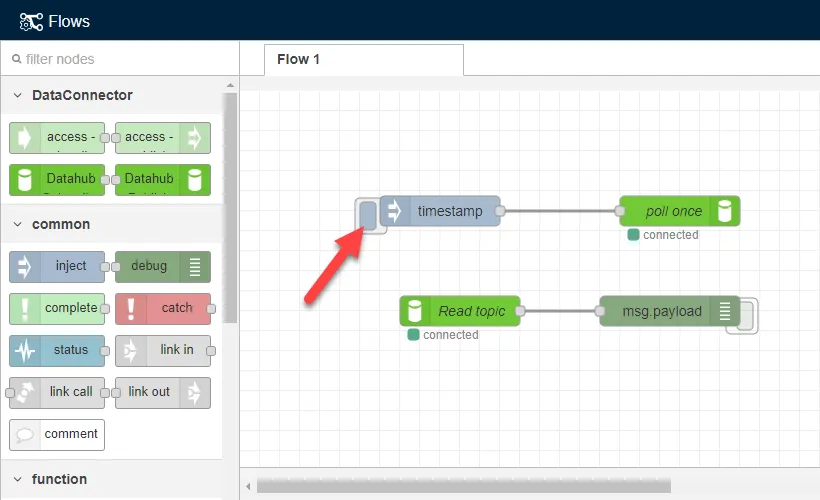 The nject button
Click the Activate Debug button. This triggers the debug node to display messages in the debug message window.
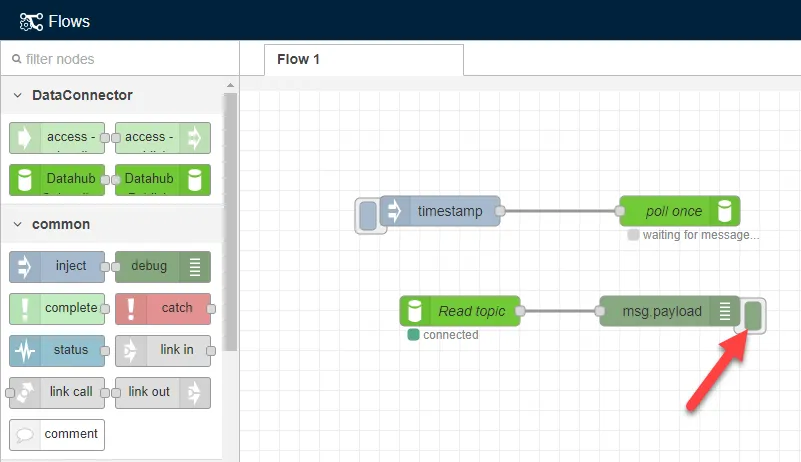 The Activate Debug button
The debug window displays a "success" :true message, which means the poll-once tag successfully polled the device and displayed the data for the tag.
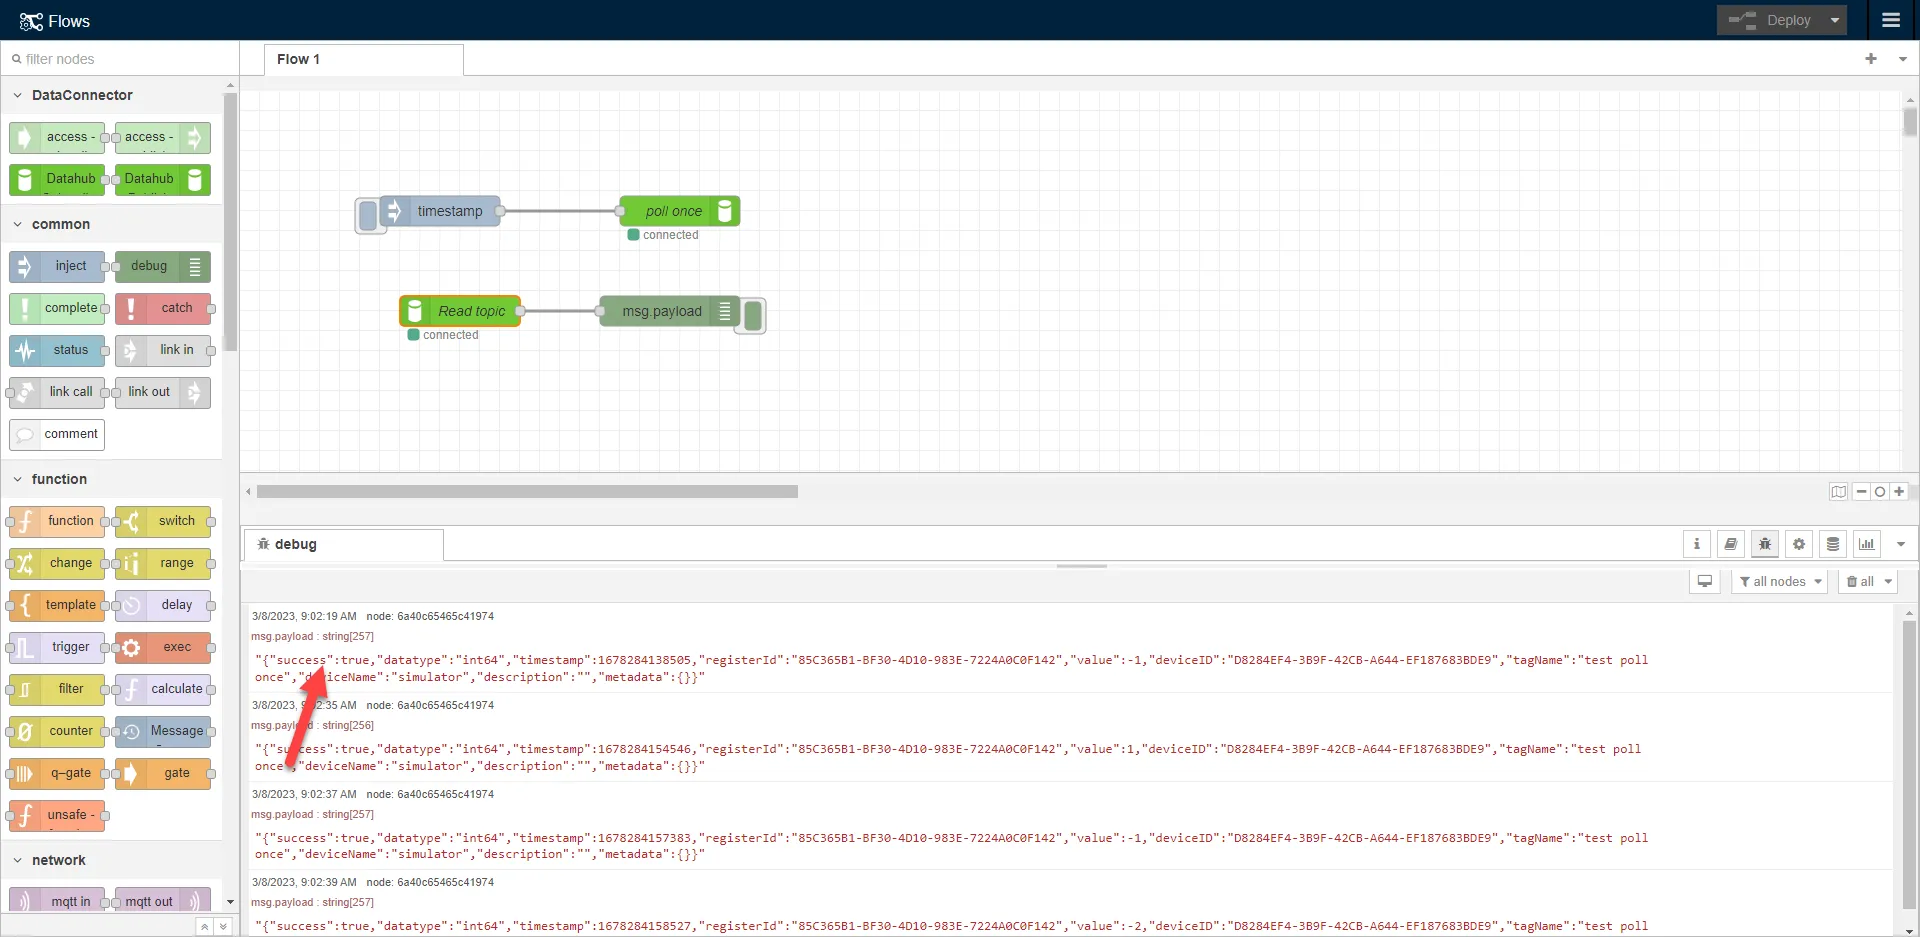
The rest of the payload displays the following information for the tag:
- Data Type: The data type configured for the tag you created in step 1.
- Timestamp: Date and time data for the poll-once message.
- Register ID: The register ID for the tag generated in Belden Horizon Data Operations.
- Value: The value generated for the tag when the poll was triggered. Since the tag was configured with S - Random value generator, a random value is generated.
- Device ID: The device ID for the DataHub device generated in Belden Horizon Data Operations.
- Tag Name: The name you configured for the tag.
- Device Name: The name you configured for the device.
- Description: The description you entered for the tag. Since no description was entered for the tag in this use case, no value was displayed.
- Metadata: The meta data configured for the tag. Since no meta data was configured for the tag in this use case, no value was displayed.
Use Case 4: Write Topic
The Write Topic allows you to write data to a PLC device.
Step 1: Send Data to the Write Topic
You will first send the data to the Write topic.
To send the data to the Write topic:
- Follow the steps in the Add DeviceHub Device section.
- Name: M - Memory Register
- Value Type: int64
- Polling Interval: 5
- Tag Name: Enter a name for the tag.
- Address: 1
Click the Action menu for the tag and select View Write Topic.
The Write dialog box displays.
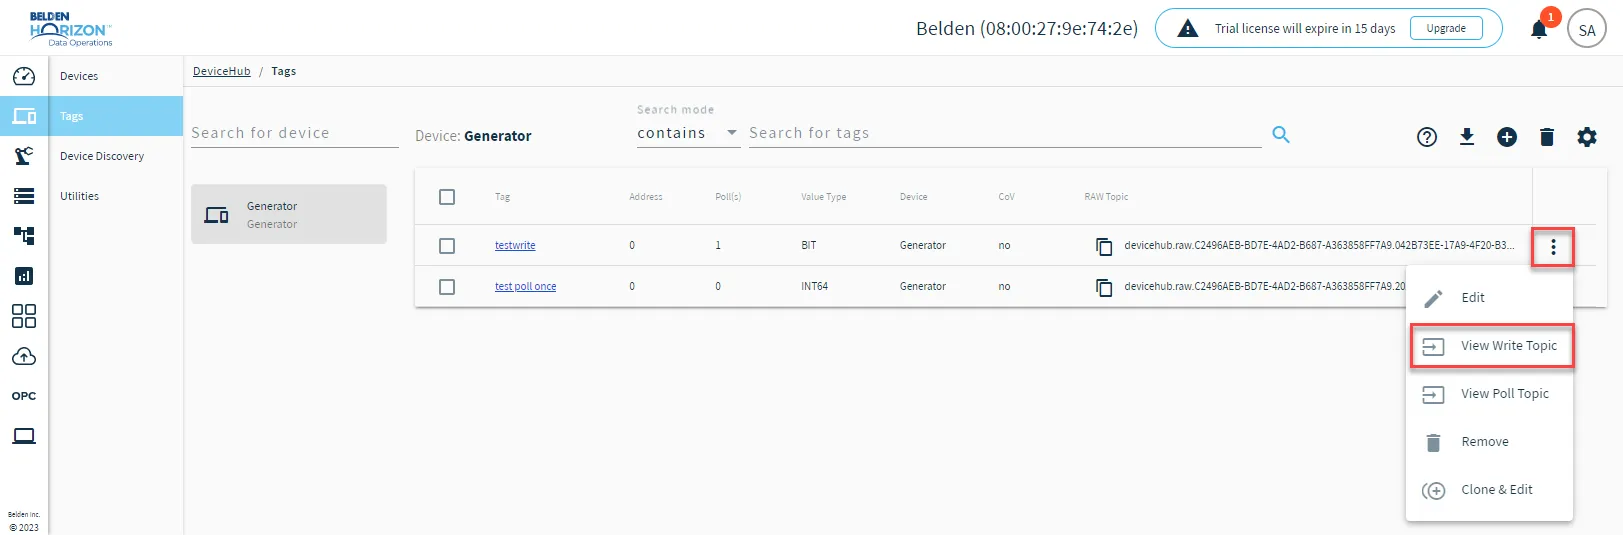 View Write Topic option
Click the Copy icon for the tag. You will refer to this later.
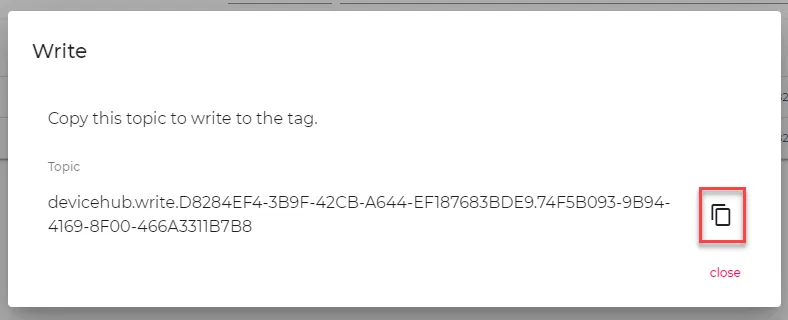 Copy icon for Write topic
For a Flows Manager, click the Go To Flow Definition icon.
The Flow canvas opens in a new browser tab.
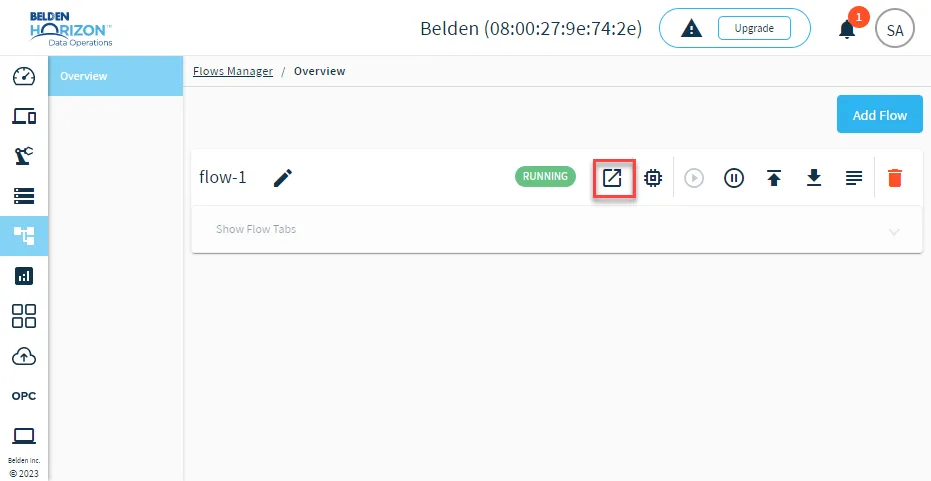
On the Flow canvas, drag the inject node and DataHub Publish node onto the canvas. Then, connect the two nodes.
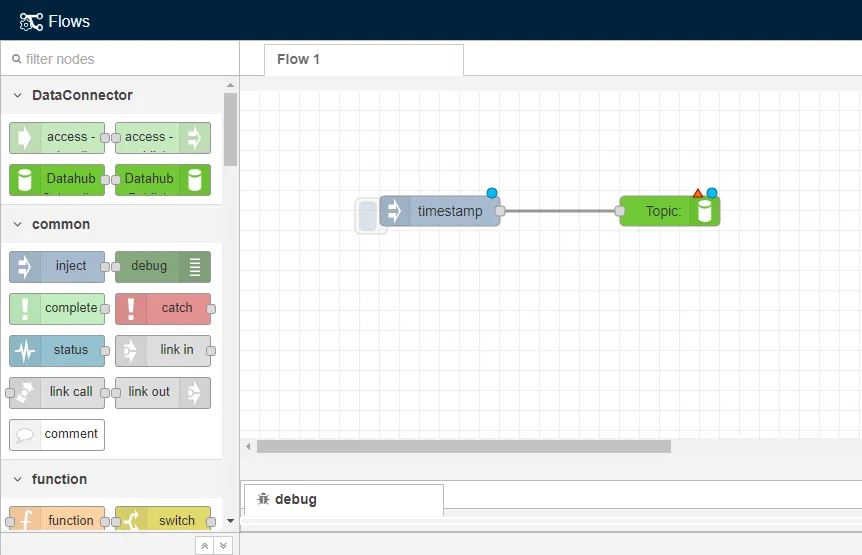
- Double-click the DataHub Publish node. The Edit DataHub Publish node dialog box displays.
- In the Topic field, paste the Write topic you copied in step 4.
- If needed, configure the Datahub Subscribe connection. See the Step 3: Configure Connector Nodes section in Create a Flow to learn more.
- Click Done.
- Double-click the inject node. The Edit inject node dialog box displays.
- For msg.payload, update the timestamp selection and select string.
- In the string field, enter test.
- Click Done.
Drag the debug node onto the canvas and connect it to the inject node.
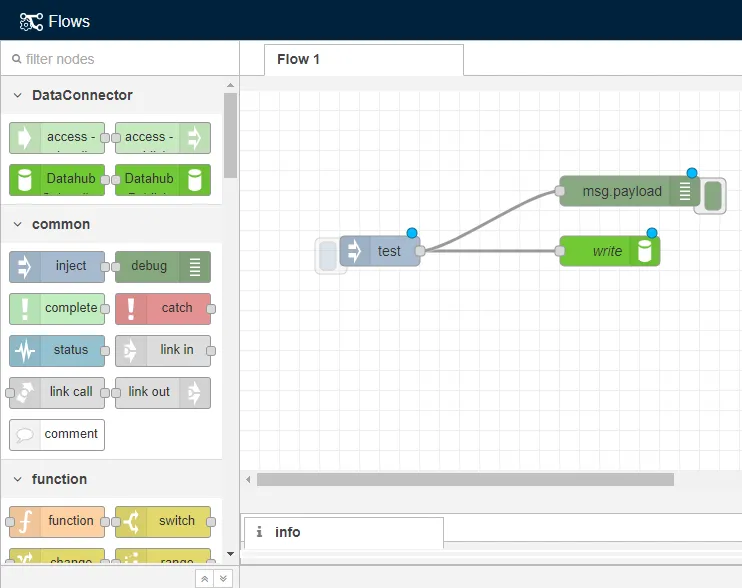 The debug node connected to existing flow
- Click Deploy.
Expand the message window beneath the flow to view debug messages.
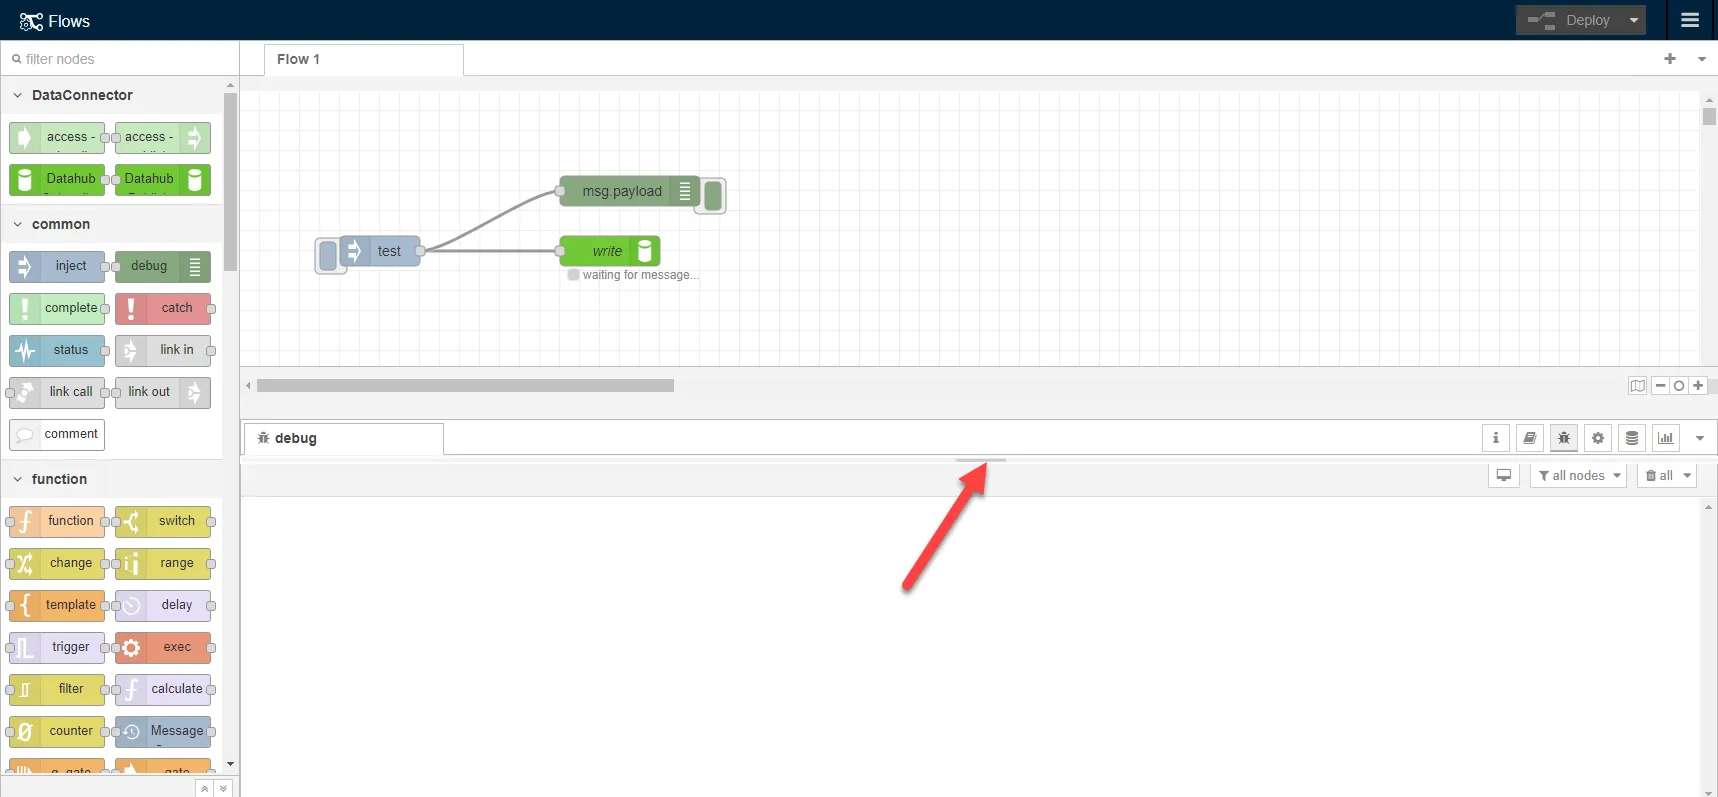 The message window
Click the Debug icon. This triggers the debug node to display messages.
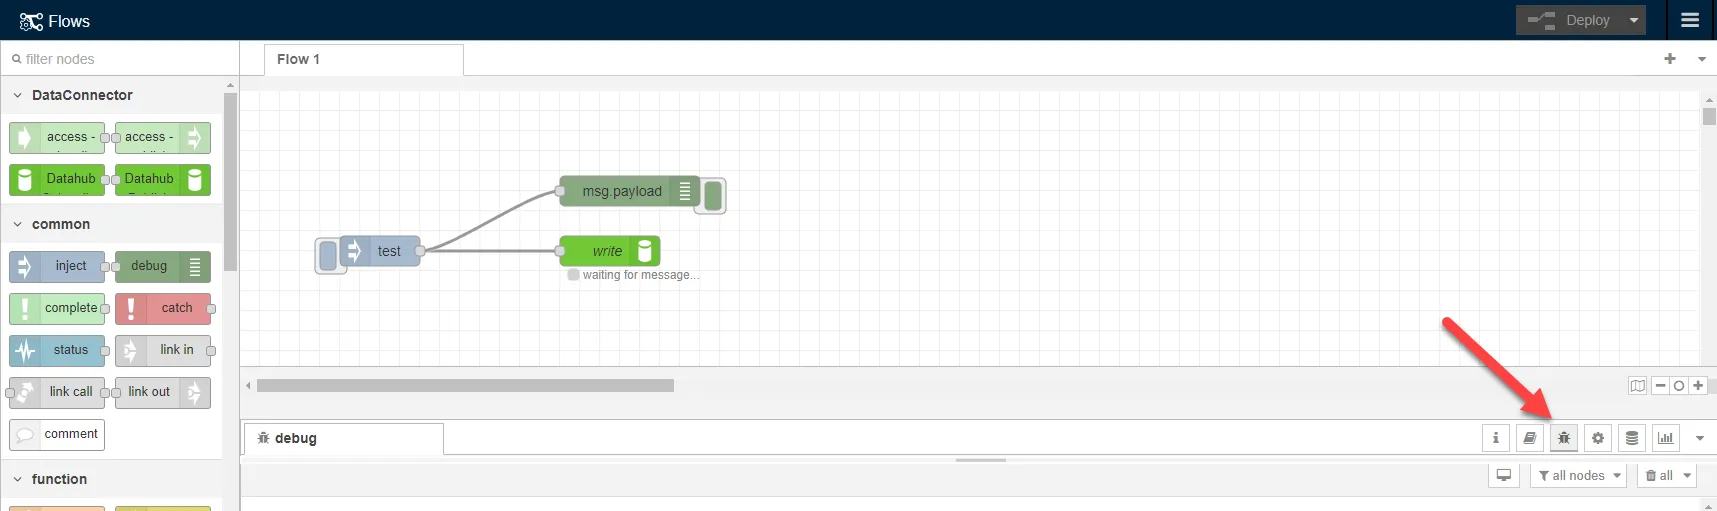 The debug icon
Click the Activate debug button and inject button. The message test displays in the debug window.
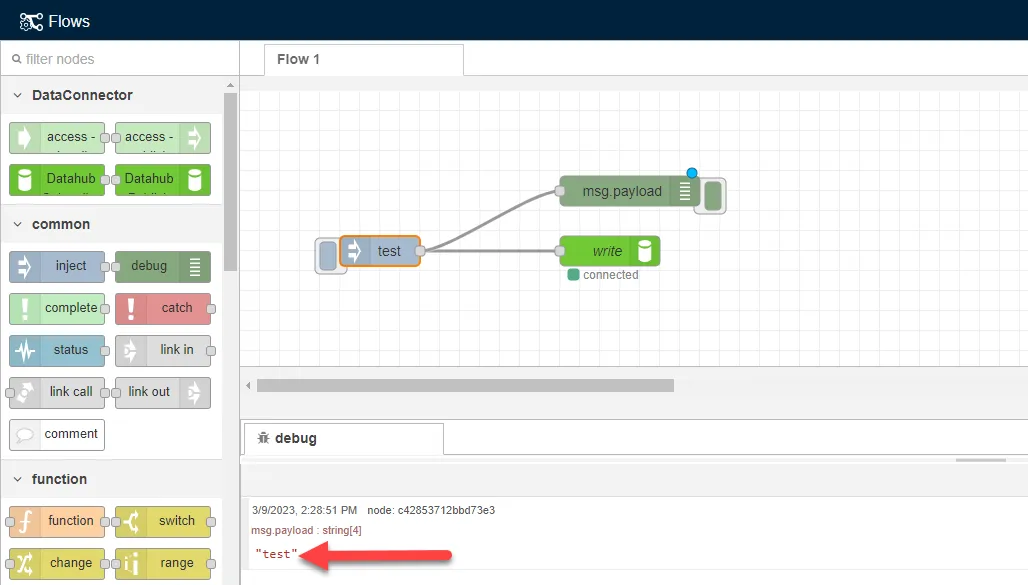 Successful write message
After sending the data to the Write topic, you can then read the data that was sent.
Step 2: Read Data That Was Sent
To read the data that was sent:
Drag the DataHub Subscribe node and debug node onto the canvas. Then, connect the two nodes.
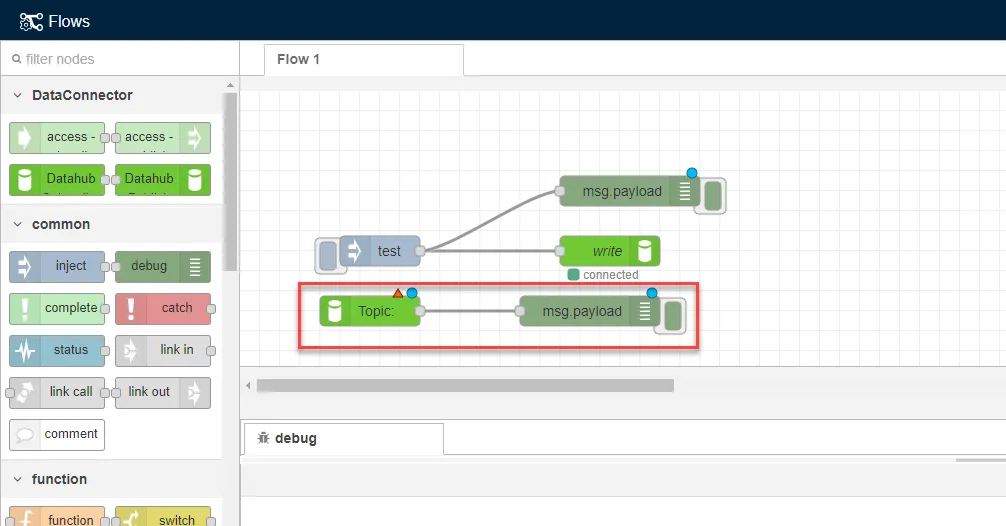 The DataHub Subscribe and debug nodes
- Double-click the DataHub Subscribe node. The Edit DataHub Subscribe node dialog box displays.
- In the Topic field, paste the Write Topic you copied in step 4.
- Click Done, and then Deploy.
Deactivate the debug node connected to the inject node and activate the debug node connected to the DataHub Subscribe node.
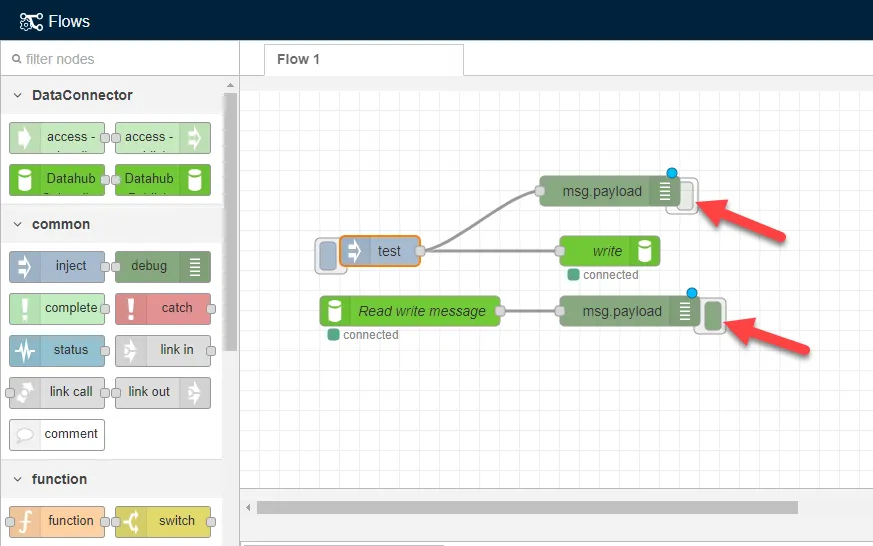 Deactivate top debug node and activate bottom debug node
Click the inject button. The message that was sent to the Write topic is displayed by the debug node in the debug window.
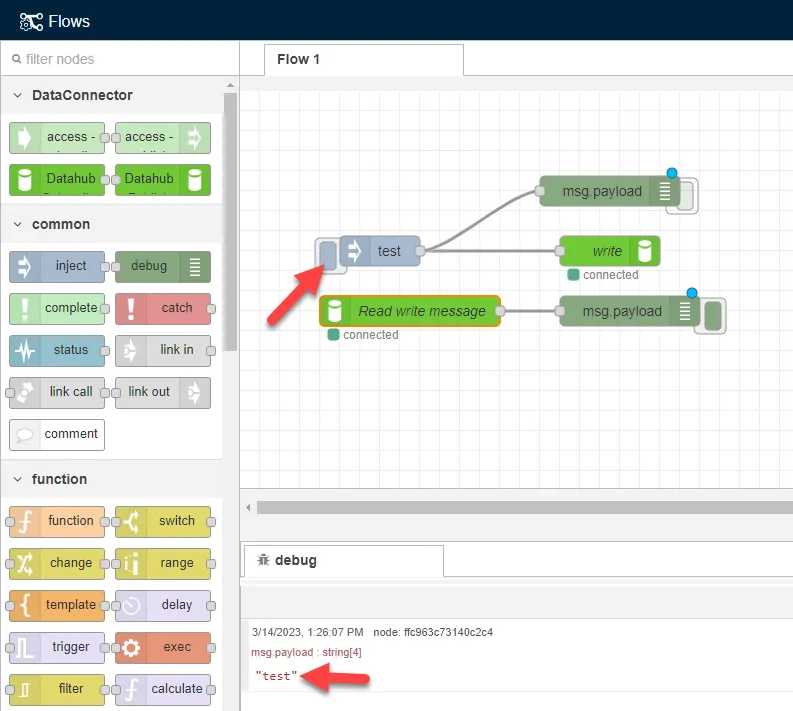 Test message is read by debug node
Use Case 5: Batch Write Topic
You can use the Batch Write Topic to send multiple write requests simultaneously.
Important:
- Only Gen 2 drivers can use batch write topics. See the Industrial Systems Connection Guide to review available Gen 2 drivers.
- This is only available for devices that don't select the Enable Alias Topics check box in the device configuration. You must use tags in the raw topic format. See Connect a Device and Manage Devices for more information.
Before You Begin
You will need the register IDs for the tags included in the batch write operation. If you don't have these values, you can get them by completing the steps in Step 2: Configure Nodes below.
Step 1: Set Up Flow Canvas
To set up the Flow canvas:
- Follow the steps in the Add DeviceHub Device section.
- Name: M - Memory Register
- Value Type: int64
- Polling Interval: 10
- Tag Name: Enter a name for each tag.
- Address: Enter 1 for the first tag, 2 for the second, and 3 for the third.
- Navigate to DeviceHub > Devices.
In the Generator device tile, click the Display Copy Options icon and select the Manage topic. This will copy the PLC Manage topic. You will refer to this topic later on.
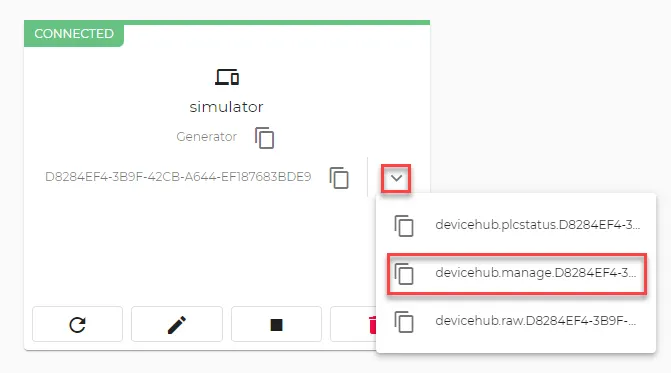 The manage topic
Copy the Raw Topic. This will copy the RAW topic. You will refer to this topic later on.
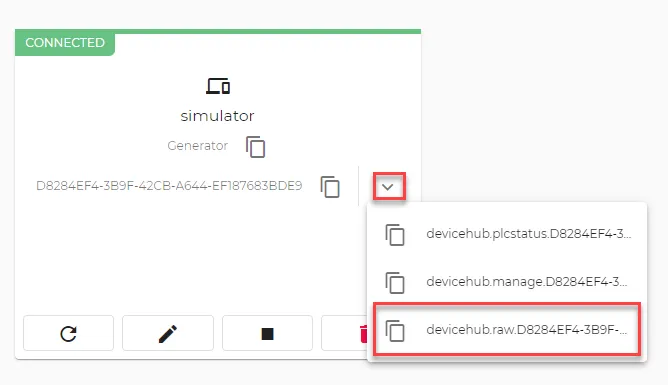 The device Raw Topic
- Navigate to Flows Manager.
For a Flows Manager, click the Go To Flow Definition icon.
The Flow canvas opens in a new browser tab.
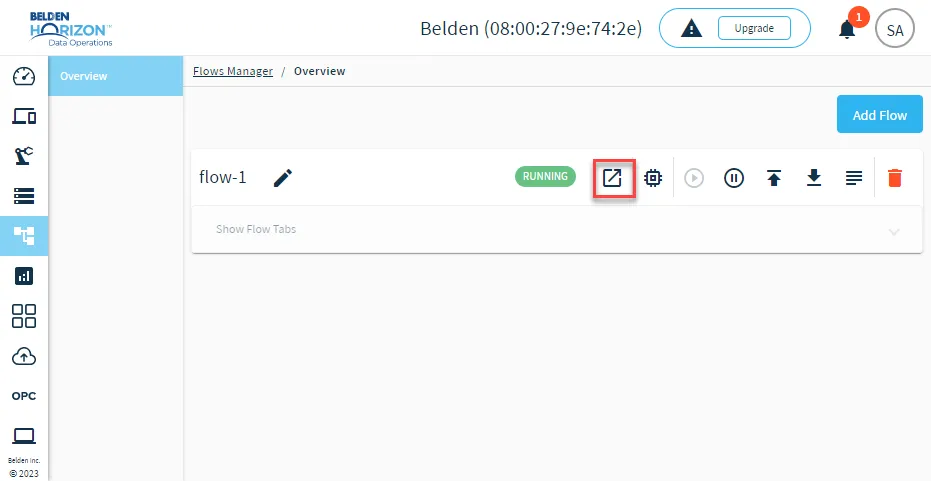 Go To Flow Definition icon
On the Flow canvas, do the following: Drag the DataHub Subscribe node and debug node on the canvas. Then, connect the two nodes. Drag the inject node and the DataHub Publish node onto the canvas. Then, connect the two nodes.
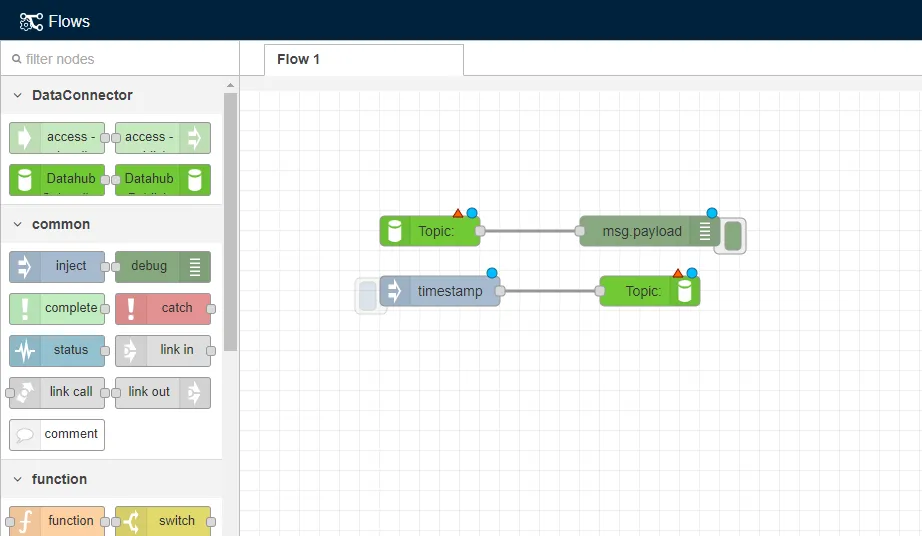 Set up the four nodes for batch write
You can now configure the nodes on the canvas.
Step 2: Configure Nodes
To configure the nodes:
- Double-click the DataHub Subscribe node. The Edit DataHub Subscribe node dialog box displays.
- In the Topic field, paste the Raw topic you copied previously.
- If needed, configure the Datahub Subscribe connection. See the Step 3: Configure Connector Nodes section in Create a Flow to learn more.
- Click Done, and then click Deploy.
Expand the message window beneath the flow to view debug messages.
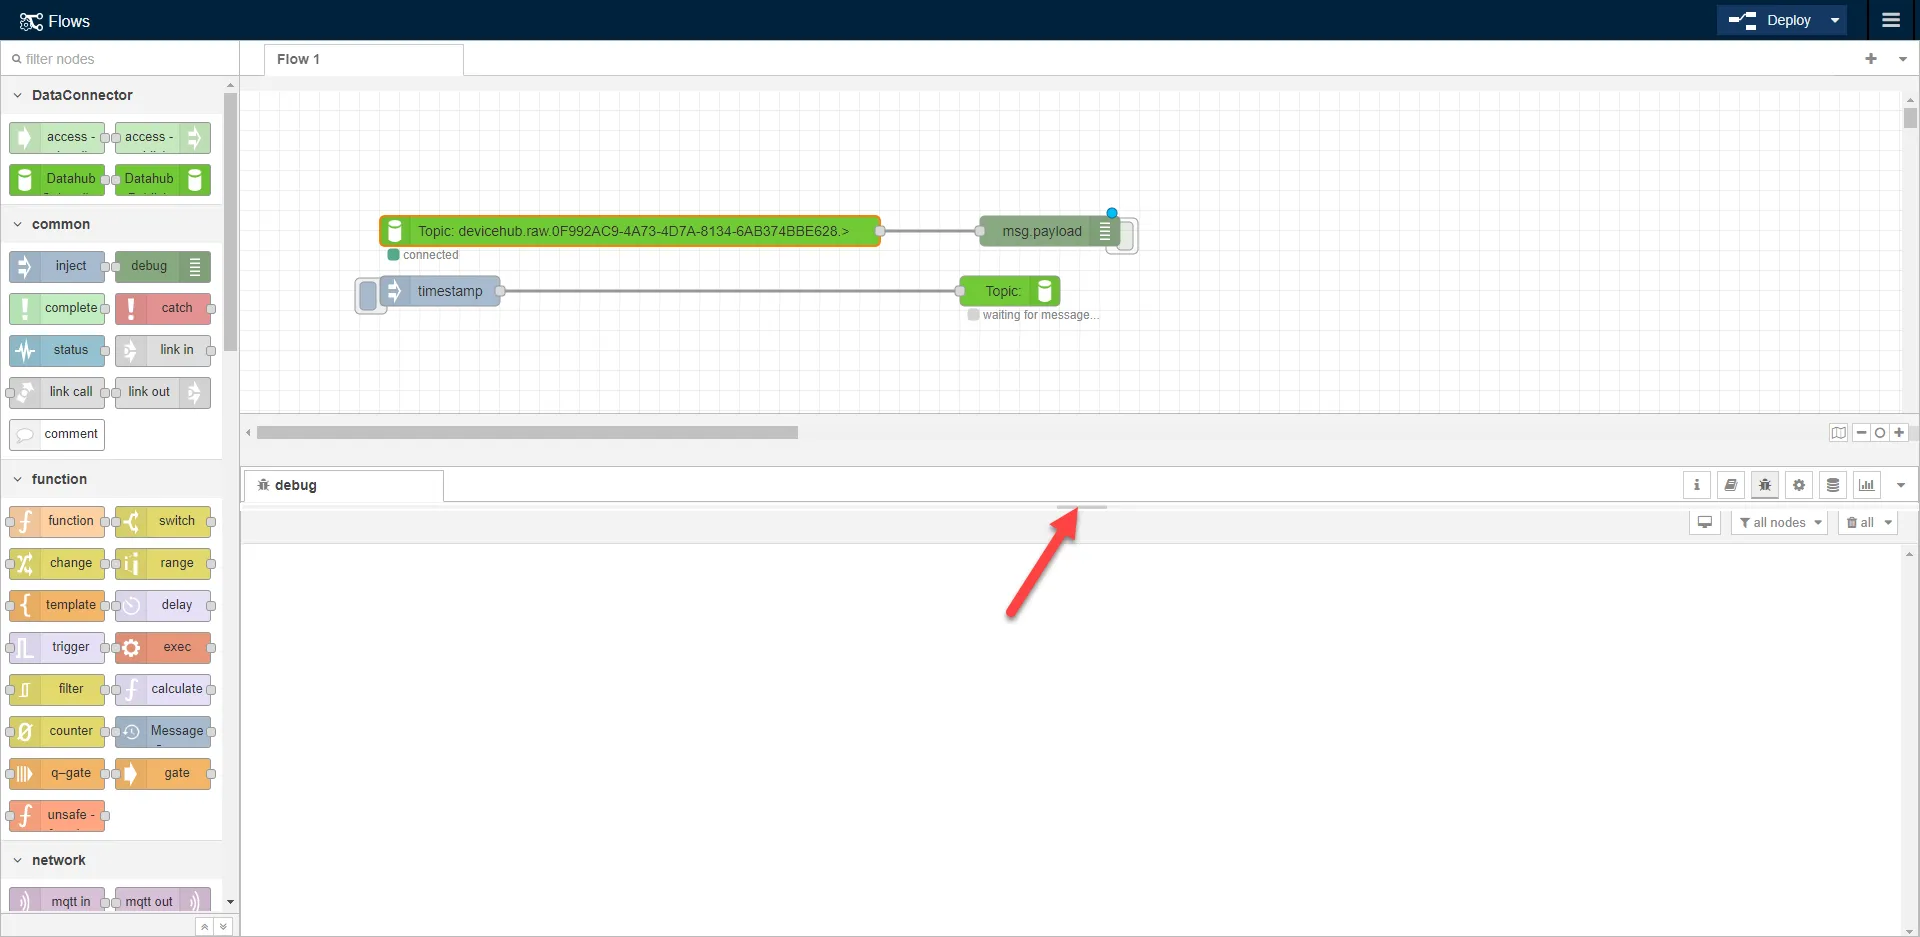 The message window
Click the Debug icon. This triggers the debug node to display messages.
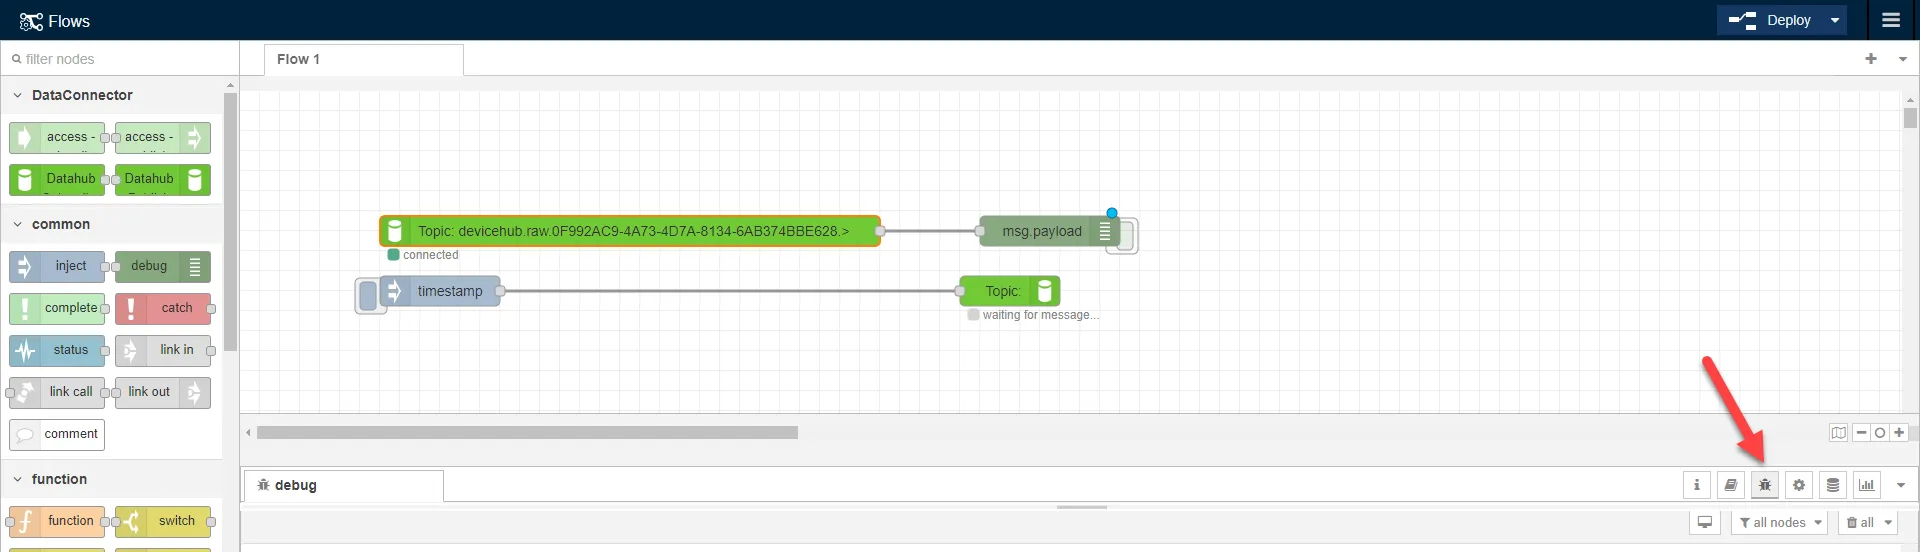 The debug icon
If not already activated, click the debug button to activate it. Then, wait for the first debug message to appear.
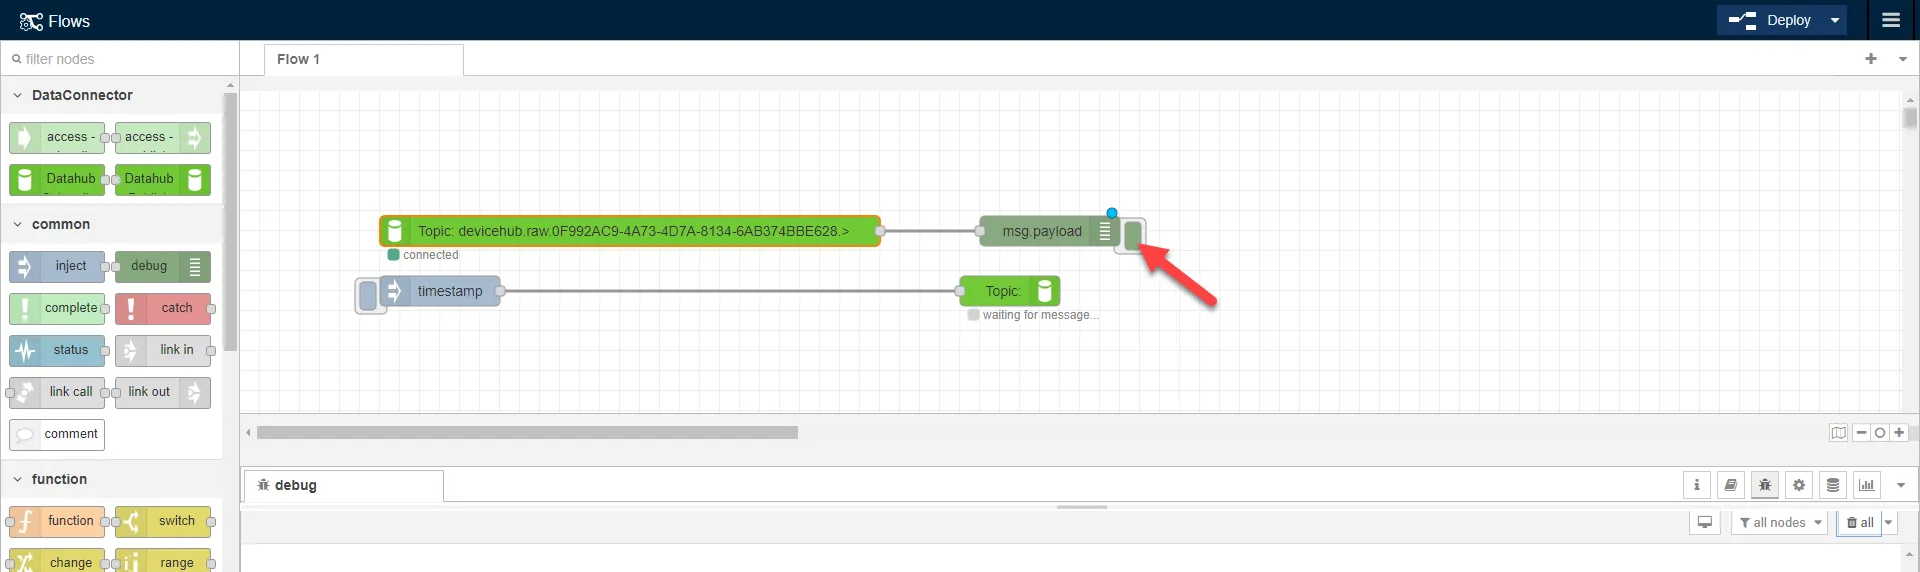 The debug button
When the first debug message displays, copy the registerID values. You may need to wait about 10 seconds (as this was the set polling interval value) for the registerID values to show up. These are the register IDs for each tag you created. You will use these values to configure the inject node.
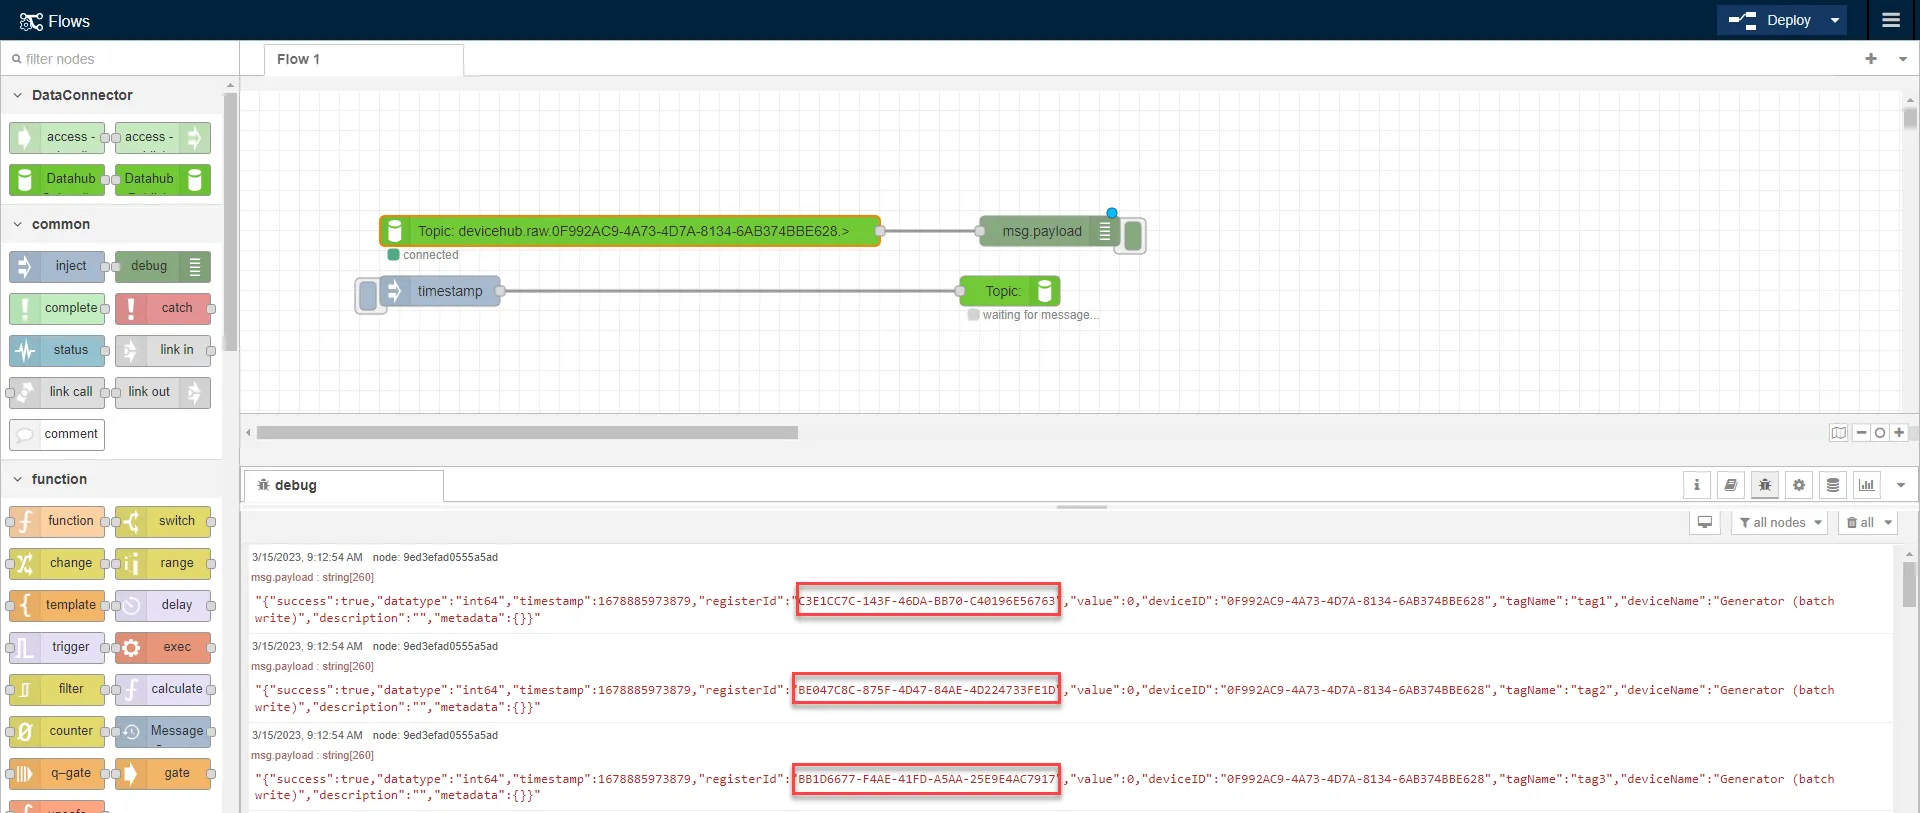 Register IDs for tags
- Double-click the inject node.
- For msg.payload, update the timestamp selection and select string.
- In the string field, enter the payload in the following format: {"registerID_1": value_1, "registerID_2": value_2, "registerID_3": value_3}. Keep in mind that the order of the register IDs you configure is based on the address values you configured for the tags. value_1, value_2, value_3 can be replaced with any value of your choosing.
- For example, for this use case, the payload will be: {"C3E1CC7C-143F-46DA-BB70-C40196E56763": 11, "BE047C8C-875F-4D47-84AE-4D224733FE1D": 22, "BB1D6677-F4AE-41FD-A5AA-25E9E4AC7917": 33}. The first register ID is the one configured with Address 1 in the tag configuration, the second register ID is the one configured with Address 2, and the third register ID is the one configured with Address 3. 11, 22, 33 are values chosen for this example.
- Click Done.
- Double-click the DataHub Publish node. The Edit DataHub Publish node dialog box displays.
- In the Topic field, paste the Manage topic you copied previously. Then, replace manage in the topic with batch_write. For example, devicehub.manage.0F992AC9-4A73-4D7A-8134-6AB374BBE628 is changed to devicehub.batch_write.0F992AC9-4A73-4D7A-8134-6AB374BBE628.
- Click Done, and then click Deploy.
You can now send the batch data to the device tags.
Step 3: Send Batch Data
To send the batch data:
Click inject button. This sends the data to all the tags configured in the inject node simultaneously. For this use case, the inject node sends the values 11, 22, and 33 to the three device tags.
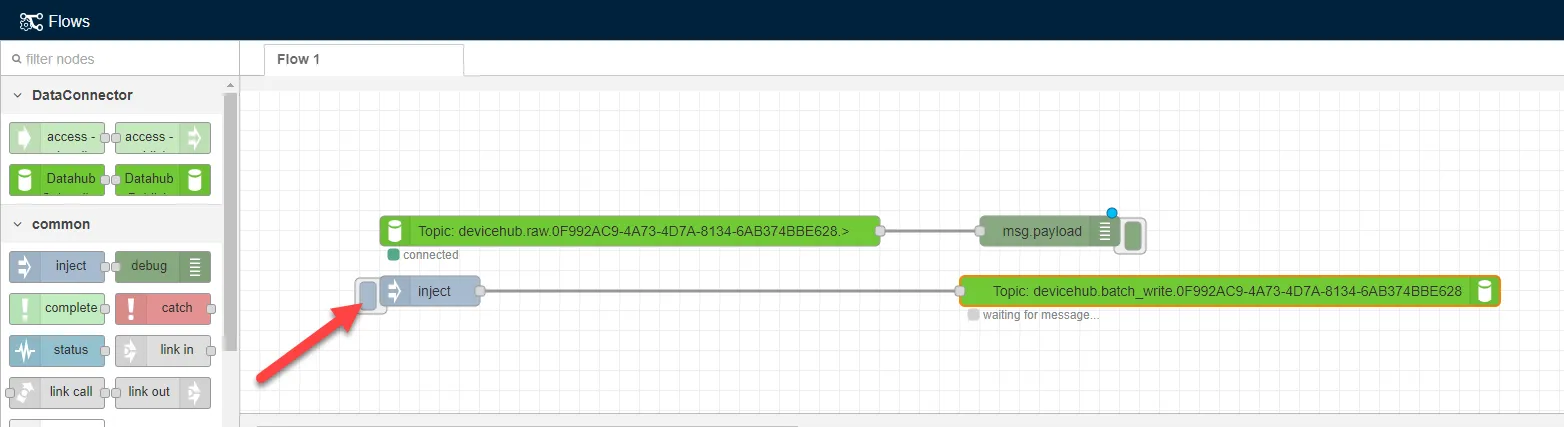 The inject node button
Wait up to 10 seconds for the next debug message. The three values display based on the Address and value parameters you configured previously.
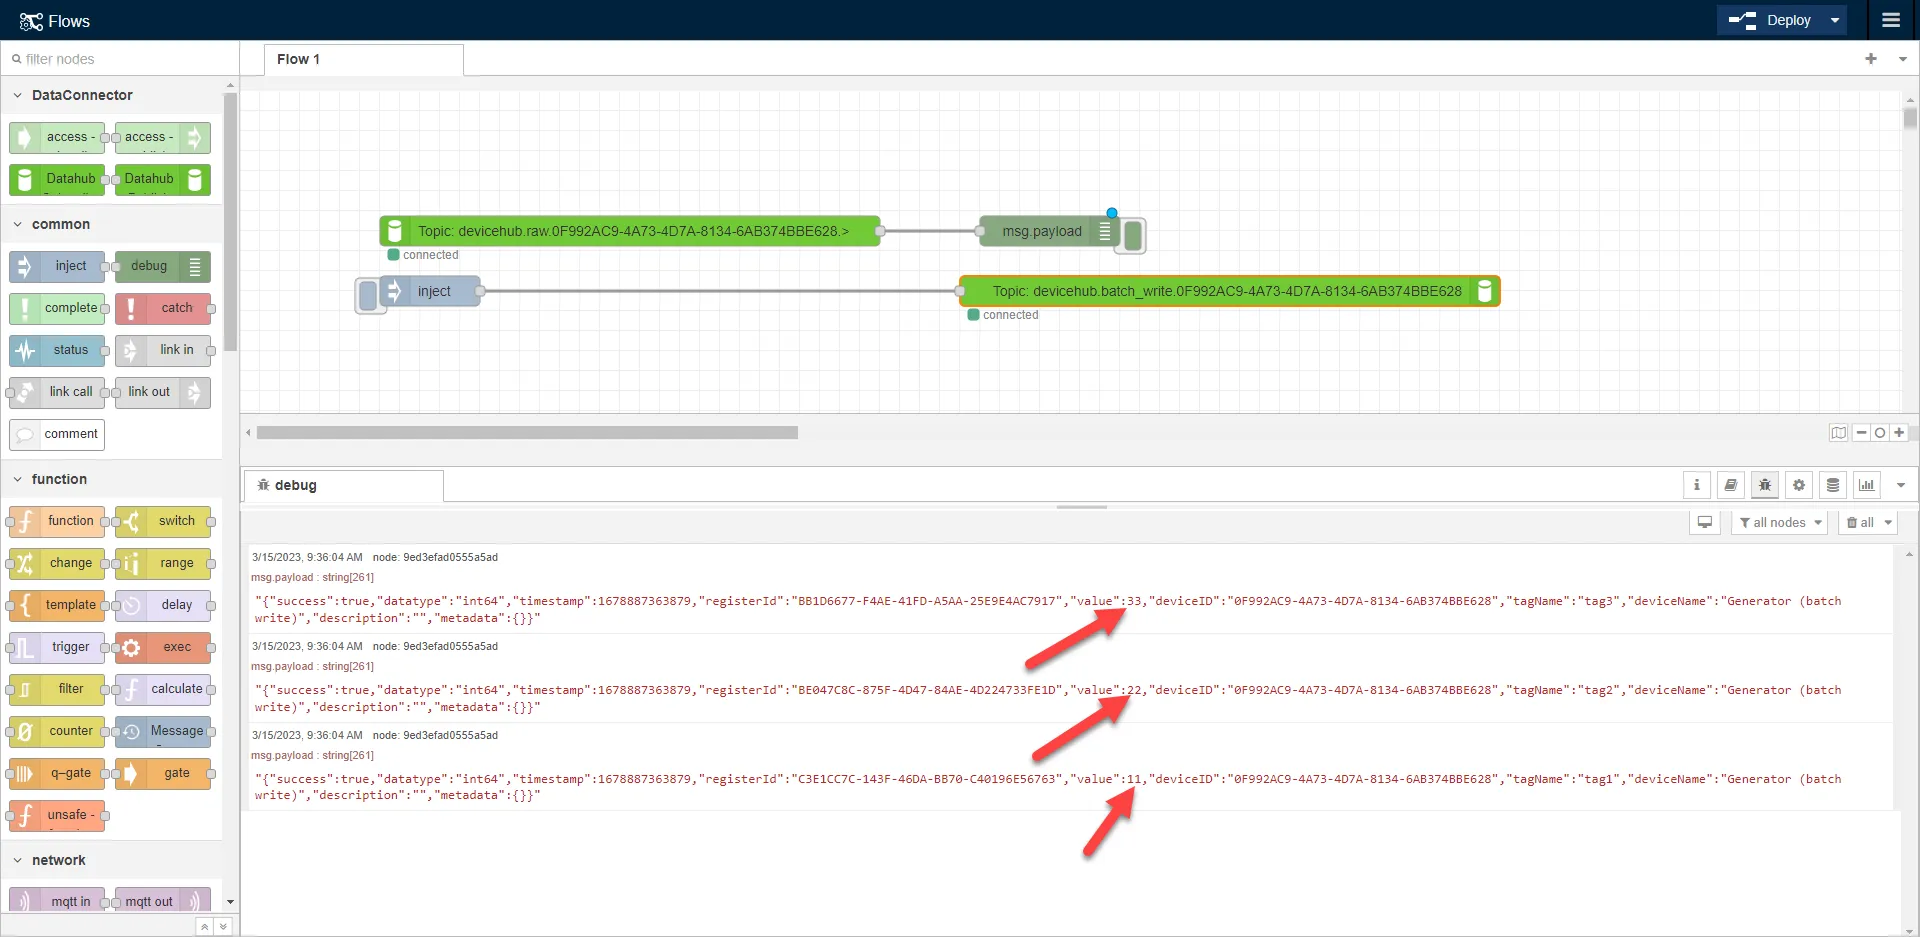 The batch write messages