Manage Connectors
After you add connectors to Belden Horizon Data Operations, you can navigate to the Integration pane to manage them.
Filter and Search Connectors
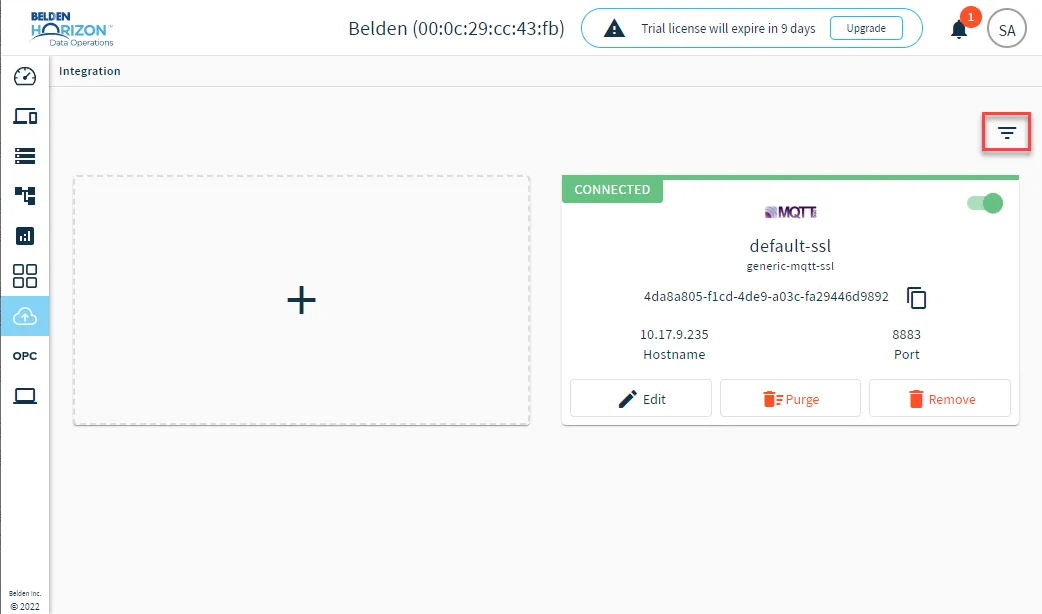
You can filter and search for connectors from the Integration pane by clicking the Toggle Connector Filter icon.
Manage Individual Connectors
Refer to the image and callouts below for management options for connectors.
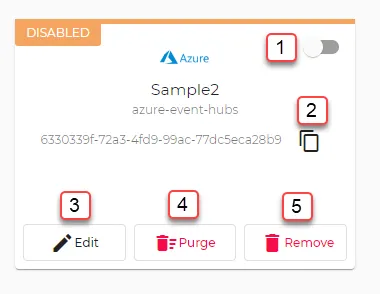
[1] Enable/Disable connector: Use the toggle to enable or disable the connector. The status will update to one of the following: Connected, Failed, or Disabled.
[2] Copy Instance identifier
[3] Edit connector: Update the fields for the connector.
[4] Purge connector: In the course of its operation, a connector persists inbound and outbound data. You might need to periodically purge the connector's data storage to avoid excessive use of disk space. Select this option to empty the connector's data storage.
[5] Remove connector: Remove the connector from the Integration pane.
Enable Logging
When you enable logging for a connector, the log displays connection and publish-based error messages. This can increase CPU usage. Therefore, it is preferable to use logging only for debugging.
Notes:
- The connector must be added and connected before logging can be enabled.
- With the exception of the default connector, all connectors have logging capability.
- Clicking the connector tile shows the details for the connector. You can view the logs section from there.
- You can download and refresh log files from the Details pane.
To enable logging:
- From a connector tile within an Integration pane, click the Edit icon. The Edit Connector dialog box appears.
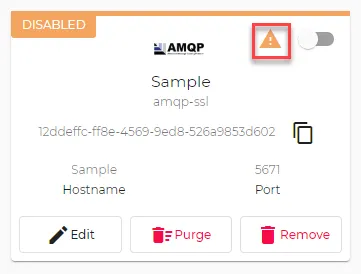
- Select the Enable logging check box, and then click Update. The Logging icon appears on the connector tile indicating that logging is active.
Access Connector Information
You can access device information and edit options by clicking the connector tile.
Connector Dashboard
After clicking a connector tile, the dashboard for the connector displays.
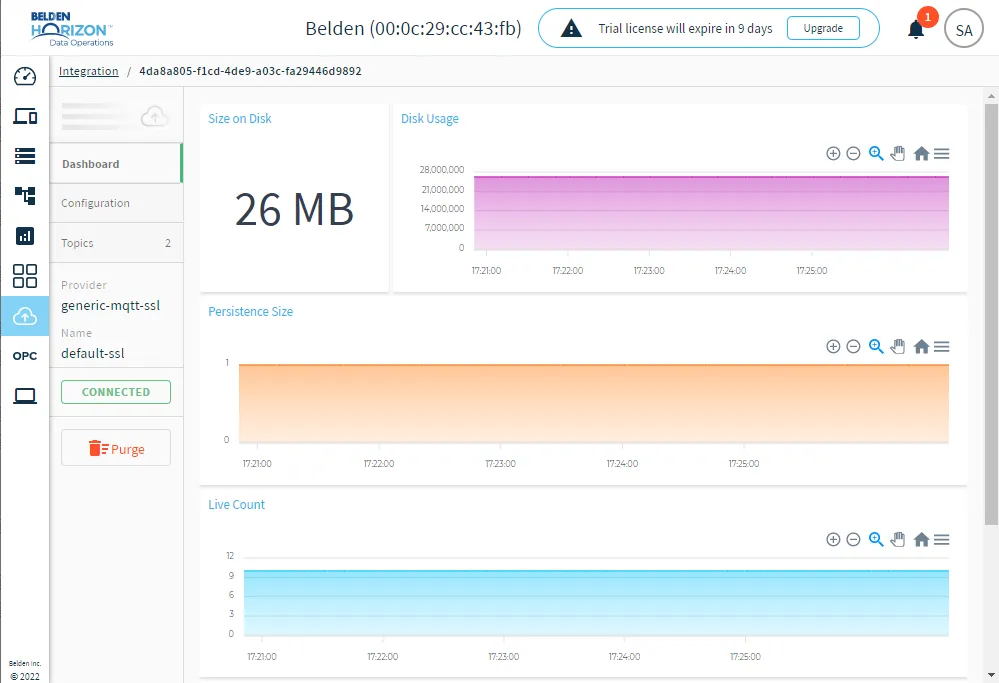
The dashboard displays the following information for the connector:
- Size on Disk
- Disk Usage
- Persistence Size
For Disk Usage and Persistence Size, you can use the icons to manipulate the charts and also download the charts in SVG, PNG, or CSV format.
Connector Configuration
The Configuration tab allows you to review and update the fields for the connector.
Make updates as needed and click Update.
Connector Topics
The Topics tab allows you to add and manage topics for the connector.
Refer to the image and callouts below for options in the Topics tab.
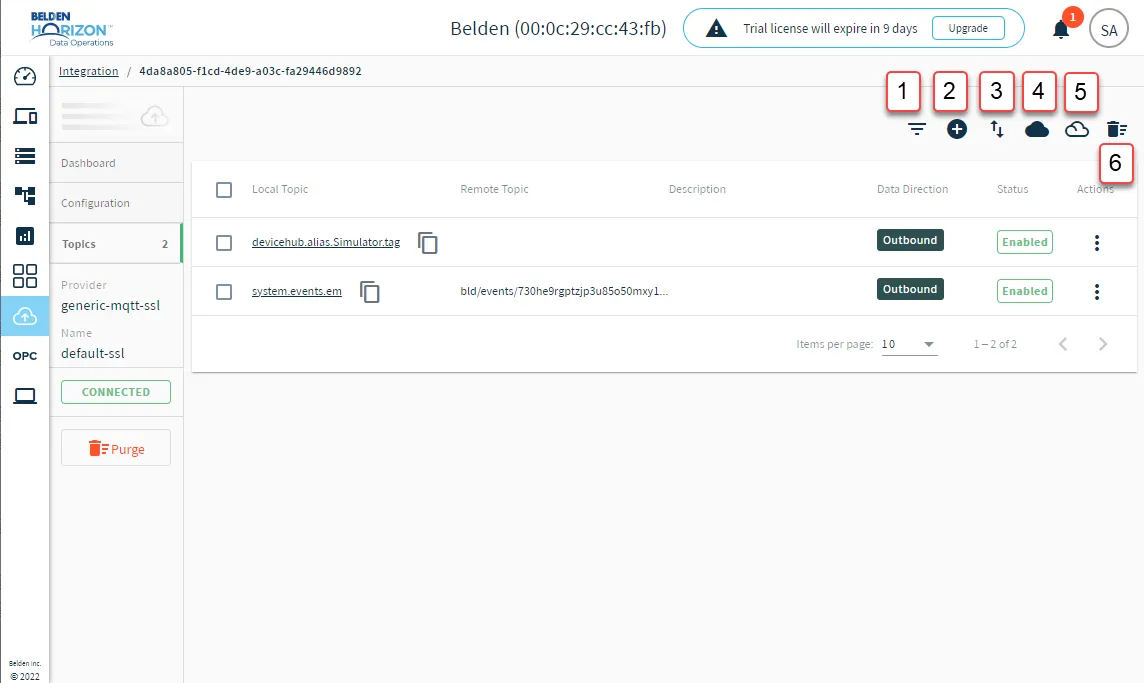
[1] Show filter: Search for topics.
[2] Add a new subscription: Add a topic to the connector. See the "Add a Topic to a Connector" section below to learn more.
[3] Import from DeviceHub tags: Import outbound topics to a connector from the DeviceHub tags. If you import DeviceHub tags for a CONNECTED connector, the connector will need to restart. All topics will be disabled upon initial import.
[4] Enable all topics: Enable all topics listed in the pane.
[5] Disable all topics: Disable all topics listed in the pane.
[6] Delete all topics: Delete all tags in the pane.
Connector Logs
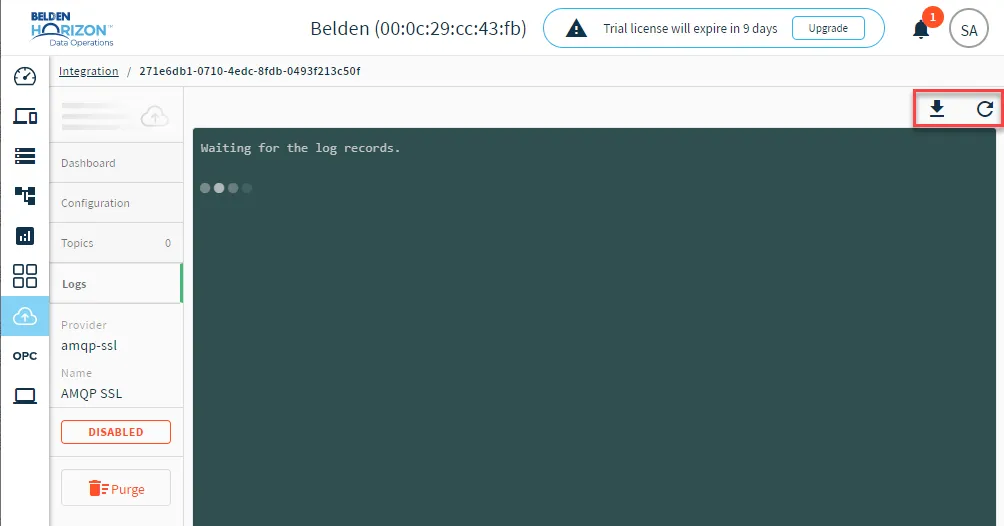
To view the Logs tab, you must enable logging for the connector. To enable logging, edit the connector and select the Enable logging check box.
From the Logs tab, you can download a file of the log and refresh the log.
Add a Topic to a Connector
You can add inbound and outbound topics to a connector. To automatically import tags to create outbound topics, you have the option of clicking the Import from DeviceHub tags icon.
Note: If you add topic to a CONNECTED connector, the connector will need to restart.
Before You Begin
Before adding a topic, make sure you do the following:
To add a topic to a connector:
- From the Integration pane, click the connector tile you want to add the topic to.
- Click the Topics tab.
Click the Add a new subscription icon. The Data Integration dialog box appears.
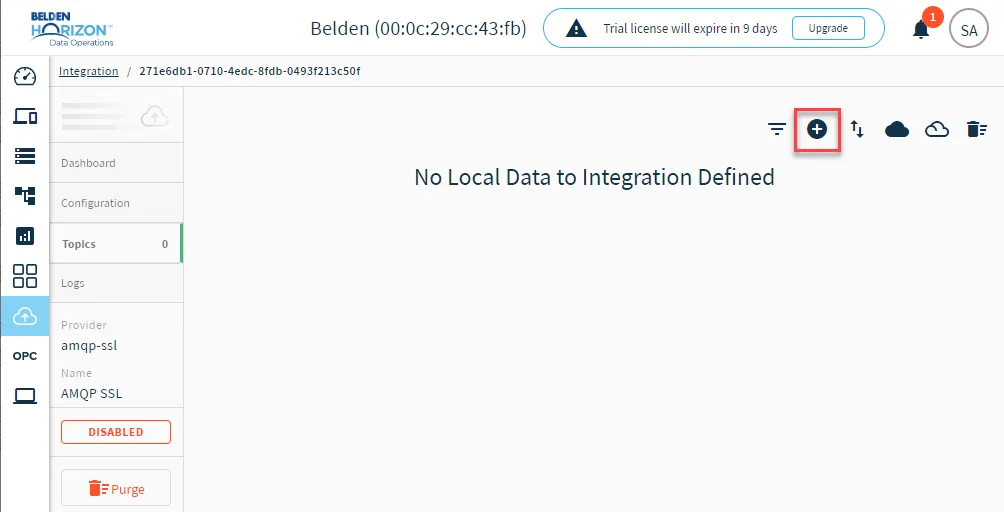 The Add a new subscription icon
- Select a data direction from the Data Direction drop-down list.
- Local to Remote - Inbound
- Remote to Local - Outbound
- In the Local Data Topic field, paste the Raw Topic copied for the device tag.
- The Remote Data Topic field may have a default value for the Integration topic parameter of the connector. If the field is blank, enter the remote data topic name.
- Enter a short description in the Description field.
- (If available) From the Qos dropdown menu, select a Quality of Service value . Available values: default, 0, 1, 2
- Click the Enable toggle to enable the connection.
- Click OK. If the connector is CONNECTED, the Confirmation dialog box appears.
- Click Yes. Follow the prompt to restart the connector. The new topic appears on the Topics pane and is enabled.
Manage Connector Topics
You can manage connector topics from the Topics tab.
To manage a topic, click the Action menu for the topic.
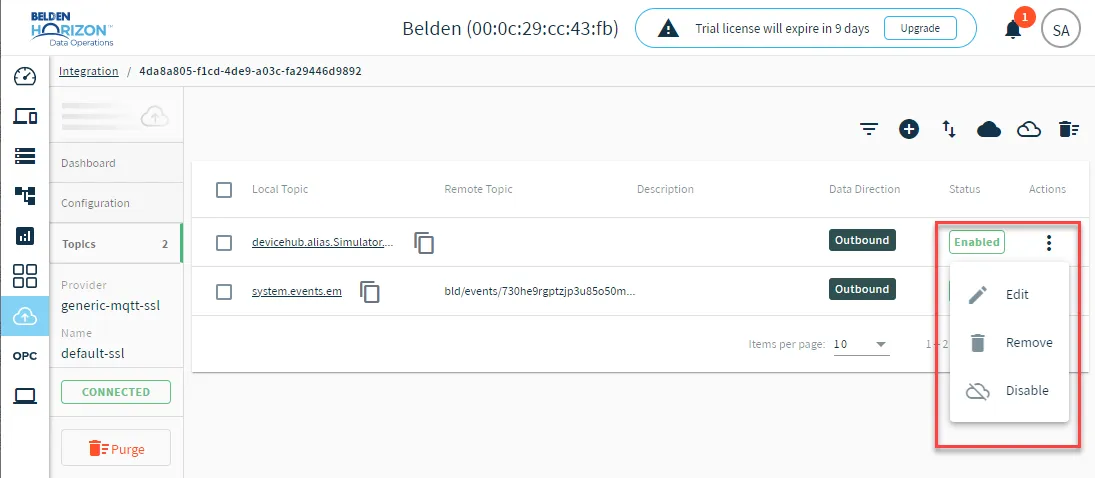
- Edit: Update the parameters for the topic. You can also click the topic name to update parameters.
- Remove: Remove the topic from the connector.
- Enable/Disable: Enable or disable the topic for the connector.