Set Up Edge Cascading with the NATS Connector
Note: The NATS Proxy feature is available for Belden Horizon Data Operations version 3.3.1 and later.
You can set up Edge Cascading with multiple Belden Horizon Data Operations instances by using the NATS connector.
Before You Begin
- Ensure that every Belden Horizon Data Operations instance that will be used to set up the NATS Proxy connection is on version 3.3.1 or newer.
- Determine which Belden Horizon Data Operations instance(s) will be the NATS server (host the API access account), and which Belden Horizon Data Operations instance(s) will be the NATS client (host the NATS connector). The NATS server and the NATS client can both send and receive the data going through the NATS proxy connection.
- If your network has a firewall, make sure it allows port 4222.
Use Case: Set up Edge Cascading with One NATS Client and One NATS Server
Review the following use case to set up two Belden Horizon Data Operations instances with Edge Cascading. Belden Horizon Data Operations (1) is the NATS Server and Belden Horizon Data Operations (2) is the NATS Client. You will be able to view data from the NATS Server.
Step 1: Enable NATS Proxy
You will need to enable the NATS Proxy connection in every Belden Horizon Data Operations instance that will be used for the connection. The connection is disabled by default.
To enable NATS Proxy:
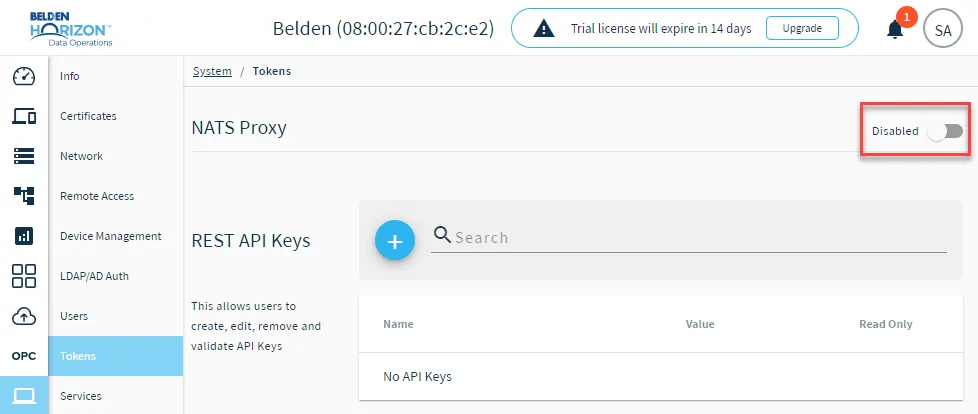
- In every instance you want to use for the NATS Proxy connection, navigate to System > Tokens.
- In the NATS Proxy section, click the Disabled toggle to Enabled.
Step 2: Create and Configure Access Account (NATS Server)
You will now need to enable a NATS server. To do this, you will need to create an access account. Once you create the account, copy the API key that you will use to set up the NATS integration connector.
To create the access account:
- From Belden Horizon Data Operations (1) (the instance where you want to create the NATS server), navigate to System > Tokens.
From the Access Accounts section, click the Add icon. The Create API Account dialog box appears.
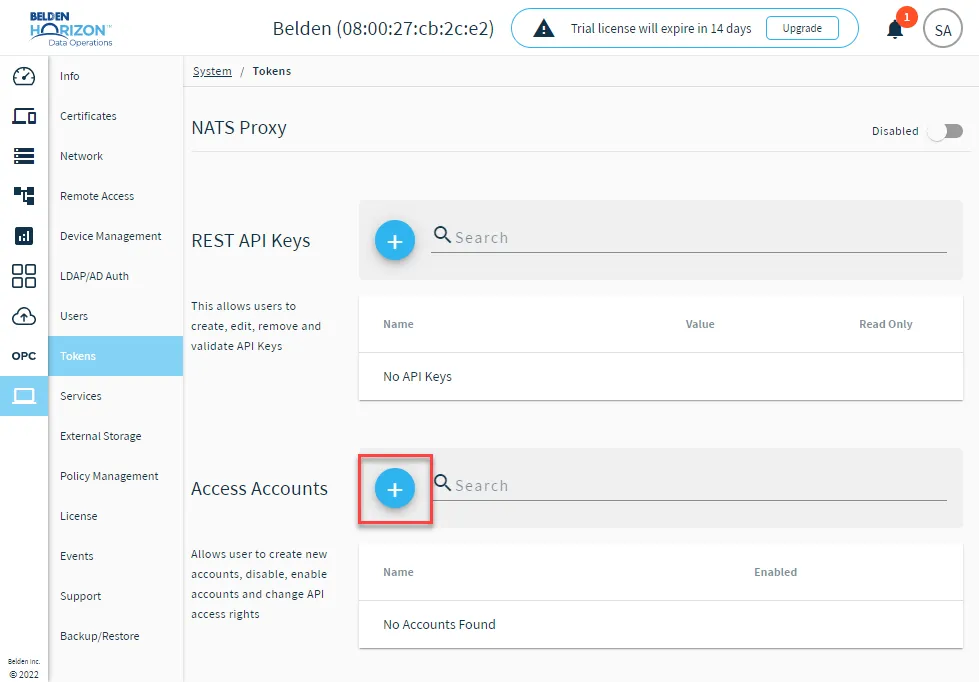 Add Access Account icon
- Enter a name for the account and ensure the Enable Account checkbox is selected.
- Click Create Account.
Click the Action menu for the account you just created and select Edit topics.
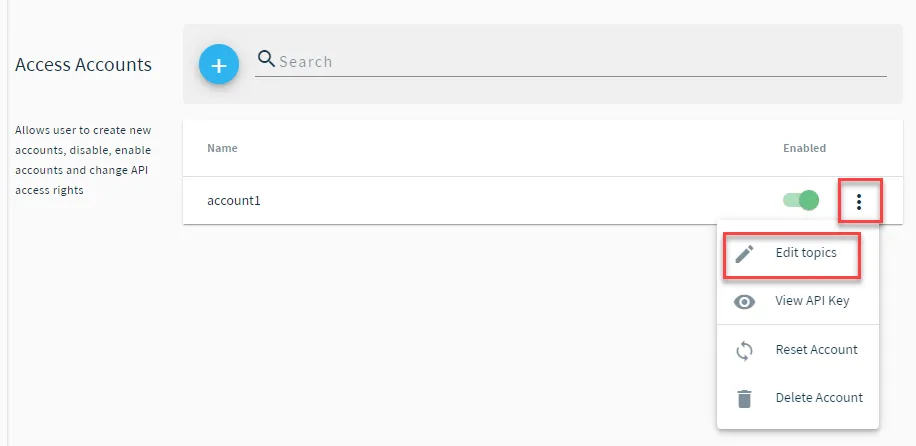 Edit topics option
- In the Read Topics field, enter the relevant NATS topics and click Add Read Topic for each one. Ensure that you follow proper NATS topics conventions for topic names. By default, a wildcard topic is created (>). This topic will read all topics.
- In the Write Topics field, enter the relevant NATS topics and click Add Write Topic for each one. Ensure that you follow proper NATS topics conventions for topic names. To create a wildcard topic, enter > for the topic name.
- When done entering read and write topics, click Update.
- Click the Action menu again for the account and select View API Key.
Click the Copy icon for the API key and paste it somewhere so you can access it later.
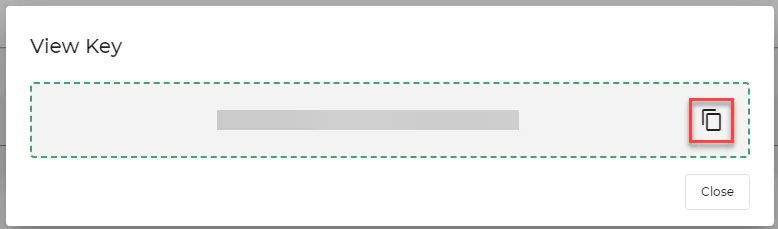 Copy API Key icon
Step 3: Create NATS Integration Connector (NATS Client)
You will now have to create a NATS client. To do this, you will create a NATS integration connector. If you will be using multiple Belden Horizon Data Operations instances as a NATS client, then you will need to set up the connector in each one.
To create the NATS Integration Connector:
- From Belden Horizon Data Operations (2) (the instance where you want to create the NATS client), navigate to Integration.
- Click the Add a connector icon. The Add a connector dialog box appears.
Use the Provider drop-down list to select the NATS connector.
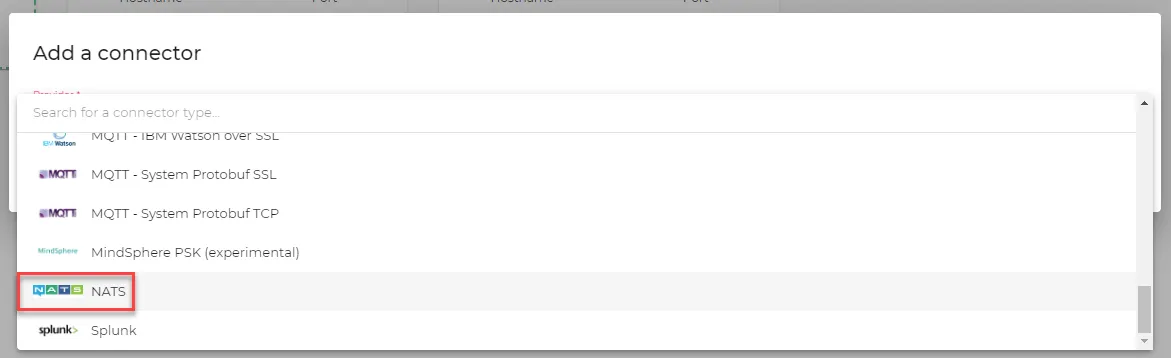 NATS connector
- Enter the details for the connector.
- Name: Enter a name for the connector.
- Hostname: Copy the URL of the Belden Horizon Data Operations instance with the NATS server and the access account you previously created. For example, if the URL of the instance with the NATS server is https://192.168.0.175, enter 192.168.0.175.
- Port: Verify the default port is correct and make any necessary changes.
- NATS Username: You can leave the field blank.
- NATS Password: This field is required. Paste the API key you copied from the access account you previously created.
- Default topic name: Enter a default topic name. The default topic name does not need to have data and does not need to present in all systems sending/receiving data. It can also be overwritten. It will be used later to view the data from the NATS connection.
- Enable TLS secure connection: Make sure the check box is selected. This allows the connector to successfully connect with the NATS server.
- Insecure skip verify: Make sure the check box is selected. This allows for a successful connection with a NATS server that may have a self-signed certificate that is not formally recognized by a certificate authority.
- Throttling limit: You have an option to enter a throttling limit.
- Persistent storage: You have the option of selecting this option. When enabled, this will cause messages to undergo a store-and-forward procedure. Messages will be stored within Belden Horizon Data Operations when cloud providers are online.
- Queue Mode: Select the queue mode as lifo (last in first out) or fifo (first in first out).
- Click Add.
Step 4: Add Device
Now that you've set up the connection between the NATS server and NATS client, you can create the DeviceHub device that will store the tags that will be used to create topics for the NATS connector.
From Belden Horizon Data Operations (2) (NATS client), follow the steps to Connect a Device.
Make the following configurations:
- Select Device Type Simulator and Driver Name Generator. You have the option of setting up a different device to your specific requirements.
- Select the check box for Enable Data Store.
Step 5: Add Tags
After connecting the device, you can Add Tags to the device. The tags will be used to create topics in the NATS connector.
Step 6: Create Connector Topics
You will need to create topics in the NATS connector you created.
To create connector topics:
- From Belden Horizon Data Operations (2) (NATS client), navigate to Integration.
- Click the NATS connector tile. The connector Dashboard displays.
Click the Topics tab.
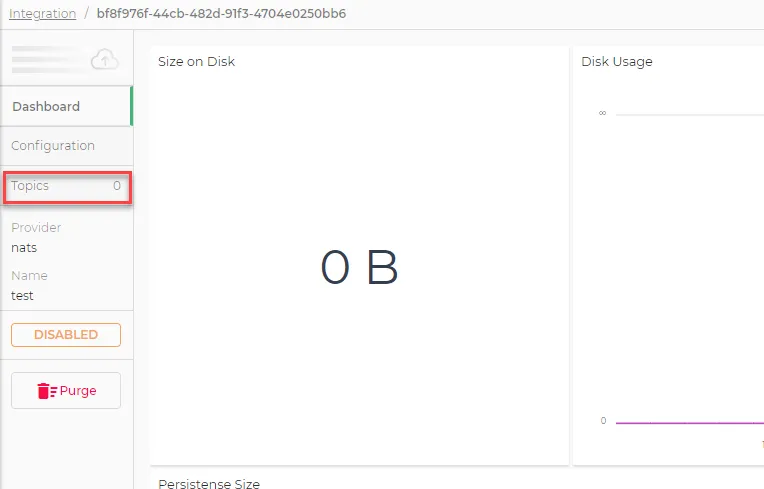 Topics tab
Click the Import from DeviceHub tags icon. The DeviceHub Import dialog box appears.
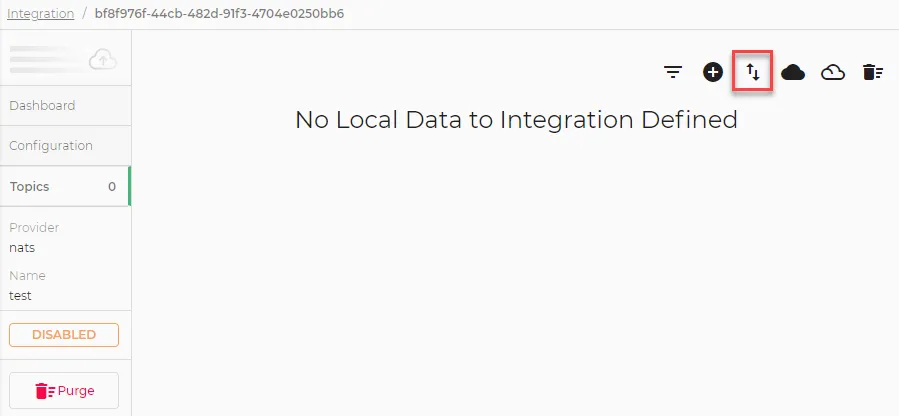 Import from DeviceHub tags icon
Select the check box to import all tags from the device you created earlier and click Import.
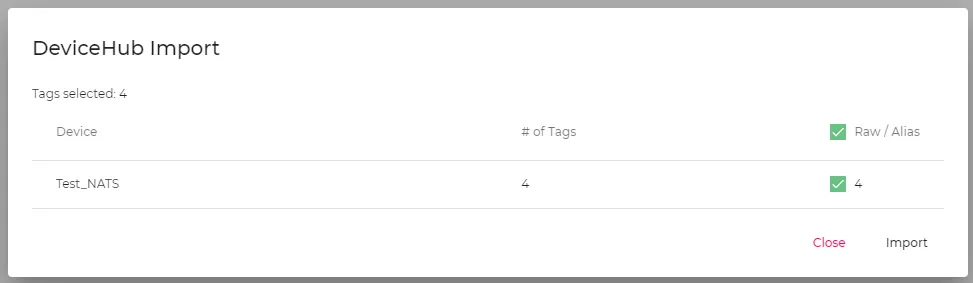 DeviceHub Import dialog box
Click the Enable all topics icon.
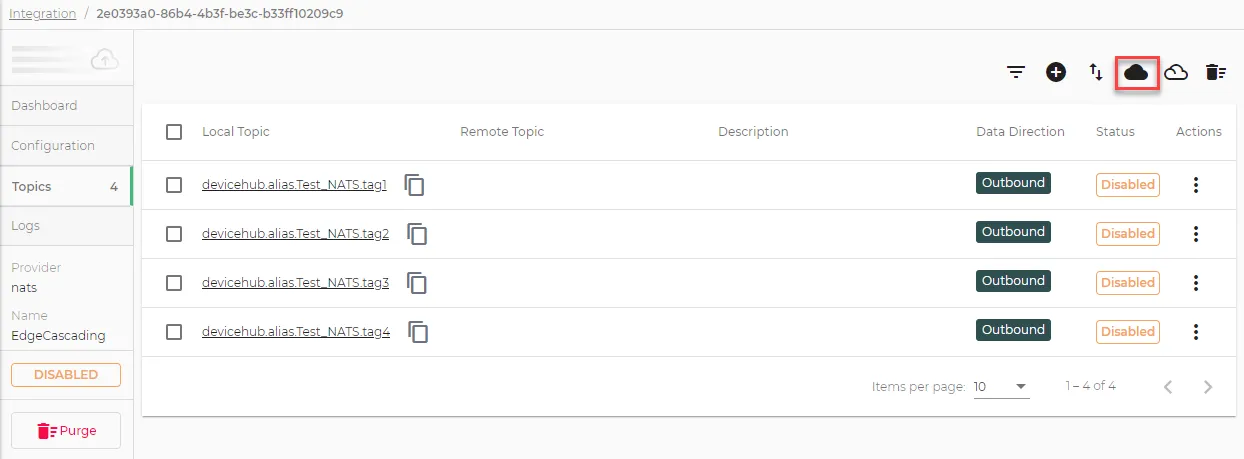 Enable all topics icon
- Return to the Integration pane and toggle the connect option to enable the connection between the connector and the NATS server.
- If the tile status shows CONNECTED, the connection was successfully set up.
Step 7: View Data
Once the connection is successfully set up, you can use the Flows Manager or Analytics to view data from the connection.
Before You Begin
You will need to use the default topic name you configured for the NATS connector. Click the Edit icon for the NATS connector tile and copy the default topic name.
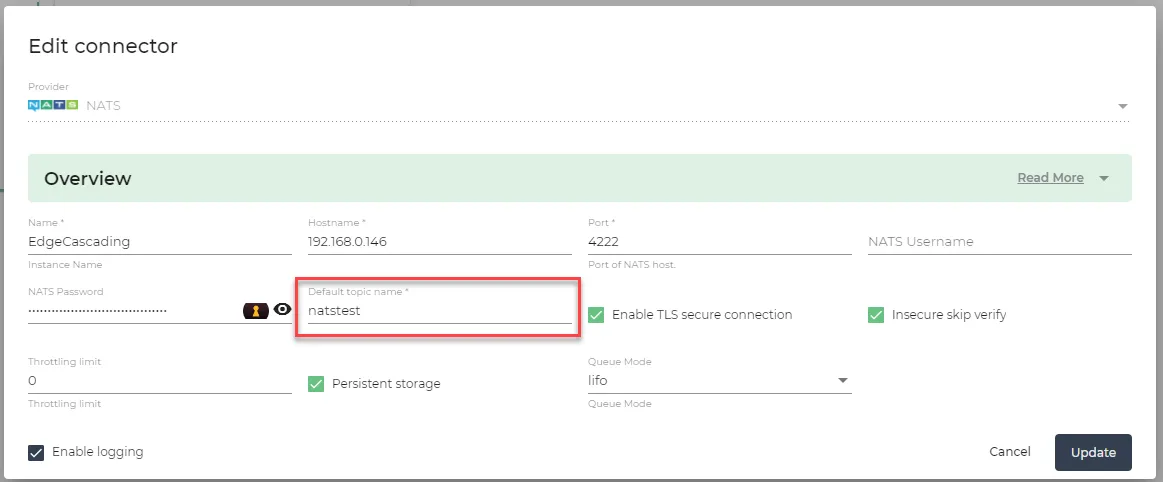
To view data from the Flows Manager:
- From Belden Horizon Data Operations (1) (NATS server), navigate to Flows Manager.
On the flow canvas, drag the Datahub Subscribe node and debug node onto the canvas. Then, connect the two nodes.
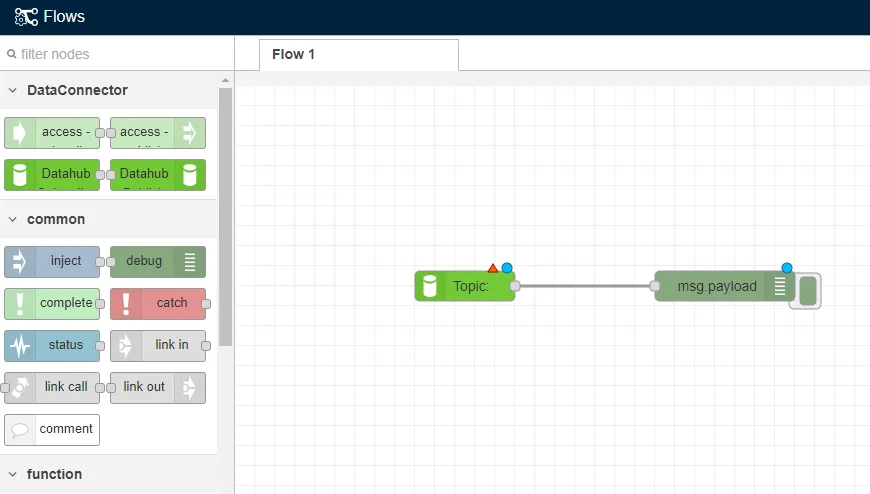 The DataHub Subscribe and Debug nodes
- Double-click the DataHub Subscribe node. The Edit DataHub Subscribe node dialog box appears.
- In the Topic field, paste the default topic name for the NATS connector.
- If needed, configure the Datahub Subscribe connection. See the Step 3: Configure Connector Nodes section in Create a Flow to learn more.
- Click Done, and then click Deploy.
Expand the message window beneath the flow to view debug messages.
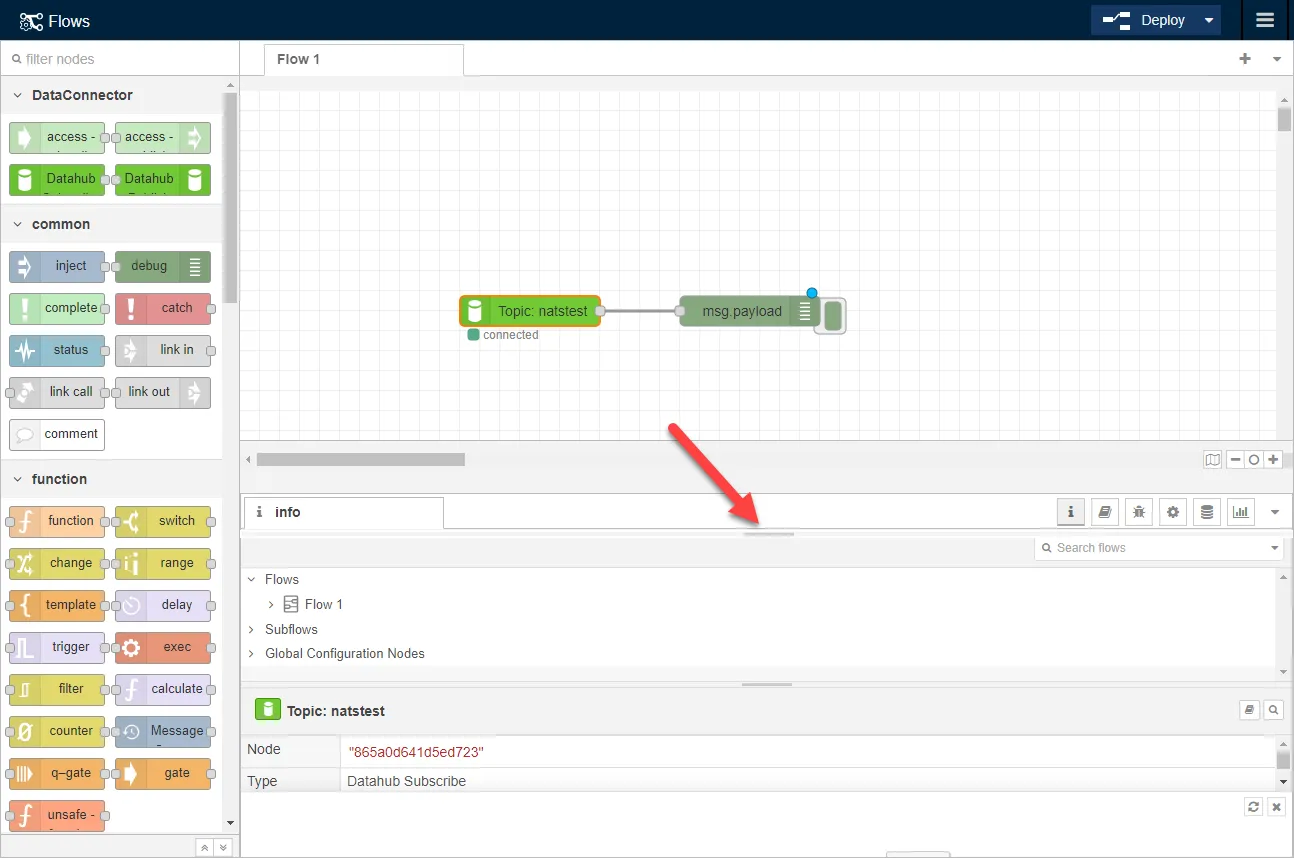 The message window
Click the Debug icon.
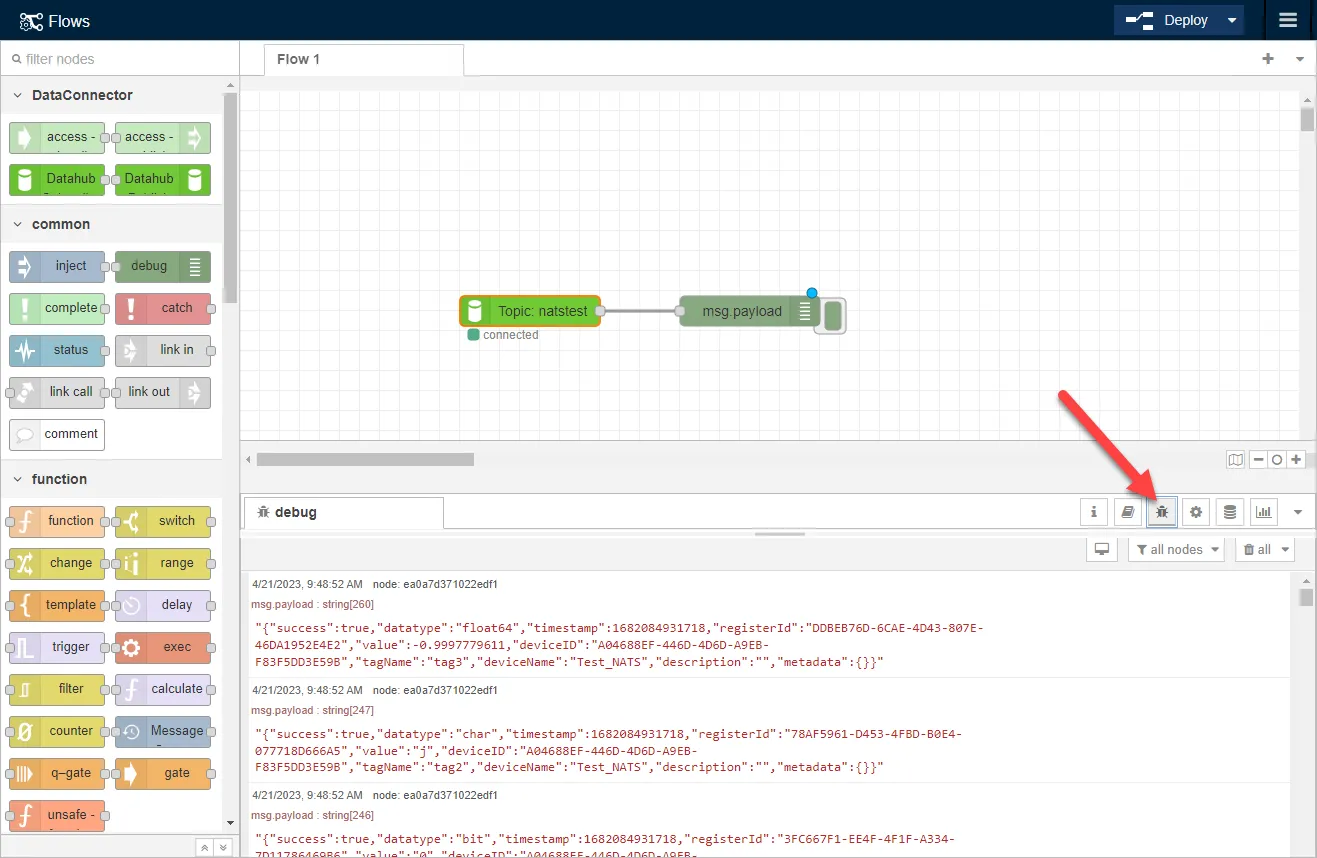 The Debug icon
Confirm the Debug node is activated and review the messages in the debug window. The "success" :true message confirms the connection is successful.
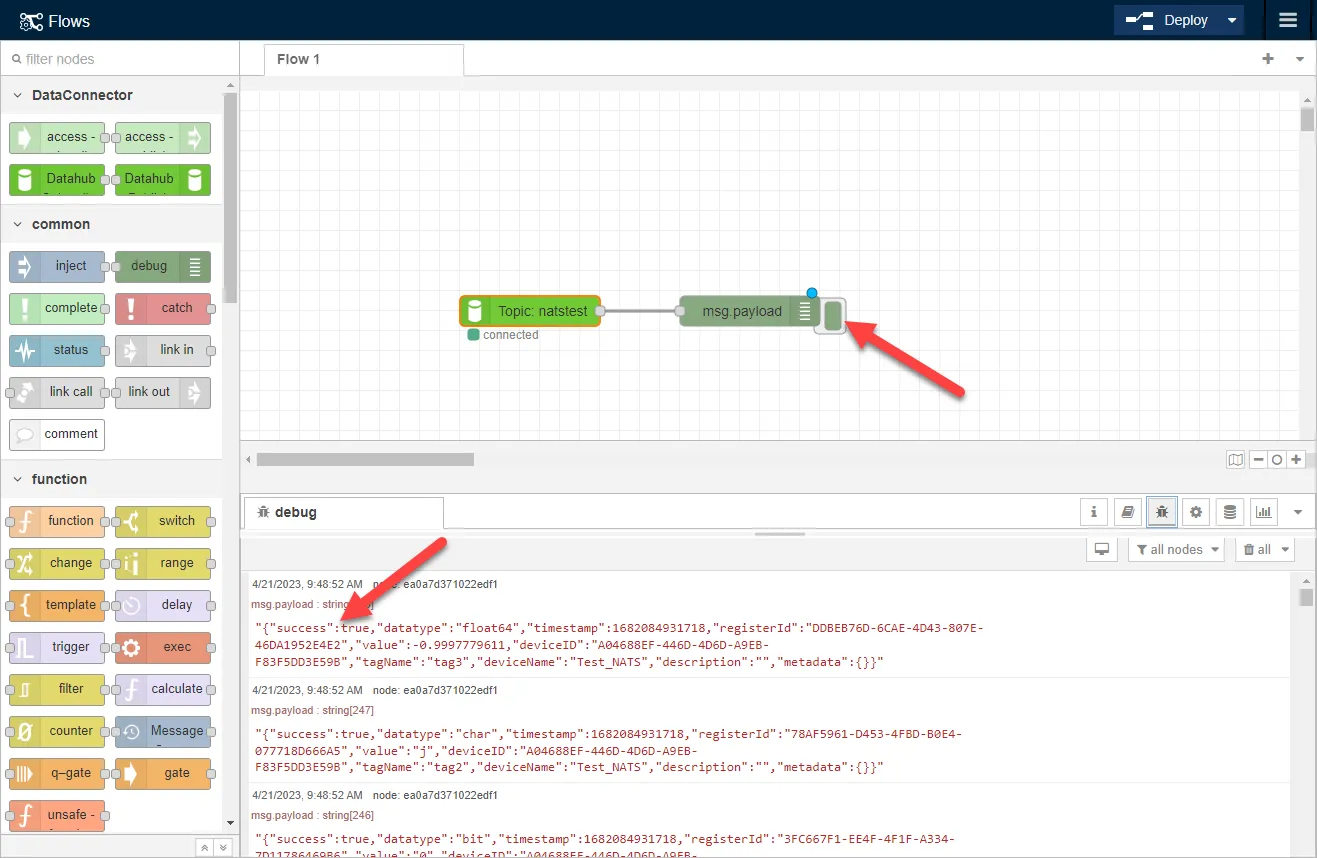 Review messages
To view data in Analytics:
- From Belden Horizon Data Operations (1) (NATS server), navigate to Analytics.
- Click Add Processor and select DataHub Subscribe.
In the Topic field, paste the default topic name for the NATS connector.
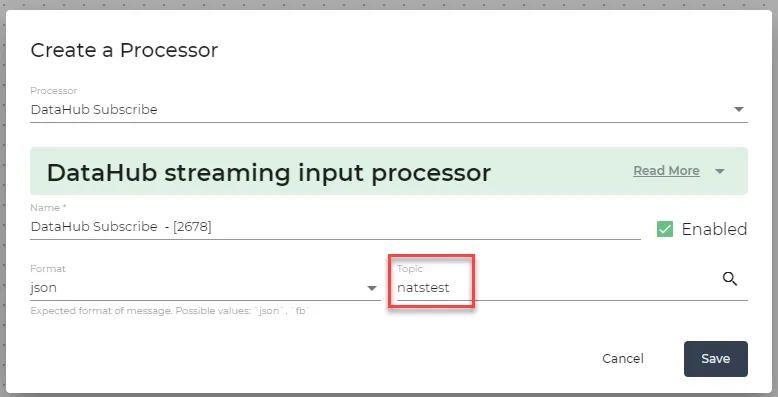 Topic name
- Click Save.
Click the View icon.
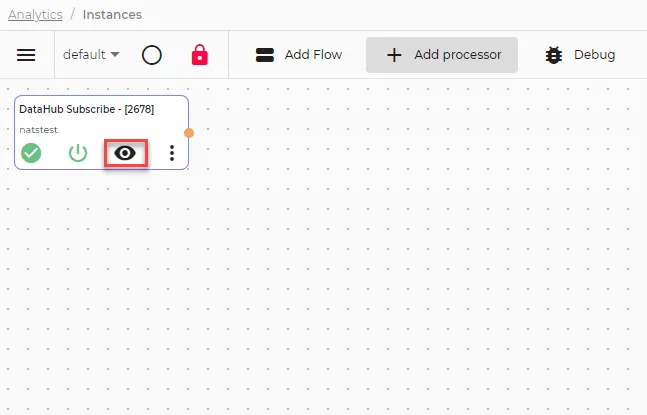
Review the Instance Messages. The "success" :true message confirms the connection is successful.
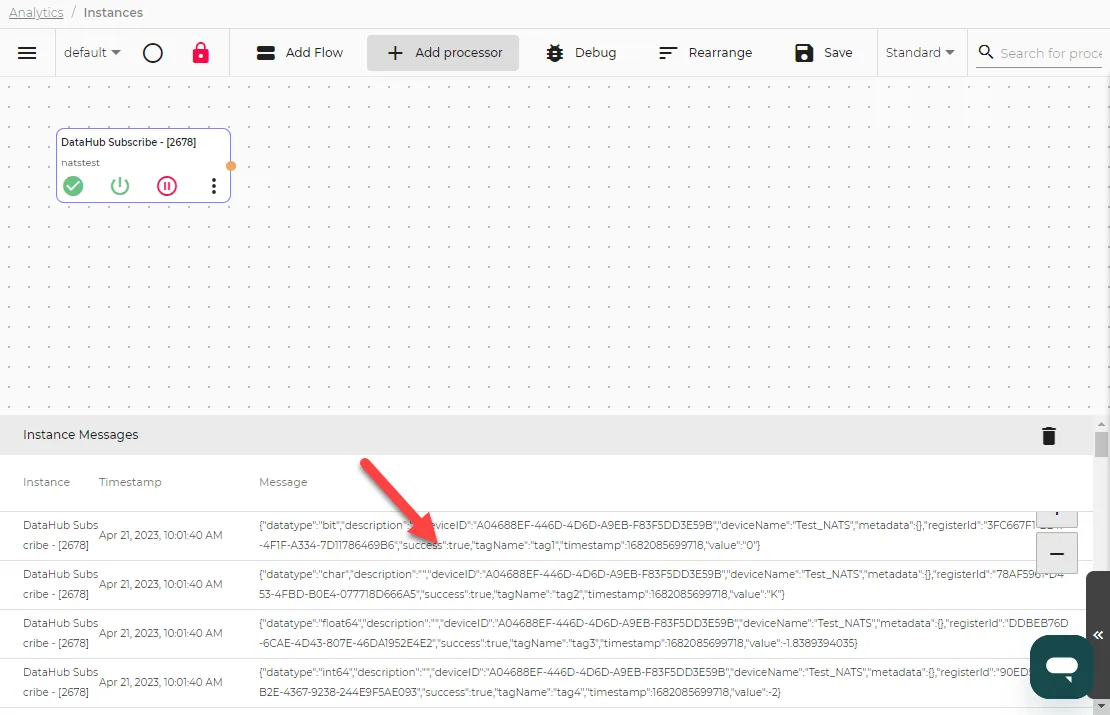 Instance Messages