Hyper-V-ISO
You can install Belden Horizon Data Operations on a virtual machine using Windows Hyper-V. See the Introduction to Hyper-V on Windows 10 for more information.
The virtual machine that runs Belden Horizon Data Operations uses the system time of the Host environment. To ensure that timestamps of collected data are as universal as possible, we recommend setting the system time of the host environment to the UTC time zone.
A typical Belden Horizon Data Operations virtual file for Hyper-V deployment adheres to a naming convention as follows: <product-std_3.1.5.0-amd64>.iso.
Before You Begin
- Verify your virtual machine can install Belden Horizon Data Operations. See Verified VM Versions for more information.
- Adjust the system clock for the host environment prior to installing Belden Horizon Data Operations. The 15-day trial period may be rejected and invalidated by the license server if the system clock is not adjusted. If this happens, contact your Belden representative.
- Obtain a valid file in the ISO format from Belden.
To use Hyper-V to install Belden Horizon Data Operations, you will need to do the following.
- Step 1: Turn Hyper-V Feature On
- Step 2: Start the Hyper-V Service
- Step 3: Create Virtual Machine
- Step 4: Configure the Virtual Machine
- Step 5: Install the Edge Device
- Step 6: Run the Virtual Machine
- Step 7: Log in to Belden Horizon Data Operations
To jump to a specific section, refer to the Table of Contents on the right side and click the corresponding step.
Step 1: Turn Hyper-V Feature On
You must first turn on the Hyper-V feature.
To turn the Hyper-V feature on:
- In Windows, navigate to Control Panel > Program > Programs and Features.
- Click Turn Windows features on or off.
Select Hyper-V from the list and click OK.
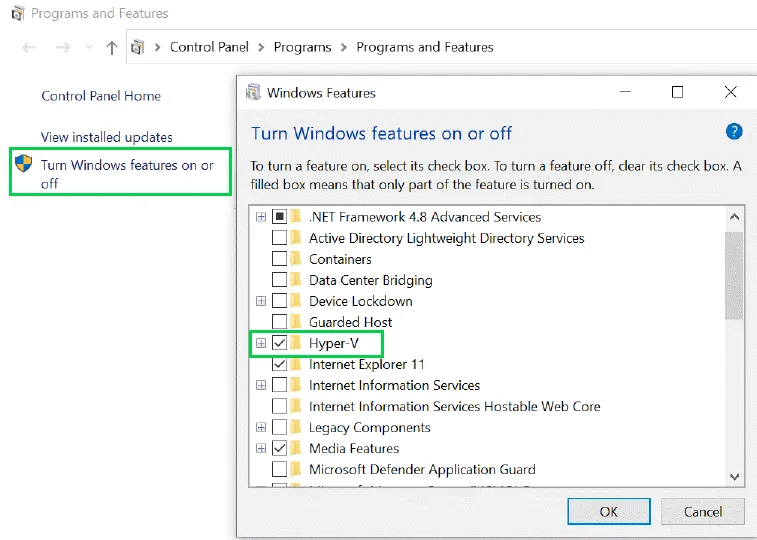 Enable Hyper-V
Step 2: Start Hyper-V Service
You can now start the Hyper-V Service.
To start the Hyper-V Service:
- Open the Hyper-V Manager.
Select SID, and then click Start Service. The Hyper-V service is running.
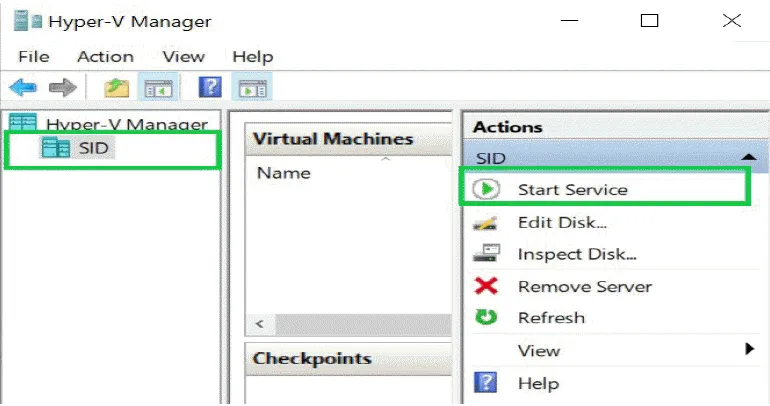 Start Service option
Step 3: Create Virtual Machine
Once the Hyper-V service is running, you can create the virtual machine. You have two options for creating it. If you don't see the Quick Create option in your version of Windows, you must follow the steps in the Create New Virtual Machine section.
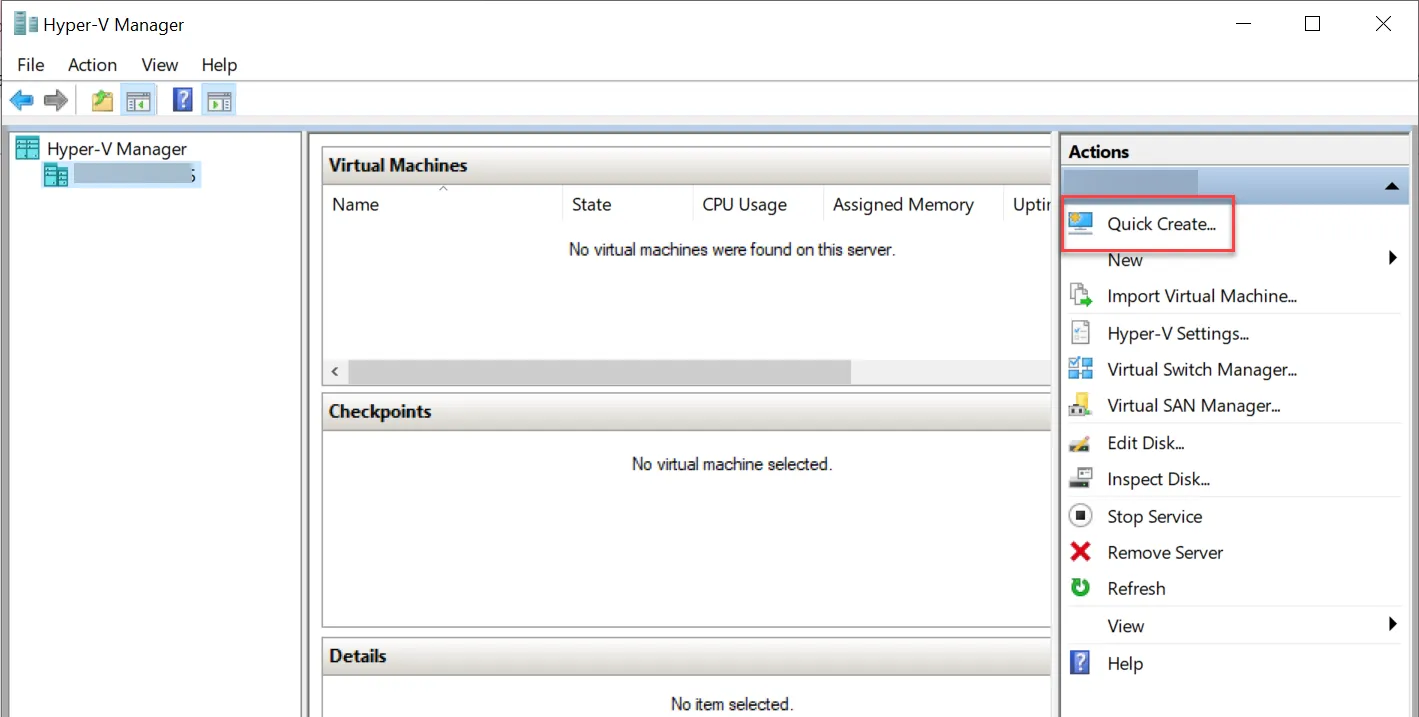
Create Virtual Machine with Quick Create
Complete the following steps if you see the Quick Create option. If you don't see this option, see the Create New Virtual Machine section below.
To create the virtual machine:
- From the Hyper-V Manager pane, click Server Name.
- From the Actions pane, click Quick Create. The Create Virtual Machine dialog box appears.
- Click Local installation source below the Select an operating system panel. The Change installation source button appears.
- Click Change installation source. The New dialog box appears.
- Navigate to the downloaded ISO file, select the file, and click Open. The name of the selected ISO file appears.
- Deselect the This Virtual Machine will run Windows check box.
- Click More Options.
- From the More Options section, configure the following.
- Appropriate name: enter <name> Virtual Machine.
- Network: Select Default Switch in the drop-down list.
- Click Create Virtual Machine.
The new virtual machine is created with the name you added and appears in the Virtual Machines pane.
Create New Virtual Machine
If the Quick Create option is not available, complete the following steps.
Important: To ensure you successfully configure the virtual machine, you must select Generation 2 when configuring the Specify Generation section.
To create a new virtual machine:
- From the Hyper-V Manager pane, click Server Name.
- Select Action > New > Virtual Machine. The New Virtual Machine Wizard appears.
- Review the Before You Begin section and click Next.
- Configure the parameters for the virtual machine.
- Specify Name and Location: Enter a name and configure the location for the virtual machine. Then, click Next.
- Specify Generation: You must select Generation 2. Then, click Next.
- Assign Memory: Assign a minimum of 4096 MB and click Next.
- Configure Networking: If you are not using a specific ethernet adapter, select Default Switch. Then, click Next.
- Connect Virtual Hard Disk: Configure the Virtual Hard Disk settings and click Next.
- Installation Options: Configure the installation options and click Next.
- Review the summary and click Finish.
The new virtual machine is created with the name you added and appears in the Virtual Machines pane.
Step 4: Configure Virtual Machine
To configure the virtual machine:
- From the Virtual Machines pane in the Hyper-V Manager, click the virtual machine name. The virtual machine name appears in the Actions pane and includes sub-menus.
- From the Actions pane, click the Settings sub-menu under the virtual machine name. The Settings for new VM dialog box appears.
- From the Settings for new VM dialog box, configure the following.
- Firmware: Make sure that DVD drive with Image File is in first place for the Boot order.
- Security: Select the Enable Trusted Platform Module check box and deselect the remaining check boxes.
- Memory: Enter at least 4096 MB in the RAM field.
- Processor: Enter 2 in the Virtual Processors field.
- Network: Select Default Switch from the Virtual Switch drop-down list.
- Click Apply, and then click OK to close the Settings dialog box.
- Click the Connect sub-menu. The Starting the new VM dialog box appears. A message appears that the VM is turned off and prompts to you to start.
- Click Start.
The installation for the virtual machine begins.
Step 5: Install Edge Device
You can now install the edge device.
To install the edge device:
- After the device initiates the installer, respond to the questions in the terminal user interface (TUI). Welcome to Operating System Installer. Are you installing over Serial (for advanced users)? Yes/No :
- Enter No, and then press ENTER.
Select Install Operating System, and then select OK. Use the arrow keys to navigate to selections.
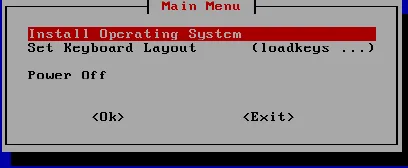 Install Operating System option
Select the partition to install, and then select OK. This list is device specific. Typically, the installation location is sda. If the device/gateway has embedded MMC (eMMC) components, the partition name may be listed as mmcblk instead of sda. Make sure you select the correct hard-drive location.
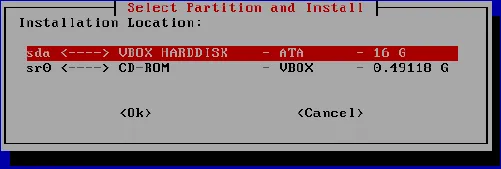 Select partition step
- Verify the OS installation location by selecting Yes. If you select No, you are returned to the beginning of the installation.
A second verification ensures that you are overwriting the correct device partition during the formatting process. Select Yes to continue formatting the device and installing the operating system.
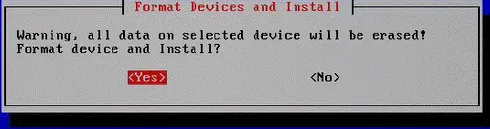 Format devices warning message
The installer indicates its progress, followed by a success message. Select Yes to power off the device.
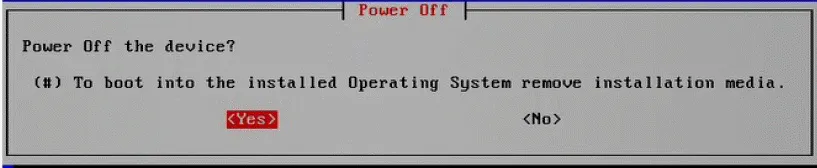 Power off option
- Close the Virtual Machine dialog box.
- From the Actions pane, click the Settings sub-menu again under the new virtual machine name. The Settings for new VM dialog box appears.
- From the Settings for new VM dialog box, configure the following.
- SCSI Controller: Select DVD Drive and click Remove to delete this drive.
- Firmware: Make sure that Hard Drive with Image File is in first place of the Boot order.
- Click Apply, and then click OK to close the Settings dialog box.
The virtual machine is ready to run from the hard drive.
Step 6: Run Virtual Machine
Now that the edge device is installed, you can run the virtual machine.
To run the virtual machine:
- From the Actions pane in the Hyper-V Manager, click the Connect sub-menu under the new virtual machine name. The New dialog box appears.
- From the New dialog box, click Start, and then select Continue from the pop-up window.
The virtual machine boots up and displays the IP address / URL to access using a web browser.
Step 7: Log in to Belden Horizon Data Operations
- See Access the Terminal User Interface for instructions on how to navigate and log in for the first time.