ESXi-Hypervisor-ISO
You can install Belden Horizon Data Operations on a virtual machine using VMWare ESXi - Hypervisor. The virtual machine that runs Belden Horizon Data Operations uses the system time of the host environment. To ensure that timestamps of collected data are as universal as possible, we recommend setting the system time of the host environment to the UTC time zone.
A typical Belden Horizon Data Operations virtual file for ESXi deployment adheres to a naming convention as follows: <product>-std_3.1.5.0-amd64.iso.
Before You Begin
- Verify your virtual machine can install Belden Horizon Data Operations. See Verified VM Versions for more information.
- Adjust the system clock for the host environment prior to installing Belden Horizon Data Operations. The 15-day trial period may be rejected and invalidated by the license server if the system clock is not adjusted. If this happens, contact your Belden representative.
- Obtain a valid file in the ISO format from Belden.
To use ESXi-Hypervisor-ISO to install Belden Horizon Data Operations, you will need to do the following.
- Step 1: Create a Virtual Machine
- Step 2: Log in to Belden Horizon Data Operations
To jump to a specific section, refer to the Table of Contents on the right side and click the corresponding step.
Step 1: Create a Virtual Machine
You will first need to create the virtual machine that will run Belden Horizon Data Operations.
To install the ESXi-Hypervisor virtual machine:
Start the VMWare application (for example, VMWare vSphere 6.7.0 Update 2 hypervisor). The VMWare ESXi application appears.
 ESXi Application window
- From the left panel, select Virtual Machines.
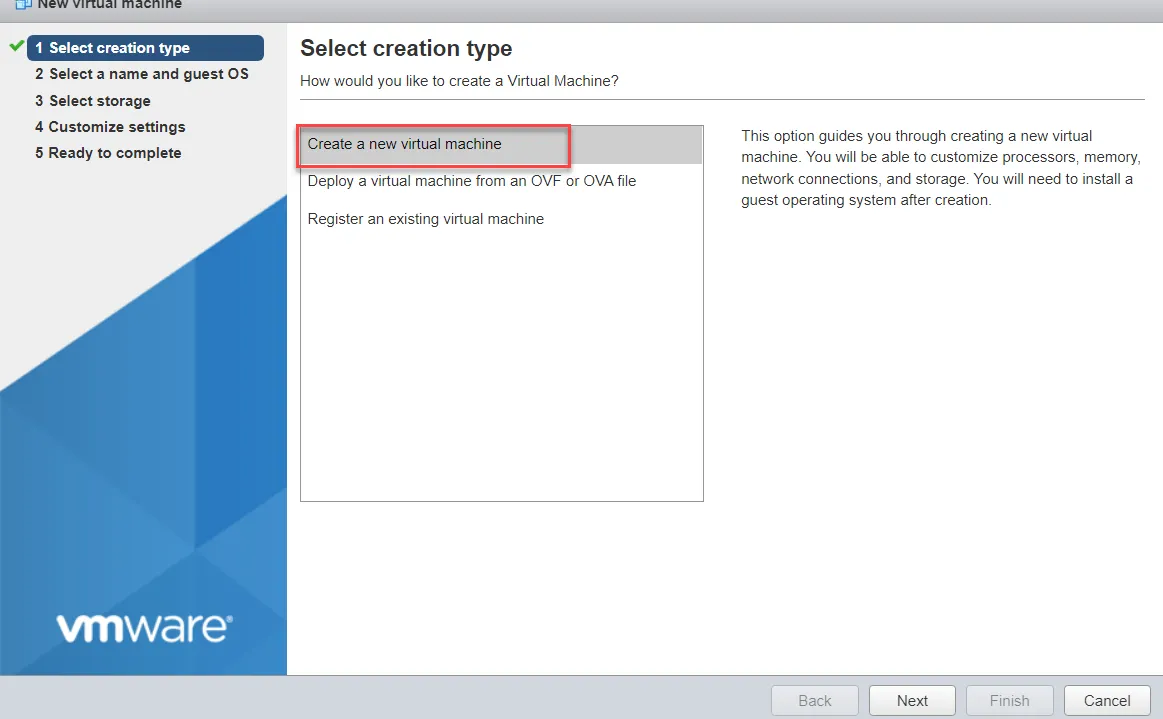
- Click Create/Register VM. The New virtual machine wizard > Select creation type window appears.
Select Creation Type
Select Create a new virtual machine and click Next.
Select a Name and Guest OS
This section allows you to provide a name for the virtual machine and identify the guest operating system.
Enter the details for the name and guest OS.
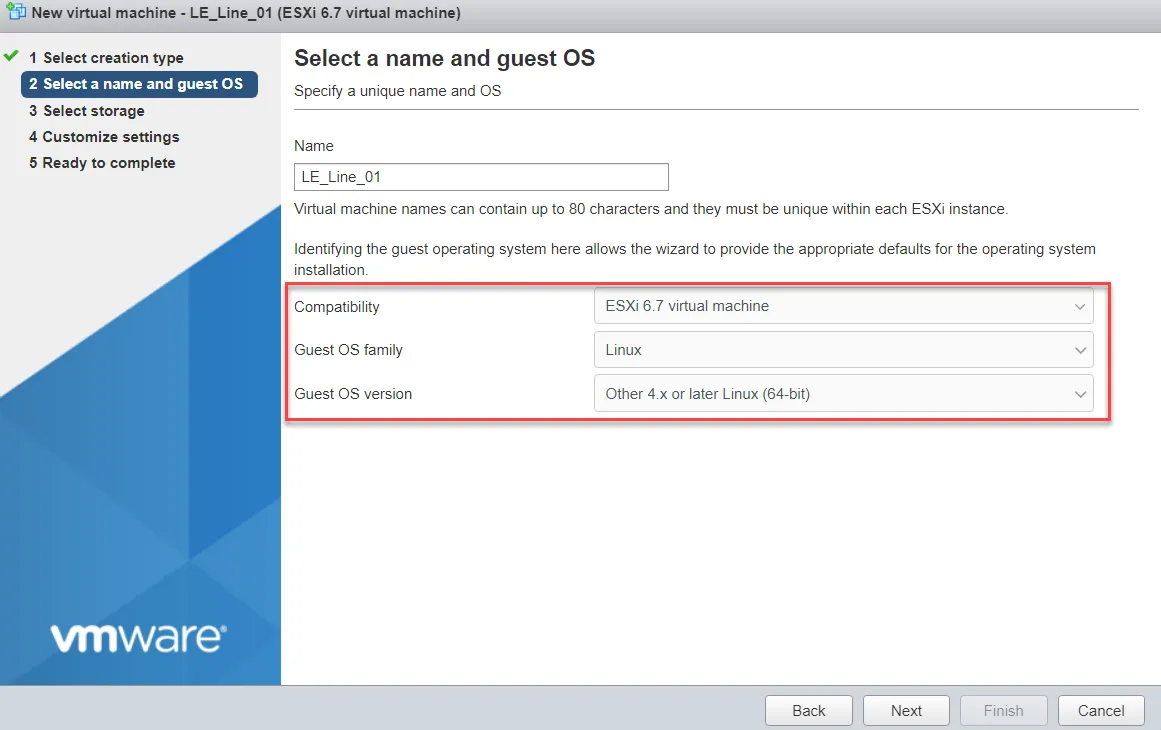
- Name: Enter a name for the virtual machine.
- Compatibility: Your selection must be compatible with your ESXi version Guest OS family (Linux).
- Guest OS family: The operating system is based on Linux.
- Guest OS version: The kernel used for the operating system is a 64-bit Yocto Kernel.
Select Storage
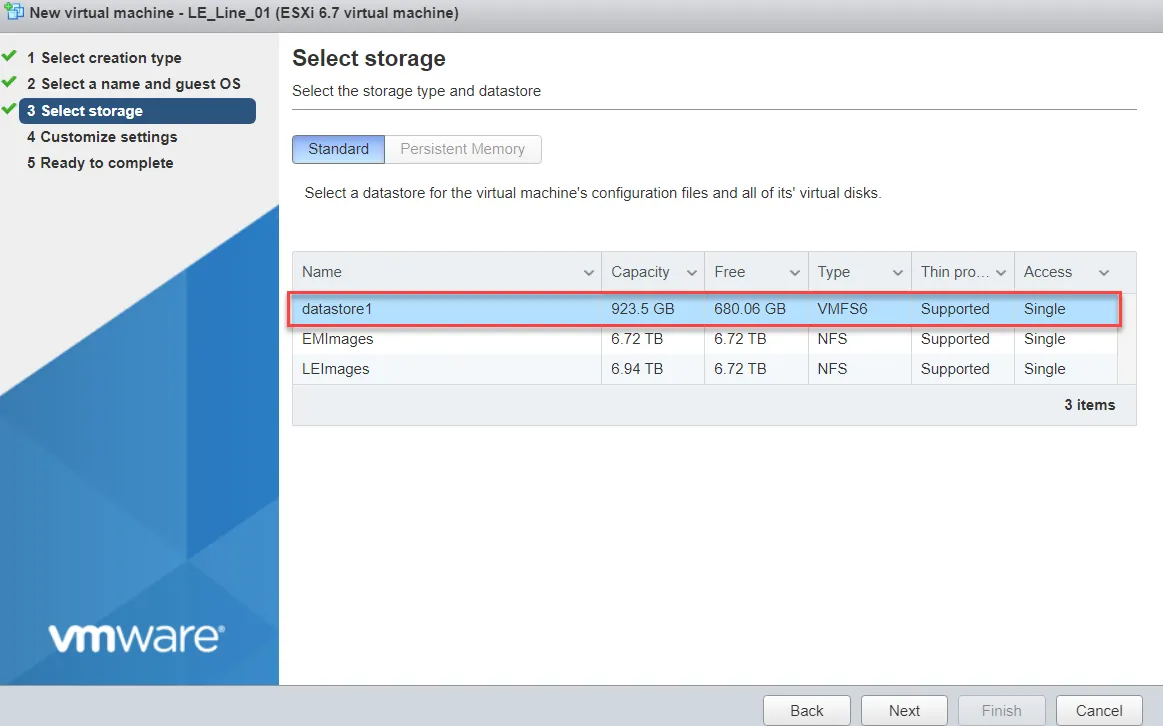
You will need to select a datastore for the virtual machine's configuration files and all of its virtual disks.
Select a datastore and click Next.
Note: The datastore must have at least 40-50 GB of free capacity.
Customize Settings
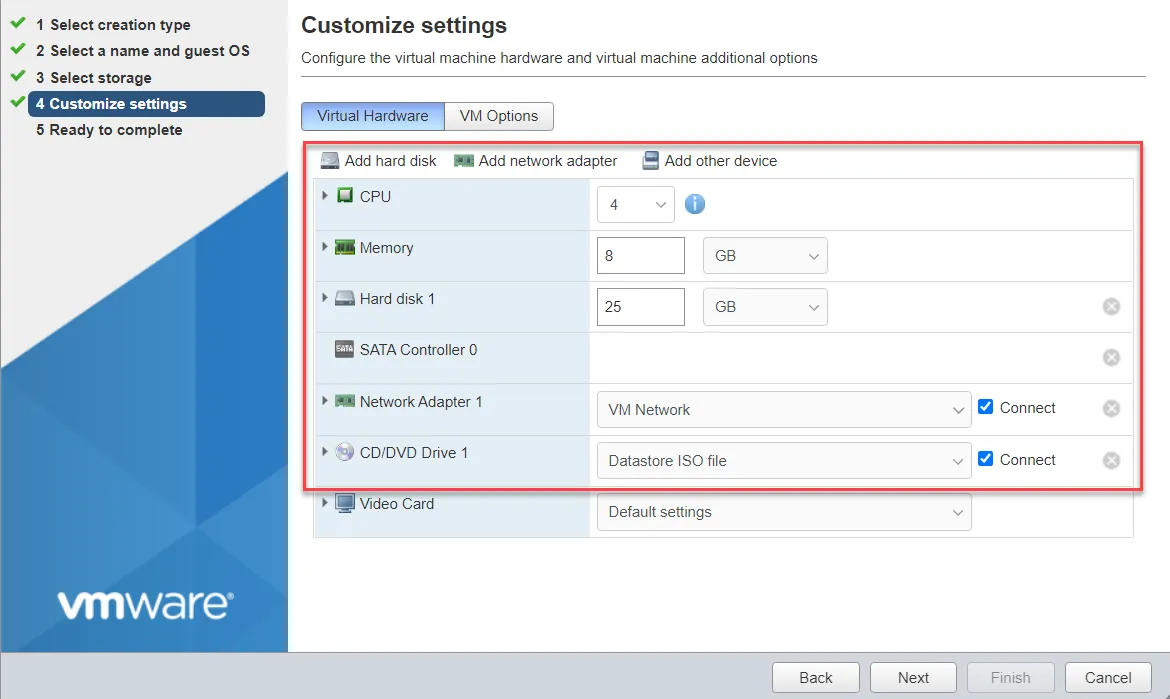
You will need to configure the virtual machine hardware and virtual machine additional options.
Configure the Virtual Hardware parameters.
CPU parameter
Select 4. This value is recommended to improve the performance of the VM. If the host system permits or the VM is a production deployment, more cores should be allocated.
Memory parameter
Enter 8 GB or set the memory size to the desired allocation. At least 2048 MB should be allocated to prevent significant reduction in performance. If the host system permits, more memory is better.
Hard disk 1 parameter
To configure the hard disk:
- Enter a minimum of 25 GB in the Hard disk field. The minimum file size must be 16 GB to allow the VM to run. The 16 GB value provides the VM with about 2 GB data storage. For a small-scale PoC without much data storage, 8 GB is enough. If this VM is deployed as a production system or the PoC requires a lot of storage for databases, increase the file size beyond 16 GB.
- Expand Hard Drive.
- From the Controller location drop-down list, select SATA controller 0. The controller has to be designated as SATA or the VM will not boot. If no SATA controller is available, contact your IT department for assistance.
- Delete SCSI Controller 0 and USB Controller 1 as they are not needed.
Notes:
- By default, VMs are defined with two network cards. They are configured for the first network card as a Bridged Network and the second network card as NAT.
- Based on the ESXi host environment, if a NAT network exists, a second network adapter must be added and set to NAT.
- If a NAT network exists, move to the next section. Otherwise, skip it.
Network Adapter 1 parameter
To confirm the network adapter:
- Click Add network adapter.
- From the New Network Adapter drop-down list, select NAT Network.
CD/DVD Drive 1 parameter
To configure the CD/DVD Drive:
- From the CD / DVD Drive 1 drop-down list, select Datastore ISO file. The Datastore browser appears.
- Select the ISO file, and then click Select.
- Click Next. The New virtual machine wizard > Ready to complete window appears.
Review the Settings and click Back to return to the Customize settings screen.
Configure the VM Options parameters.
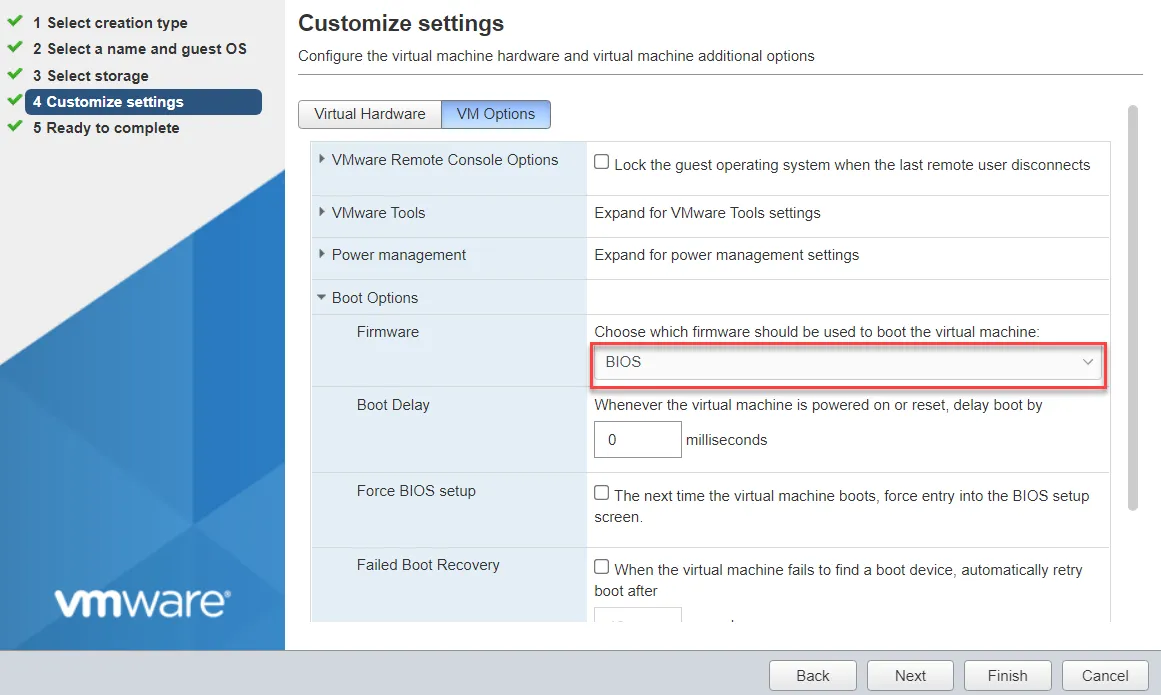
To configure the VM options:
- Select the VM Options tab.
- Expand Boot Options and select BIOS from the Firmware drop-down list. BIOS is needed for the installer to load.
- Click Next.
- Click Finish. The new virtual machine link appears in the Virtual Machine list.
- Click the new virtual machine link. The virtual machine details pane appears.
- Click the Terminal shell to start the virtual machine. Some errors appear in the terminal window. These are warnings and can be ignored for now.
The Welcome to Operating System Installer appears in the Terminal shell.
Configure Operating System Installer
To configure the operating system installer:
- From the Welcome to Operating System Installer screen, enter yes and press ENTER. Select a drive to Install (sda) appears.
- Enter sda and press ENTER. To Confirm Installation and format partitions appears.
- Enter yes and press ENTER. The installation begins. During the installation, another error appears regarding an invalid partition table. This is also a warning and can be ignored.
- When the installation completes, close the terminal shell.
- From the virtual machine details pane, click Edit. The Edit settings dialog box appears.
- Select the VM Options tab.
- Expand Boot Options and select EFI from the Firmware drop-down list.
- Click Save. The virtual machine details pane appears.
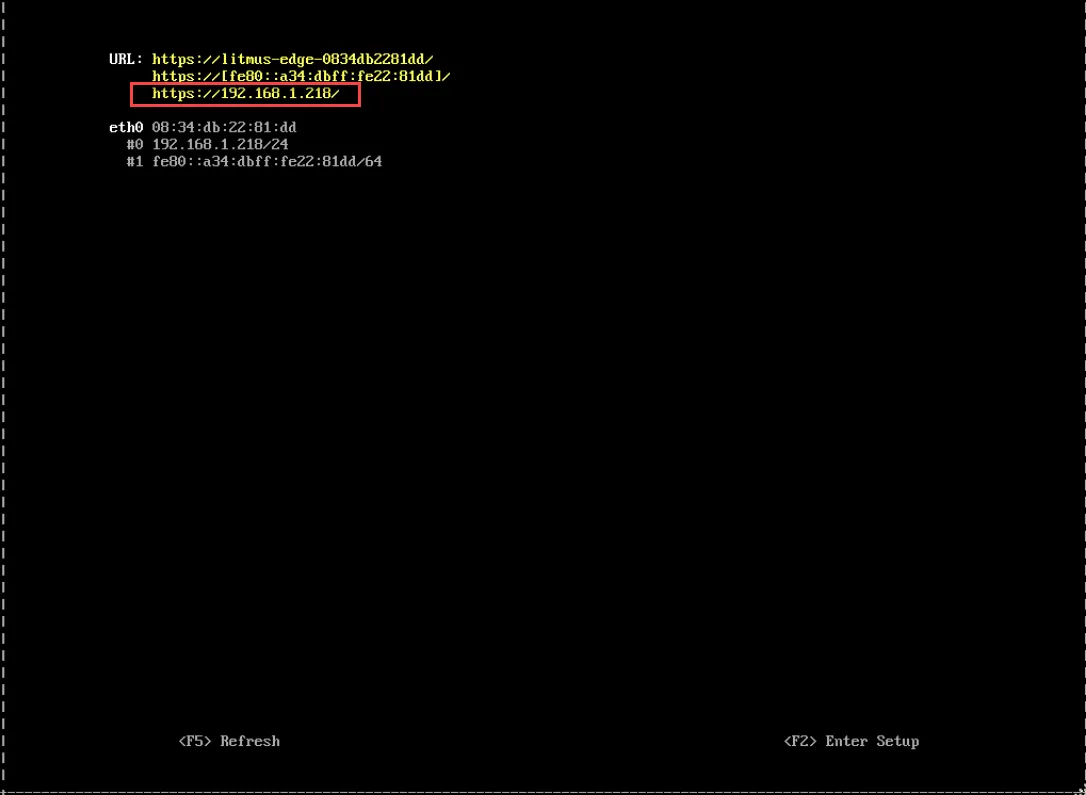
- Click Power on, and then click the Terminal shell. The Welcome window appears.
- Note the IP address required for log in.
Step 2: Log in to Belden Horizon Data Operations
- See Access the Terminal User Interface for instructions on how to navigate and log in for the first time.