Generic MQTT-TCP Using HiveMQ
You can connect and send messages to an outside message broker from a generic MQTT-TCP message broker.
In the following use case, the HiveMQ message broker is used as the selected outside message broker.
HiveMQ's MQTT broker is designed for cloud native deployments to make optimal use of cloud resources. The use of MQTT reduces network bandwidth required for moving data.
Before You Begin
You must download MQTT Explorer.
Visit the MQTT Dashboard to find the settings required in the MQTT Explorer application.
Step 1: Connect MQTT Explorer
To connect MQTT Explorer:
- Open MQTT Explorer.
- Click the Add icon to create a new connection.
- In the Name field, enter a name for the connection.
- In the Host field, enter broker.hivemq.com.
- In the Port field, verify that 1883 is entered.
- Click CONNECT. The connection appears in the left pane.
Step 2: Add Generic MQTT Connector
Follow the steps to Add a Connector and select the MQTT - Generic provider.
Configure the following parameters.
- Name: A recognizable name to identify the connector.
- Hostname: Enter broker.hivemq.com.
- Port: Confirm that the default value 1883 is entered.
- Client ID: Enter a client ID.
- Username (Optional)
- Password (Optional)
- QoS: Make sure the default value 0 is entered.
- Parallel Publish Count: Enter 100. The number of messages being published simultaneously. Once the defined limit has been reached, subsequent messages are silently dropped.
- Integration Topic: Enter a topic name. For example: mqtt_topic.
- LWT topic: The topic for MQTT's Last Will and Testament feature.
- LWT payload: The payload for MQTT's Last Will and Testament feature.
- LWT payload type: The payload type for MQTT's Last Will and Testament feature. The options are string and base64.
- LWT QoS: The Quality of Service value for MQTT's Last Will and Testament feature.
- LWT retained: Select this check box to retain the value for MQTT's Last Will and Testament feature.
- Throttling limit: The maximum number of messages per second to be processed. The default value is zero, which means that there is no limit.
- Persistent storage: When enabled, this will cause messages to undergo a store-and-forward procedure. Messages will be stored within Belden Horizon Data Operations when cloud providers are online.
Step 3: Create Topics for MQTT Connector
To add the outbound and inbound topics to the MQTT Connector:
- Navigate to Integration.
- Click the MQTT - Generic connector tile.
- Click the Topics tab.
Click the Add a new subscription icon. The Data Integration dialog box appears.
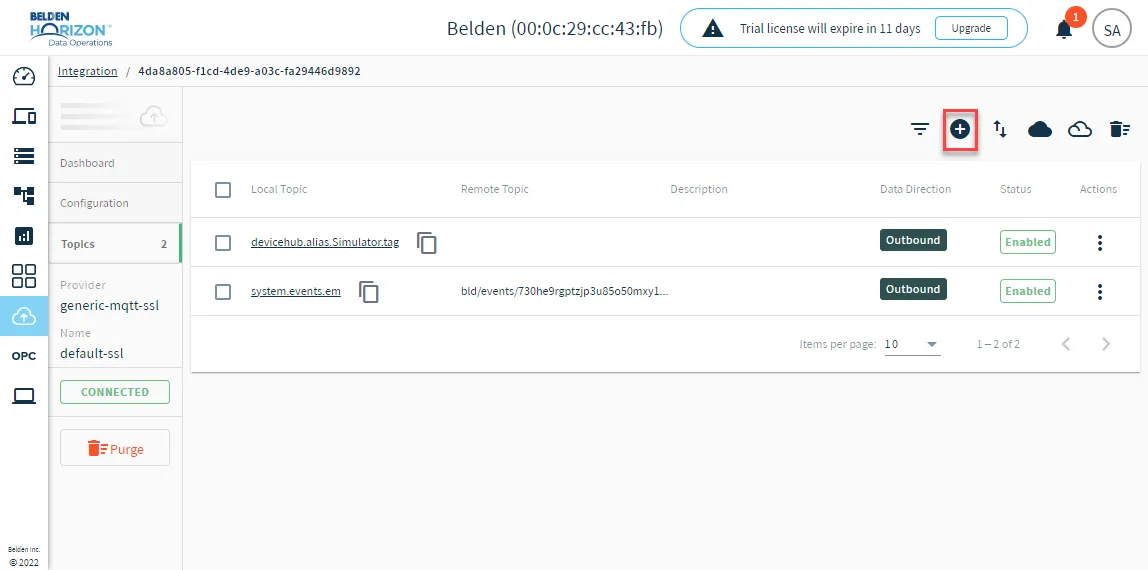 Add a new subscription icon
- Data Direction: Select Local to Remote - Outbound.
- Local Data Topic: Enter a local data topic name.
- Remote Data Topic: Confirm the topic where the data is pushed. This is the Integration Topic value for the connector.
- Enable: Select the toggle to enable the topic.
- Click Yes to add the topic.
- Click the Add a new subscription icon again to add the inbound topic.
- Configure the following parameters.
- Data Direction: Select Remote to Local - Inbound.
- Local Data Topic: Enter a local data topic name. For example: local_topic.
- Remote Data Topic: Confirm the topic where the data is pushed. This is the Integration Topic value for the connector.
- Enable: Select the toggle to enable the topic.
- Click Yes to add the topic.
Step 4: Enable the MQTT Connector
To enable the connector:
- Return to the Belden Horizon Data Operations Integration browser tab.
Click the connection toggle on the connector tile. The connector shows connected after verifying the connection.
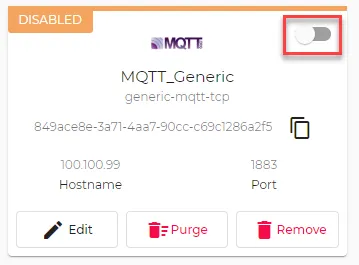 Toggle to enable connector
Step 5: Verify Connection in MQTT Explorer
You can verify the connection in MQTT Explorer by subscribing to the topics for the connector.
To verify the connection:
- Open MQTT Explorer.
- Click DISCONNECT.
- Select the connection you created earlier.
- Click ADVANCED.
- In the Topic field, enter the Integration Topic value you configured in Step 2. In this use case, the value is mqtt_topic.
- Verify the QoS value is 0.
- Click +ADD.
- Click BACK.
- Click SAVE, and then CONNECT.
Verify that data is being displayed.